Polar & PlayerData setup for FIFA referees.
Two short setups. One time only. From this guide you'll connect your devices to MyCoach Pro, filter your sessions, and get the most out of your training data.
Before you start
⚠️ REQUIRED FIRST STEP - Update your MyCoach Pro app
Version 1.134.0 or later - required to access Polar and PlayerData integrations.
How to check: open the App Store (iOS) or Google Play (Android), search MyCoach Pro AMS, tap Update if available.
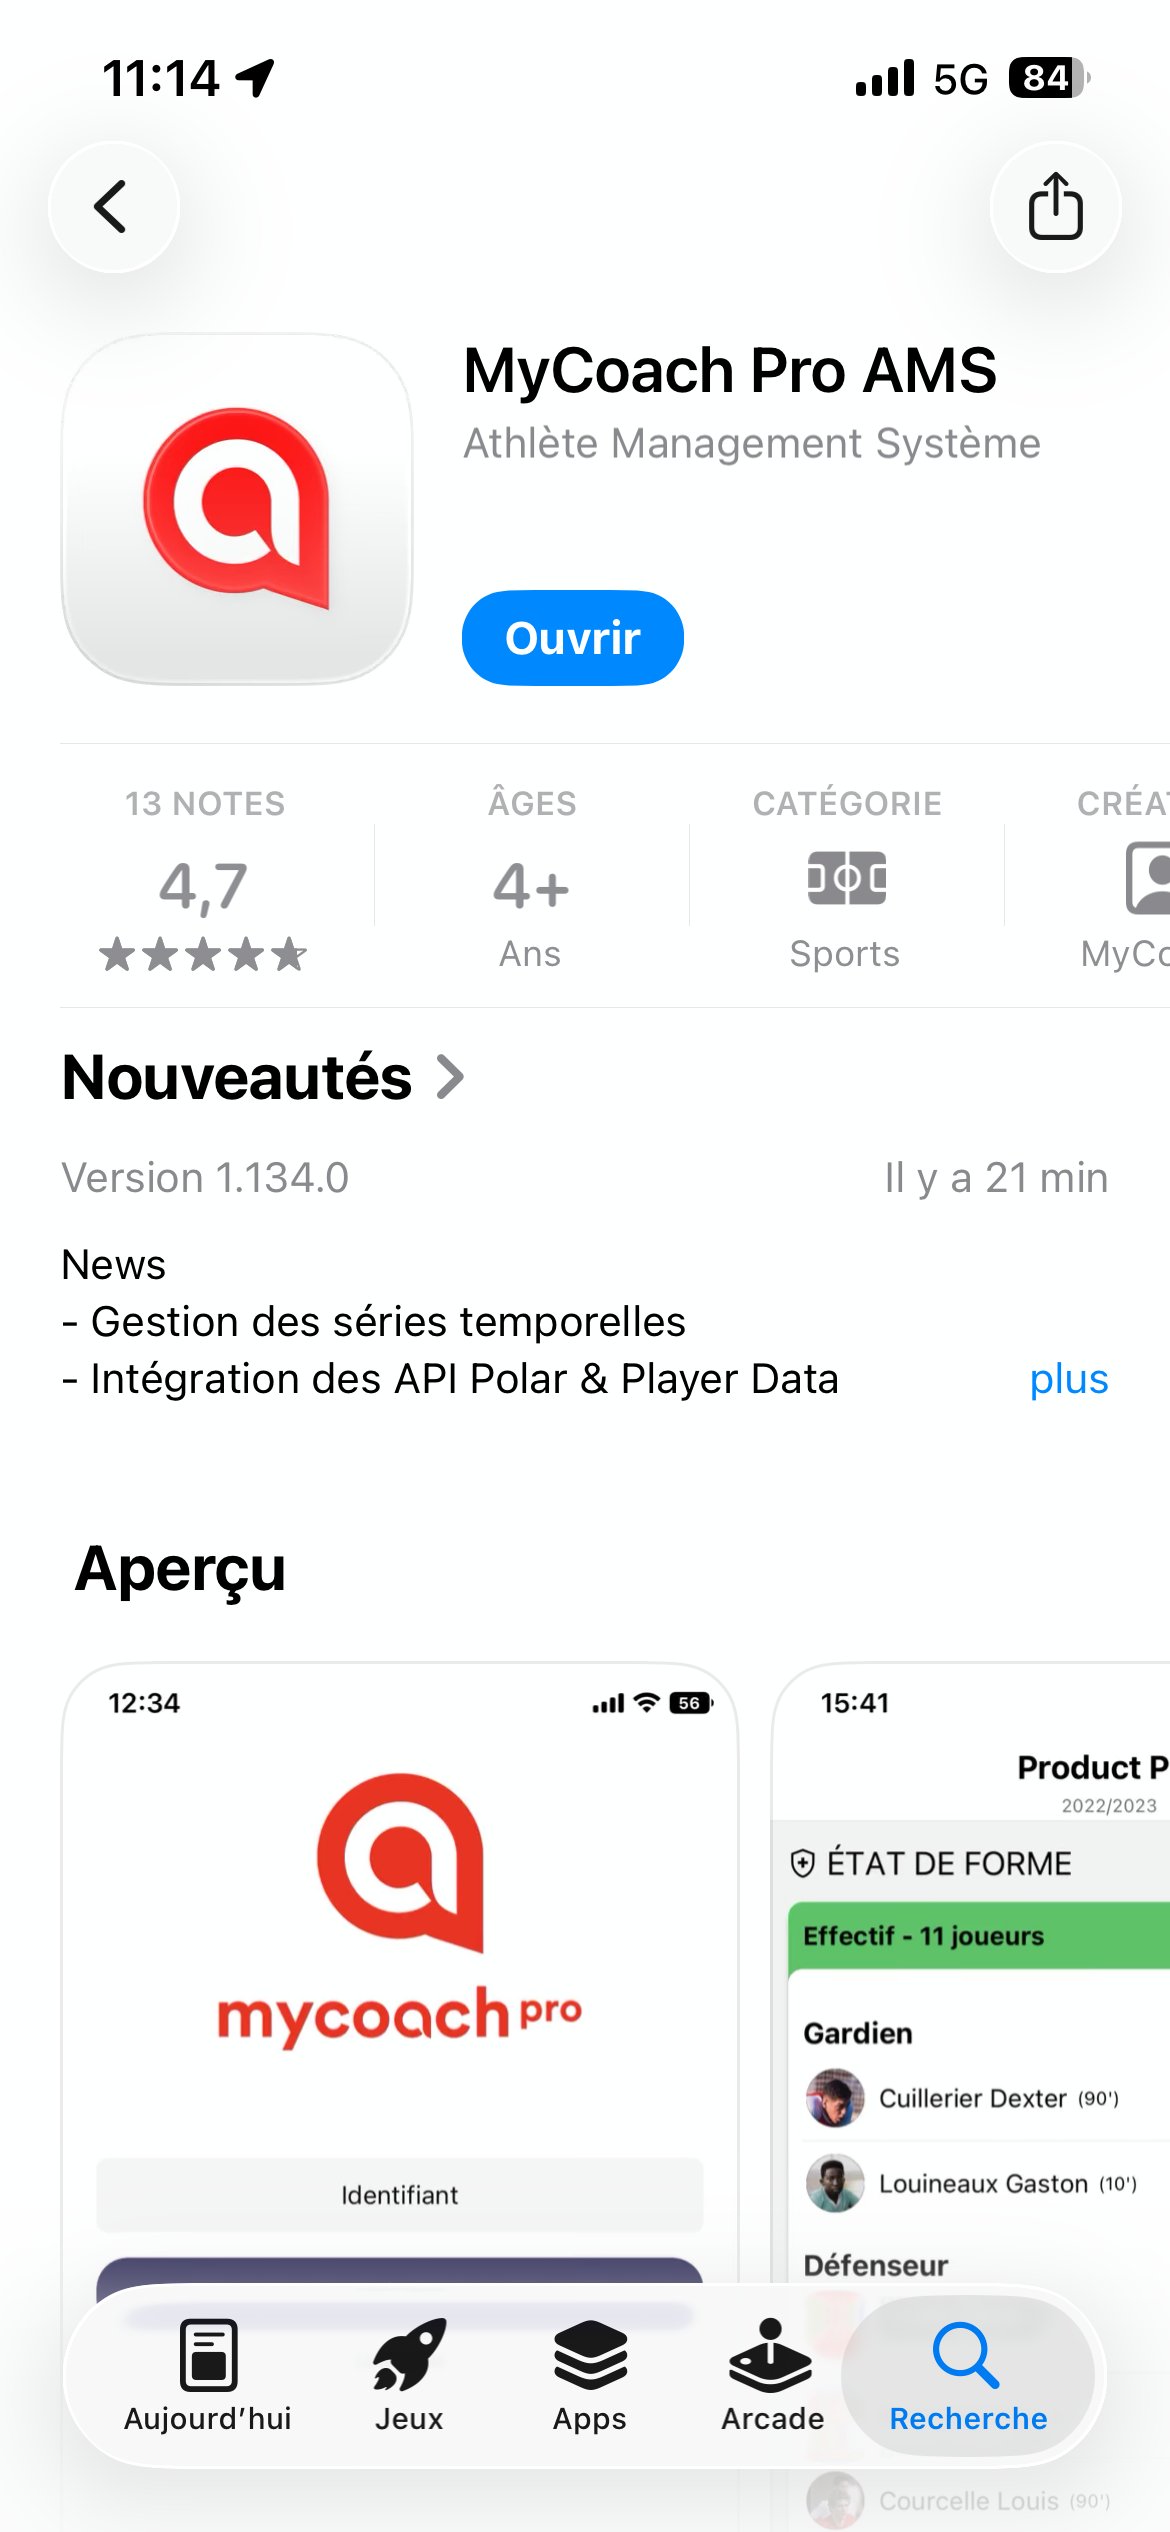
App Store . iOS
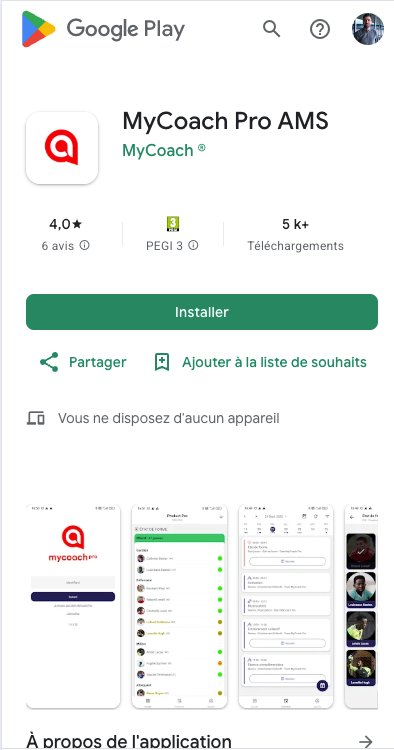
Google Play · Android
1 · Polar
Connect. Configure. Use.
Heart rate, pace, route map, HR zones - all flowing directly from Polar Flow into MyCoach Pro.
The flow in six steps
- Open Integrations
- Tap Polar
- Sign in to Polar
- Accept cookies
- Authorize access
- Linked ✓
1.1 · Connect to Polar
Step 1 - Open Integrations
From your Dashboard, tap the sync icon next to Synchronized Sessions.
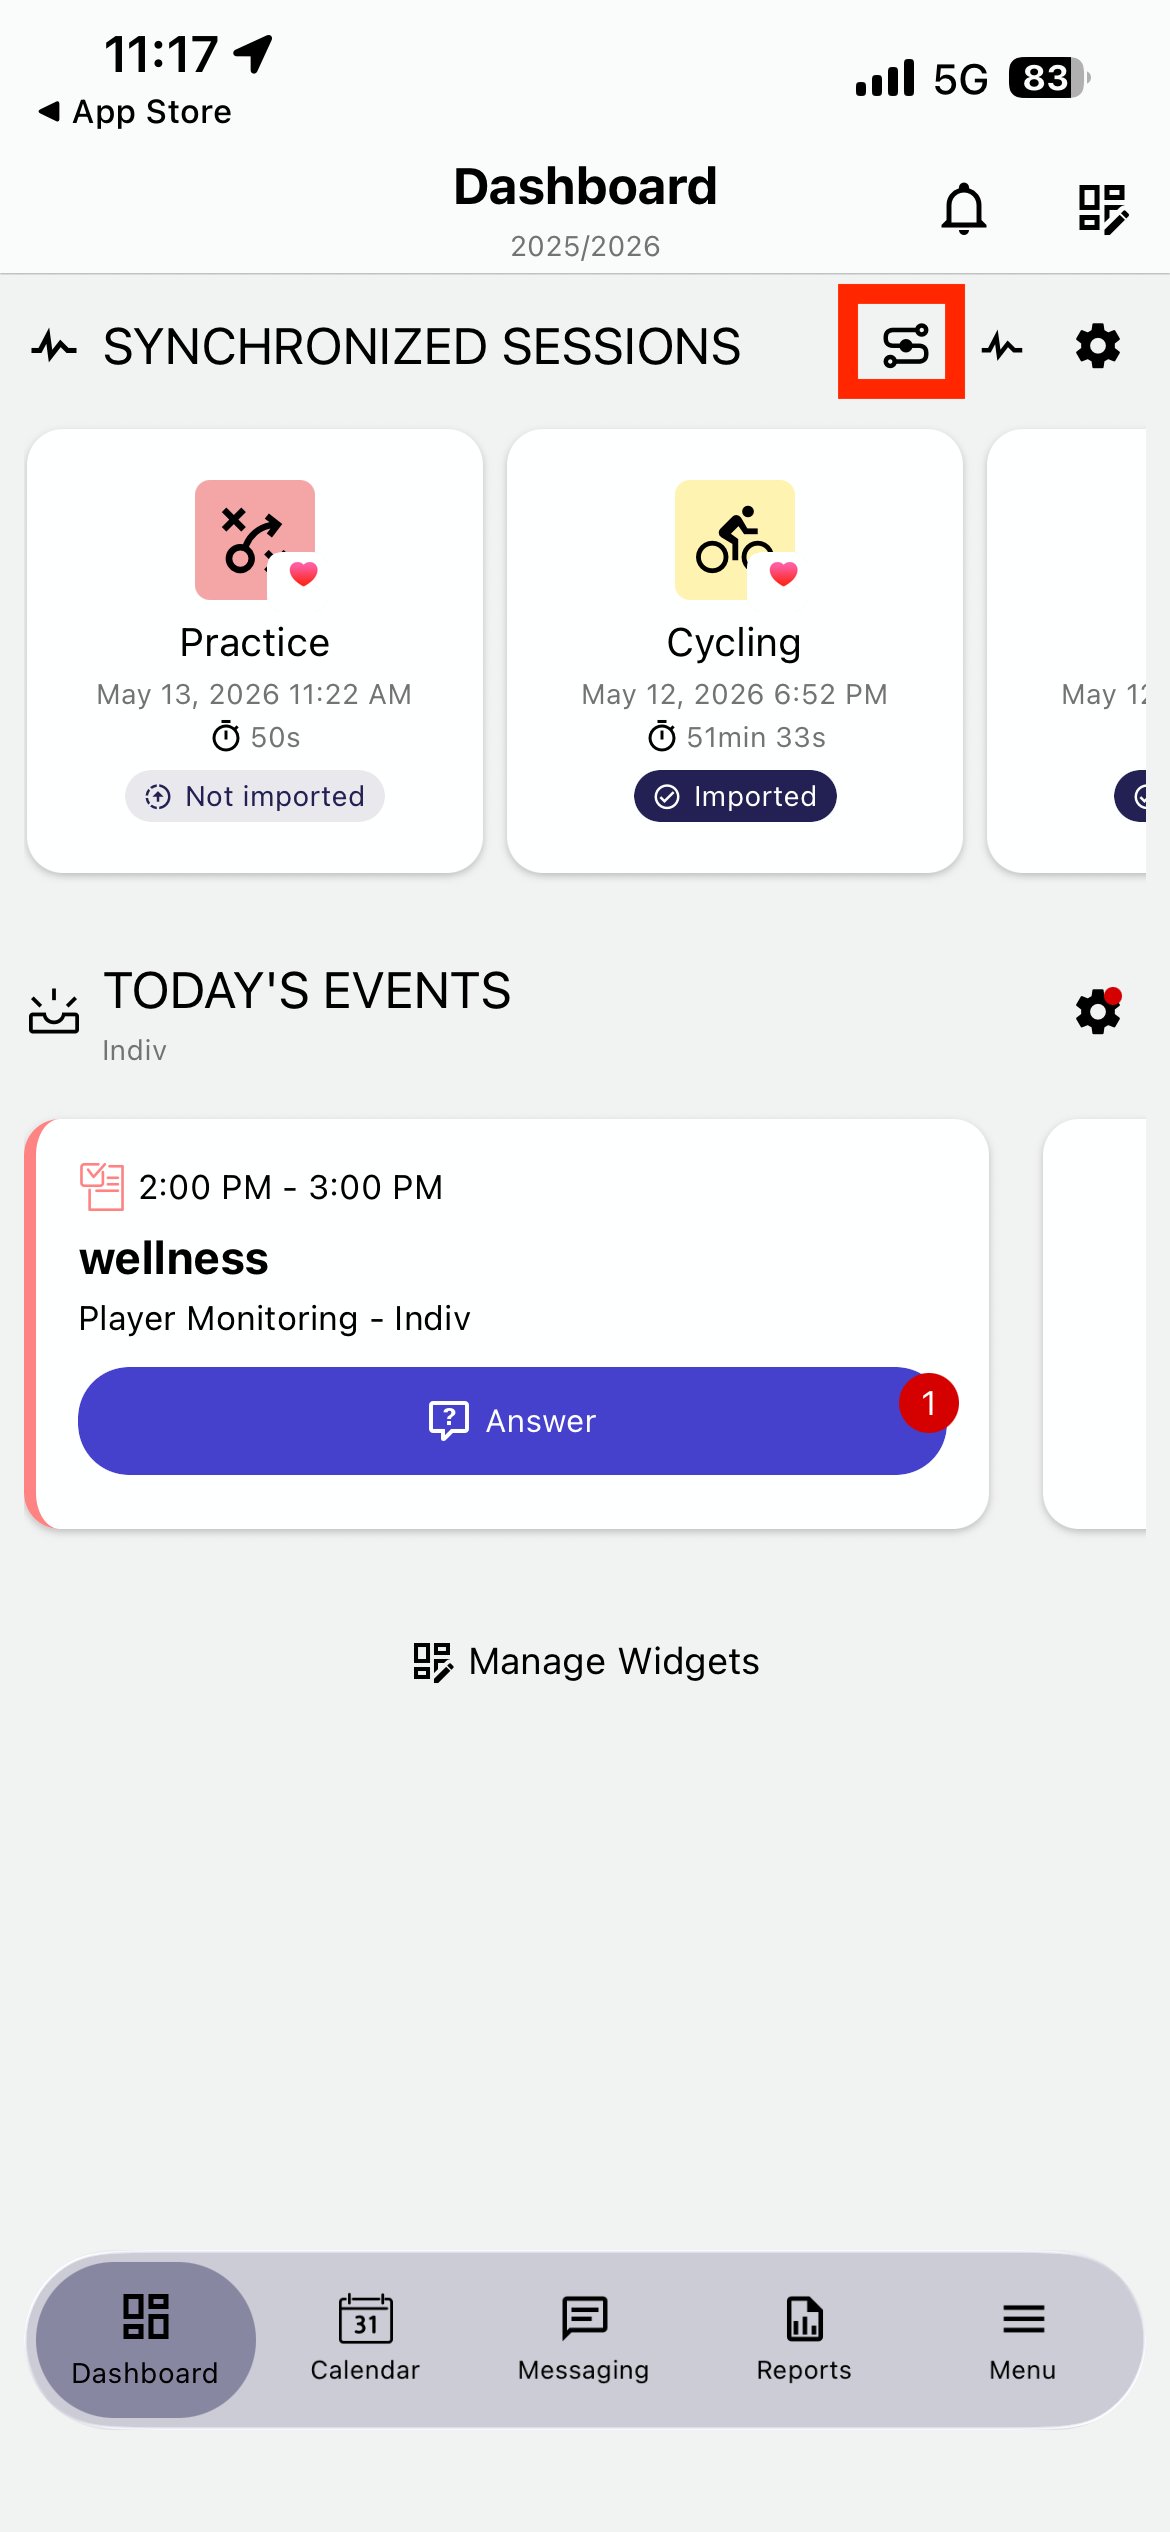
Dashboard · MyCoach Pro
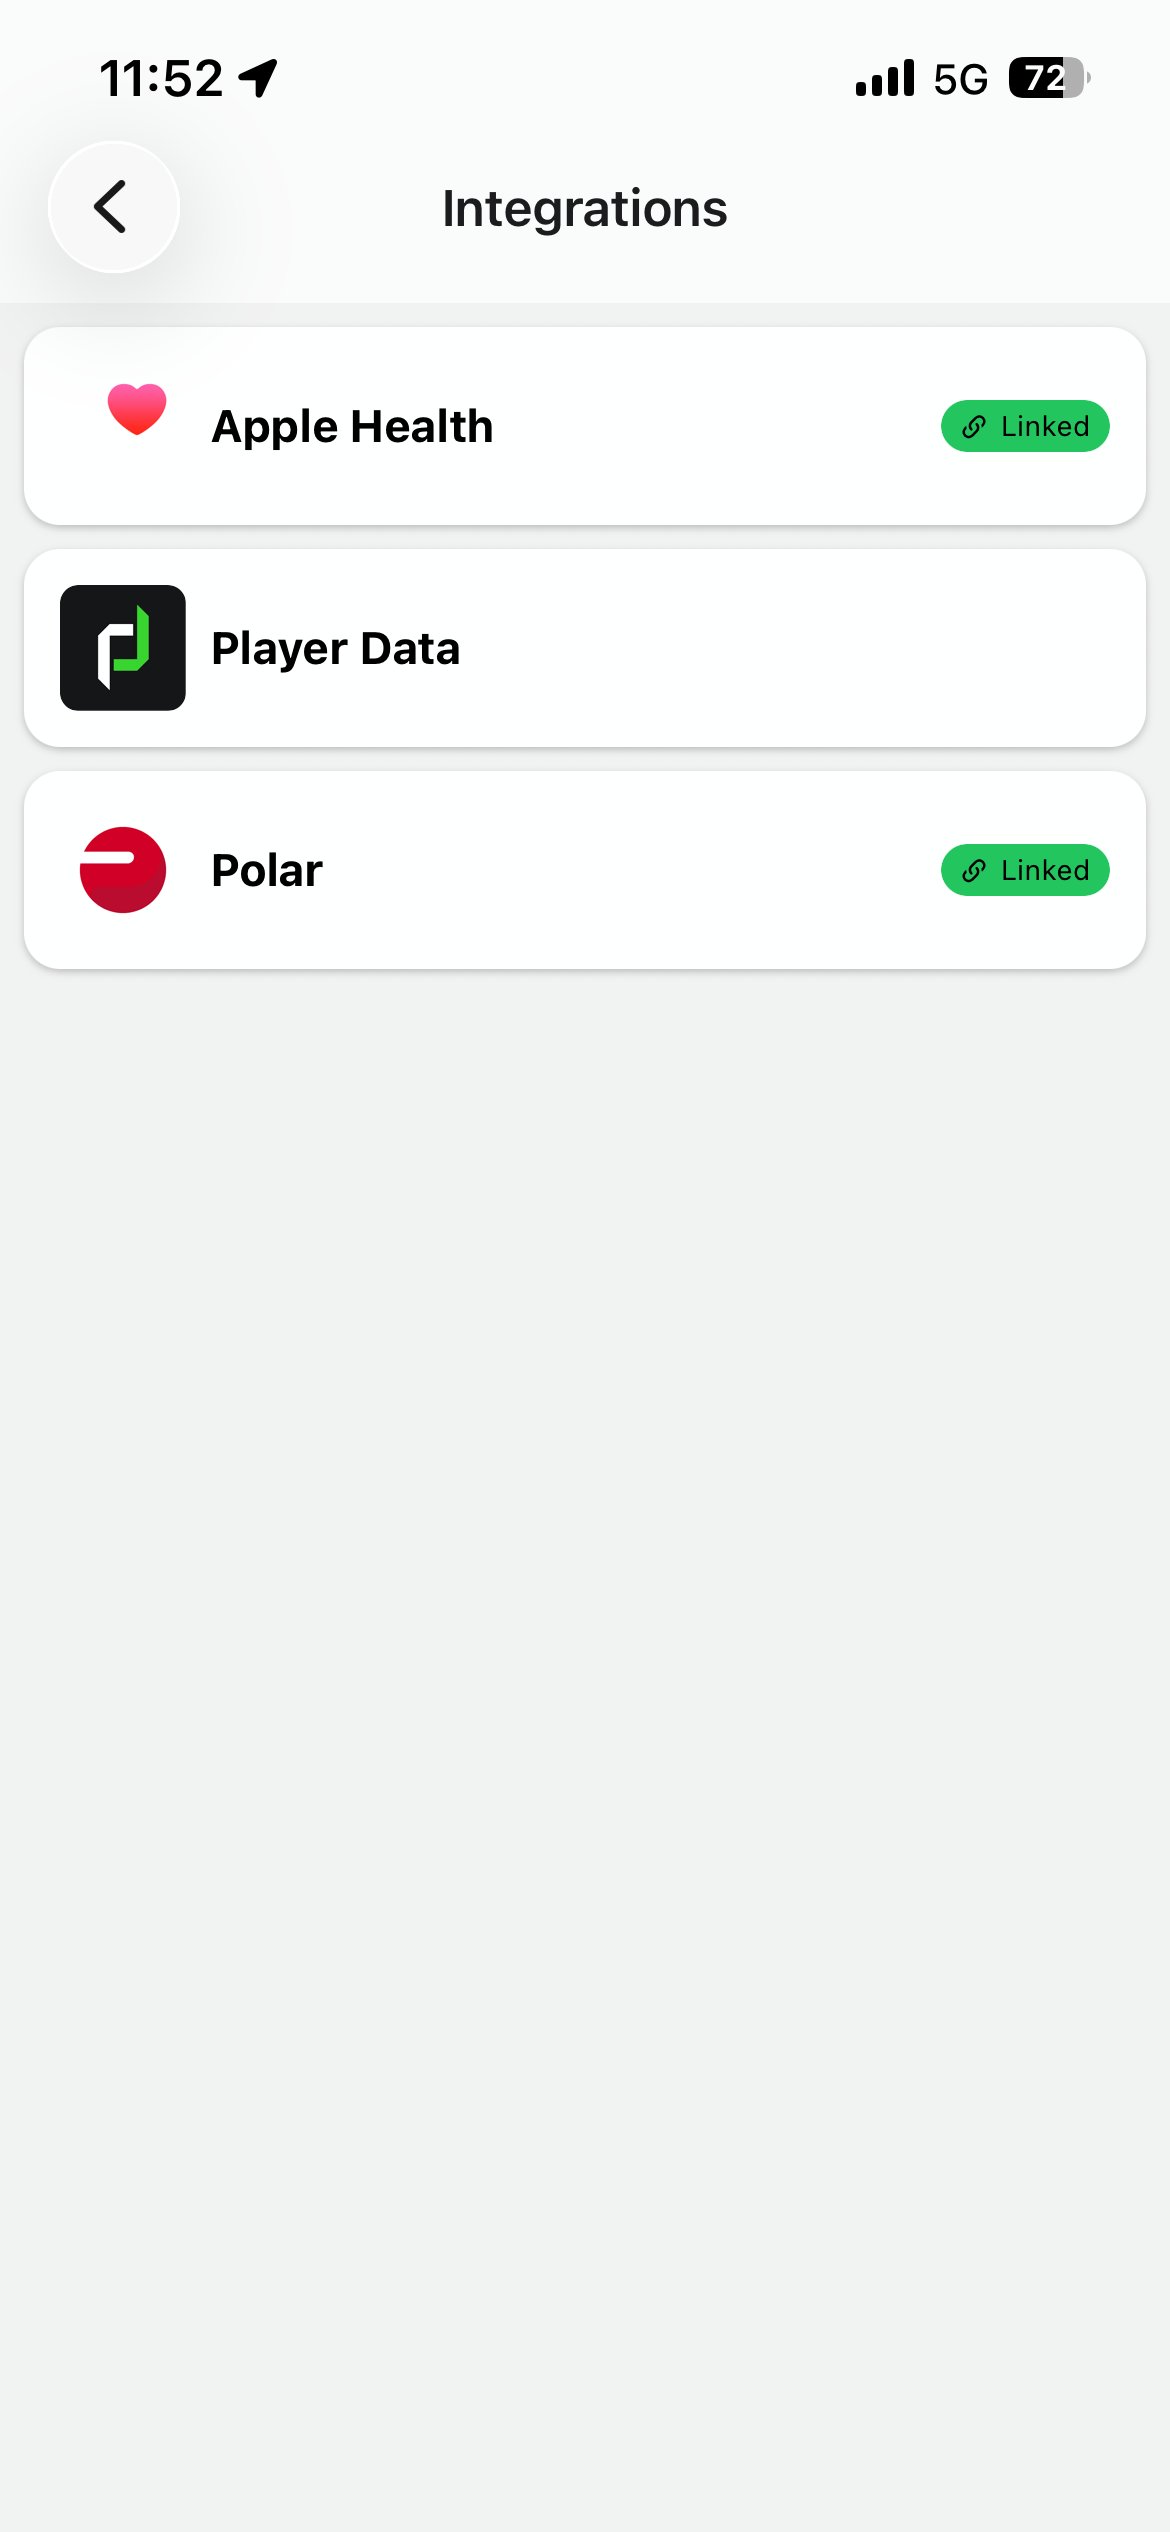
Step 2 - Select Polar
Tap Polar in your Integrations list.
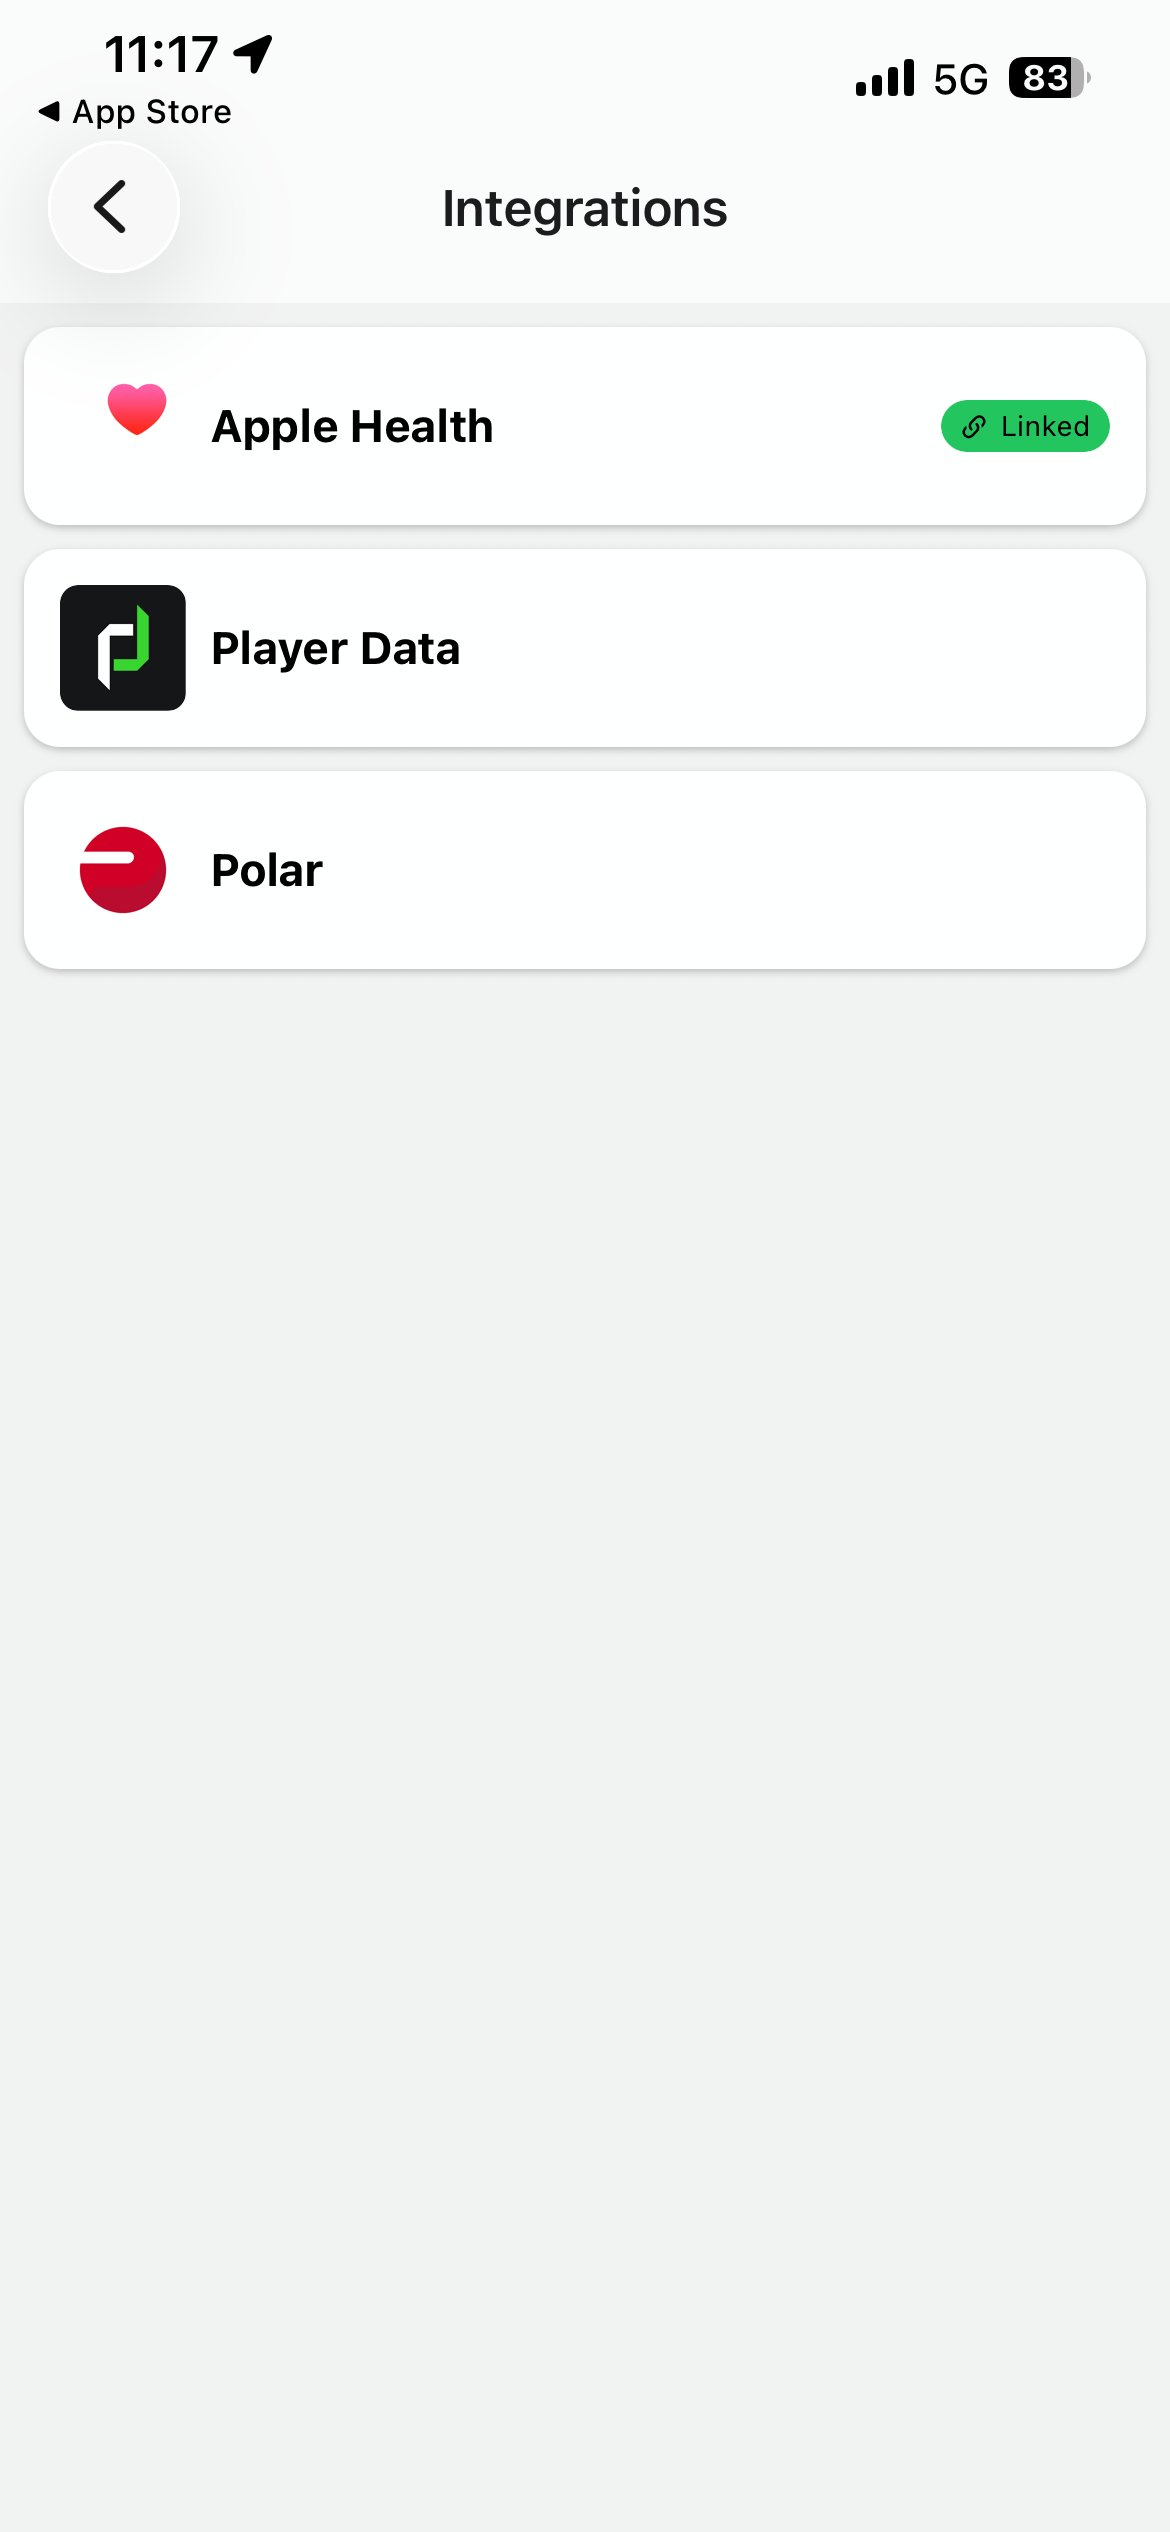
Integrations · MyCoach Pro
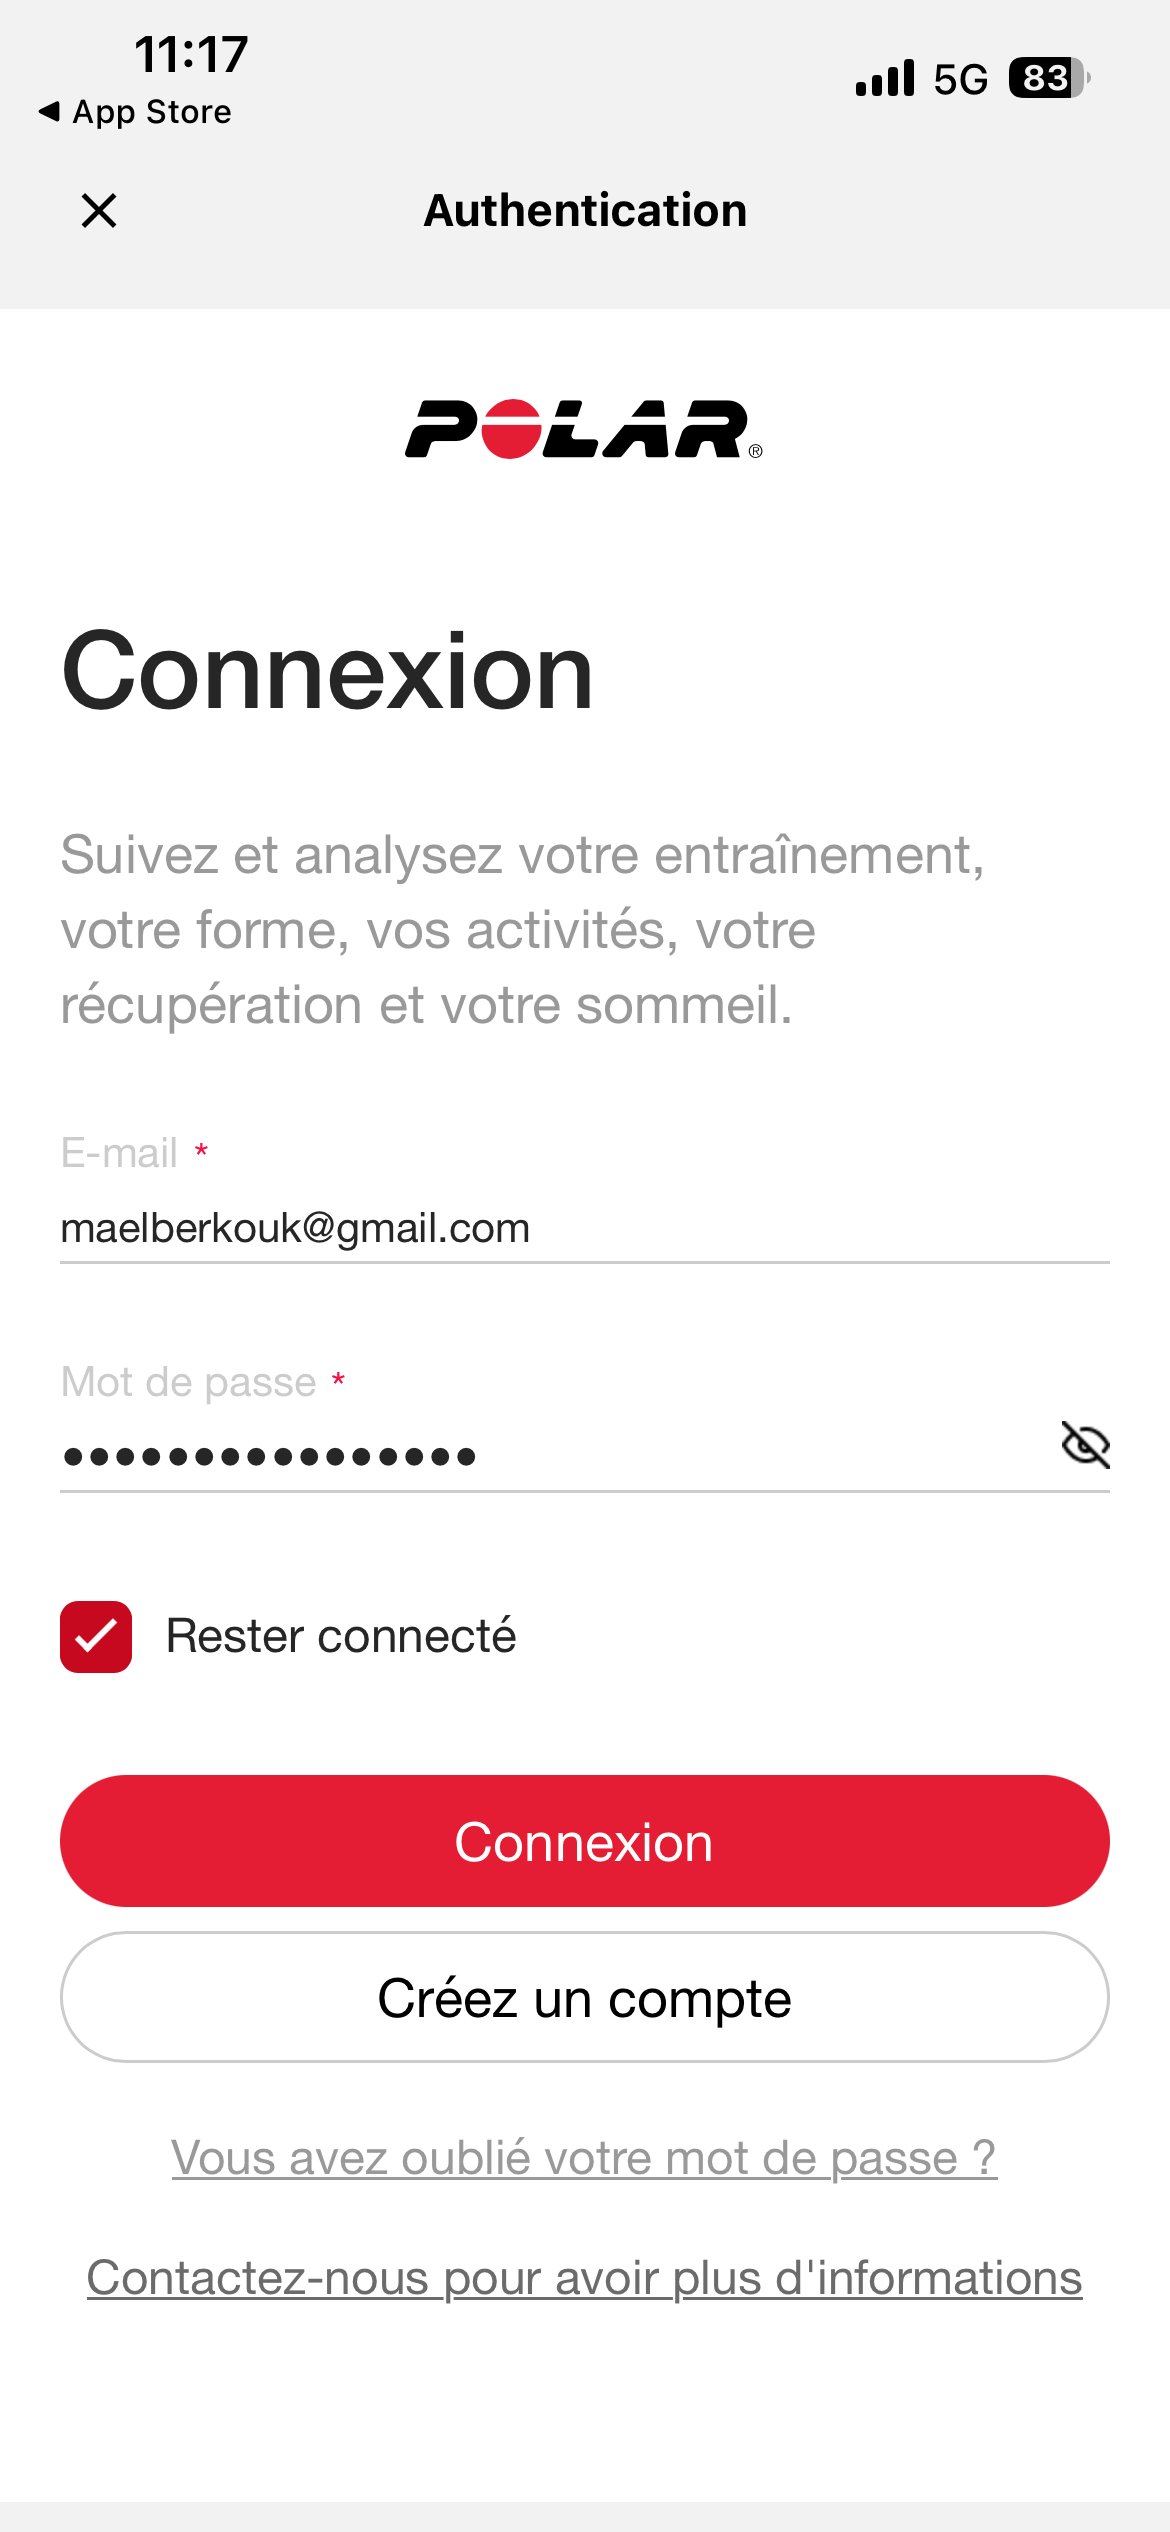
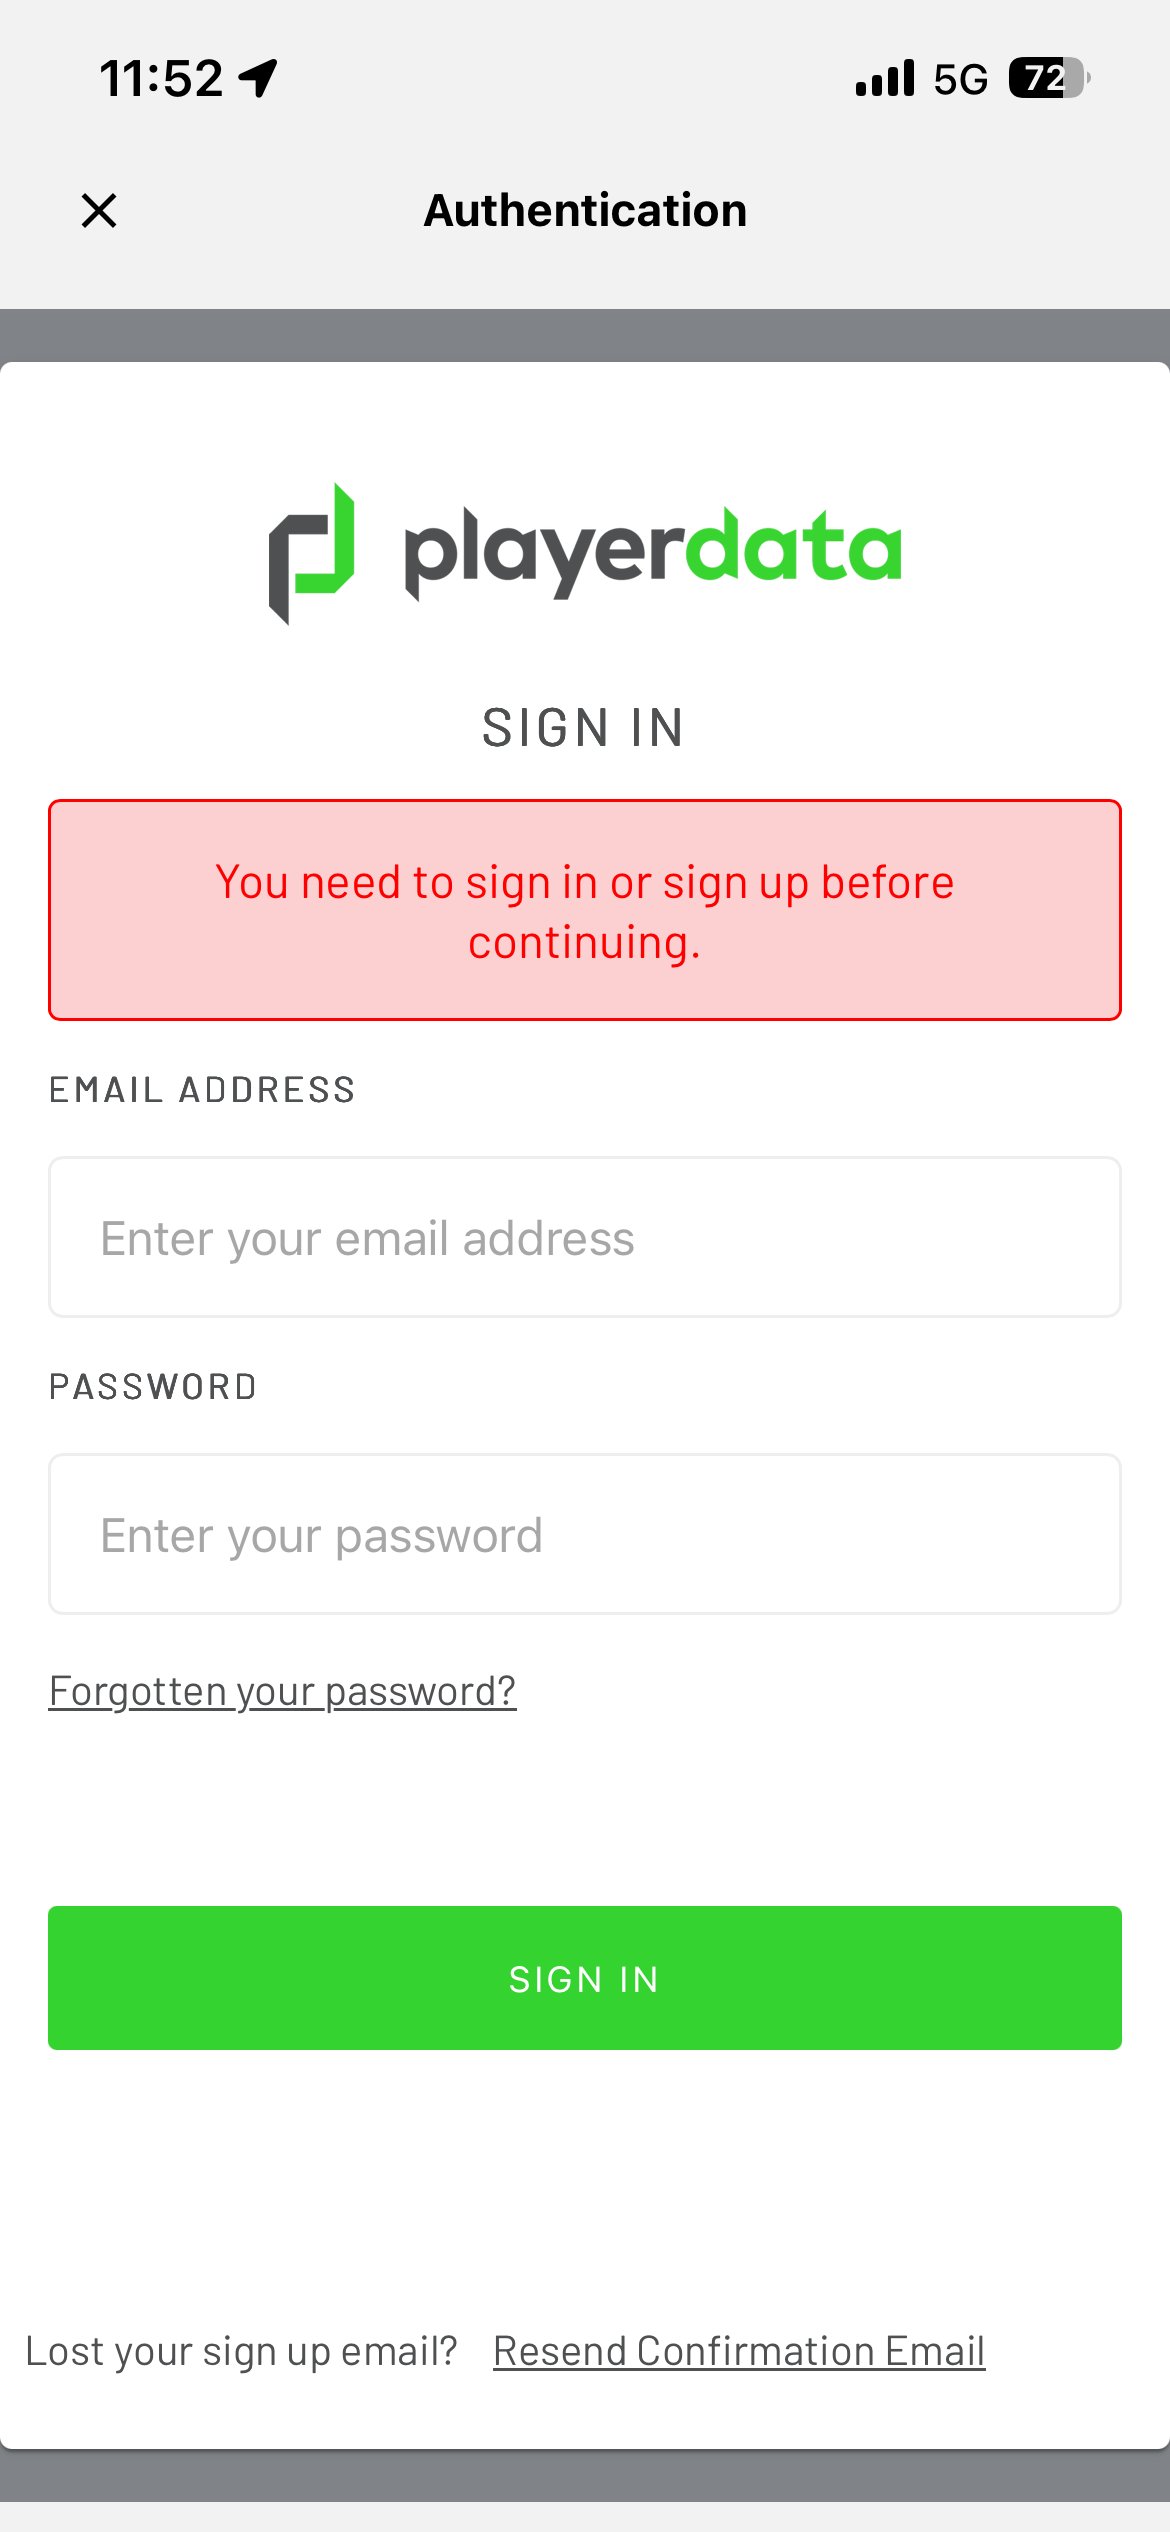
Step 3 - Sign in to Polar
⚠️ IMPORTANT - Use your own Polar Flow account
Email and password from Polar Flow - not your MyCoach Pro login. Tap Connexion.
Polar Flow authentication
Step 4 - Accept cookies
Polar Flow asks for cookie consent before continuing. Allow selection is enough - necessary cookies only.

Polar Flow cookie consent
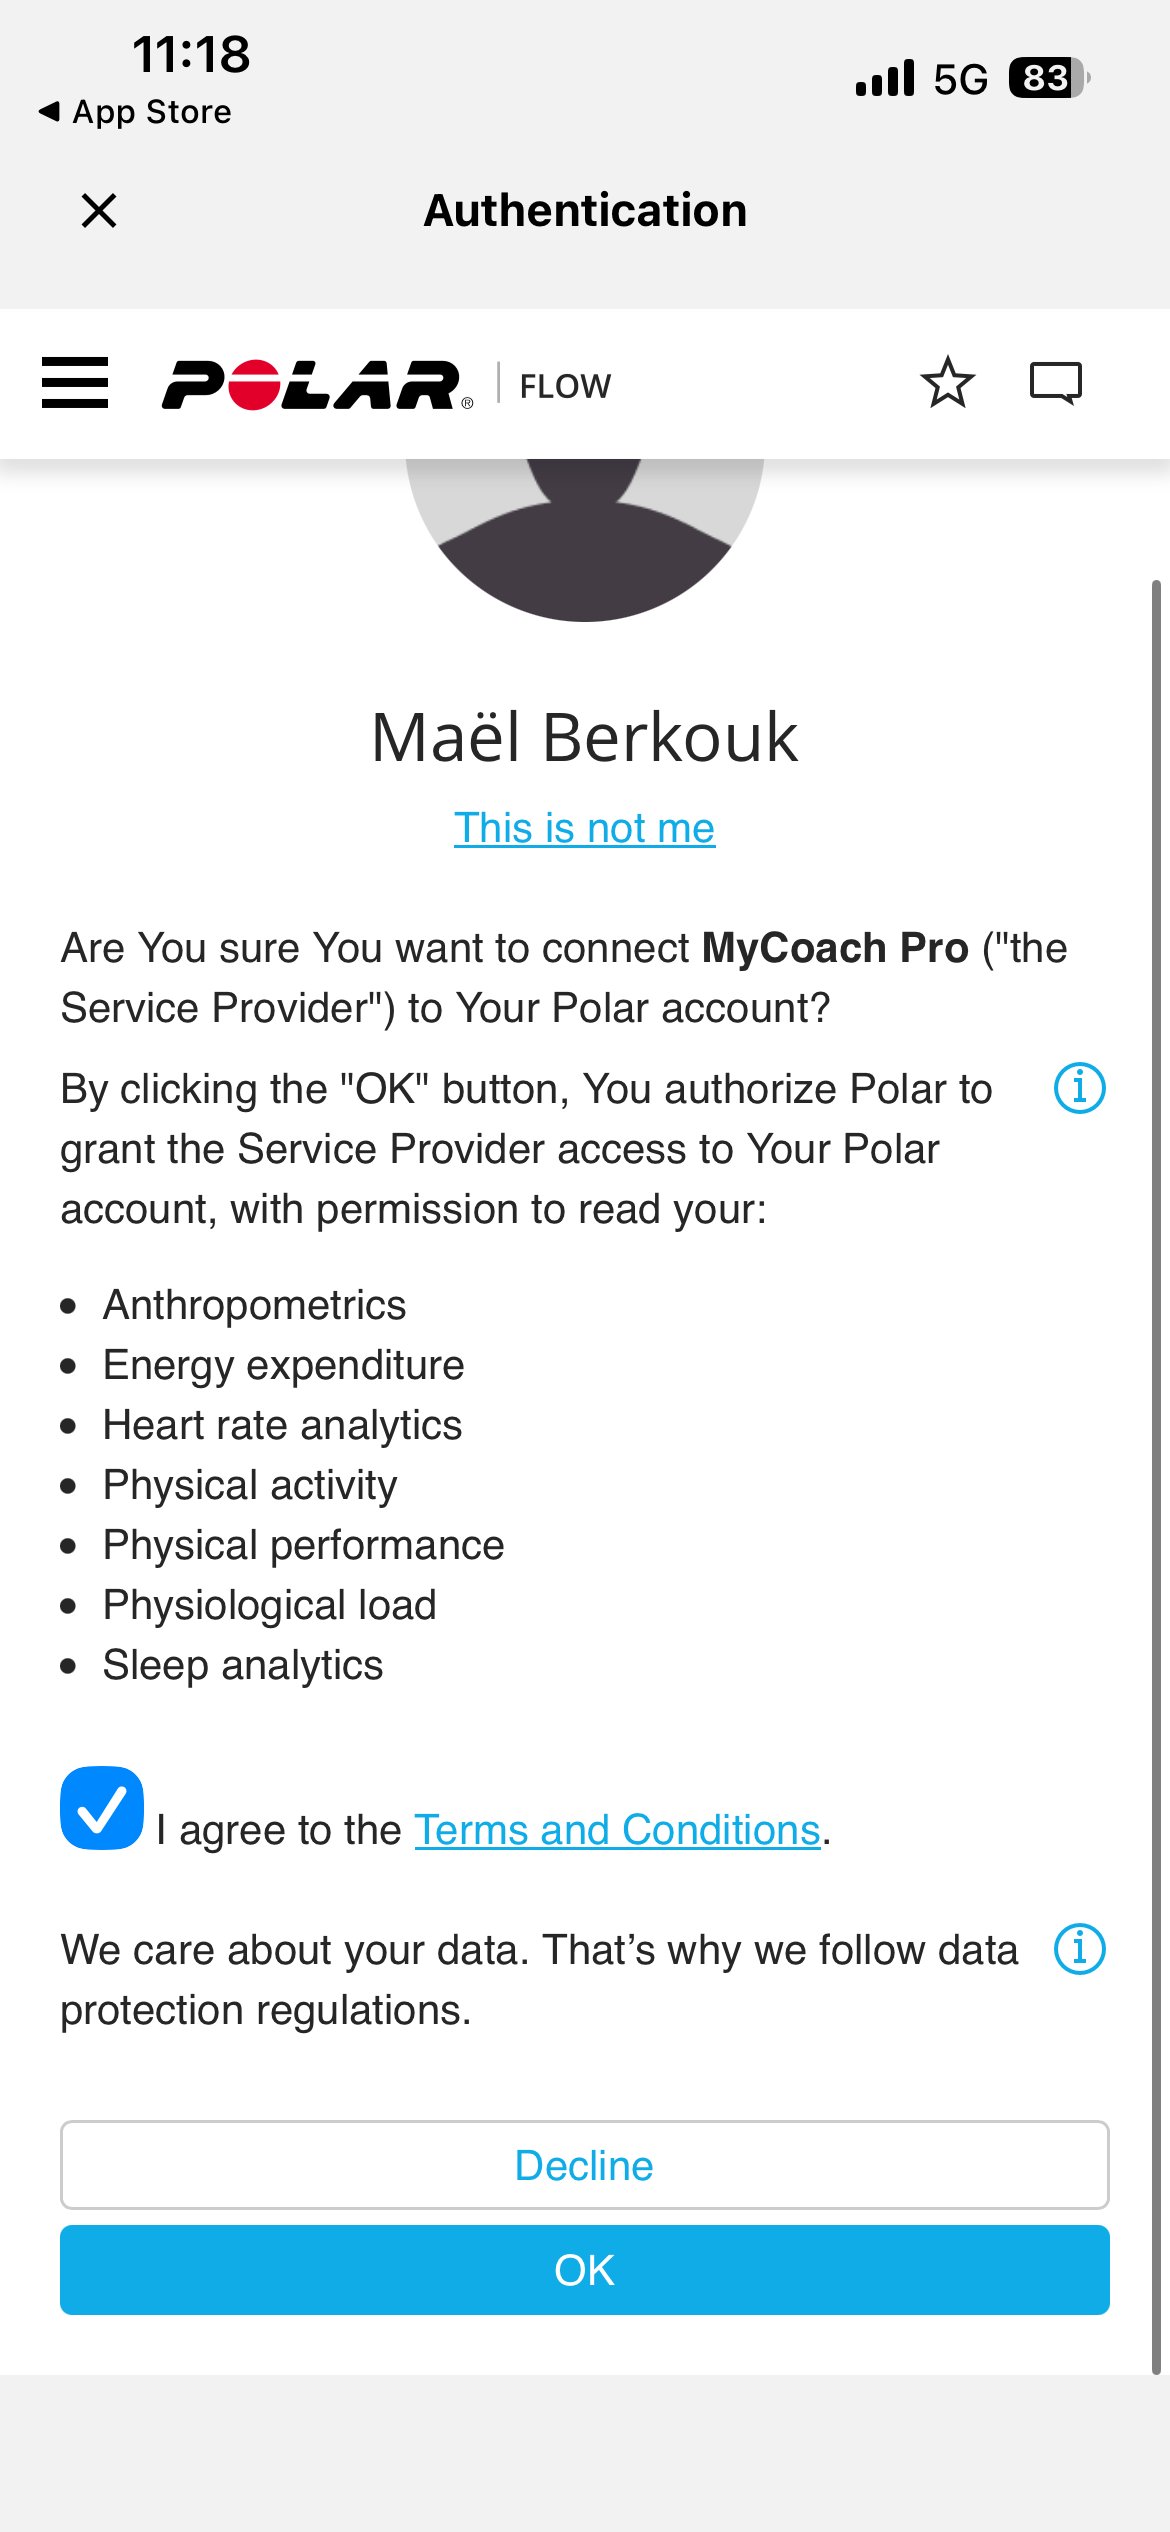
Step 5 - Authorize MyCoach Pro
⚠️ IMPORTANT - Accept the Terms and Conditions
Check I agree to the Terms and Conditions then tap OK. This authorizes Polar to share your training data with MyCoach Pro.
Polar authorization screen
Step 6 - You're linked
Polar now shows as Linked in your Integrations. Your future sessions will sync automatically from Polar Flow.
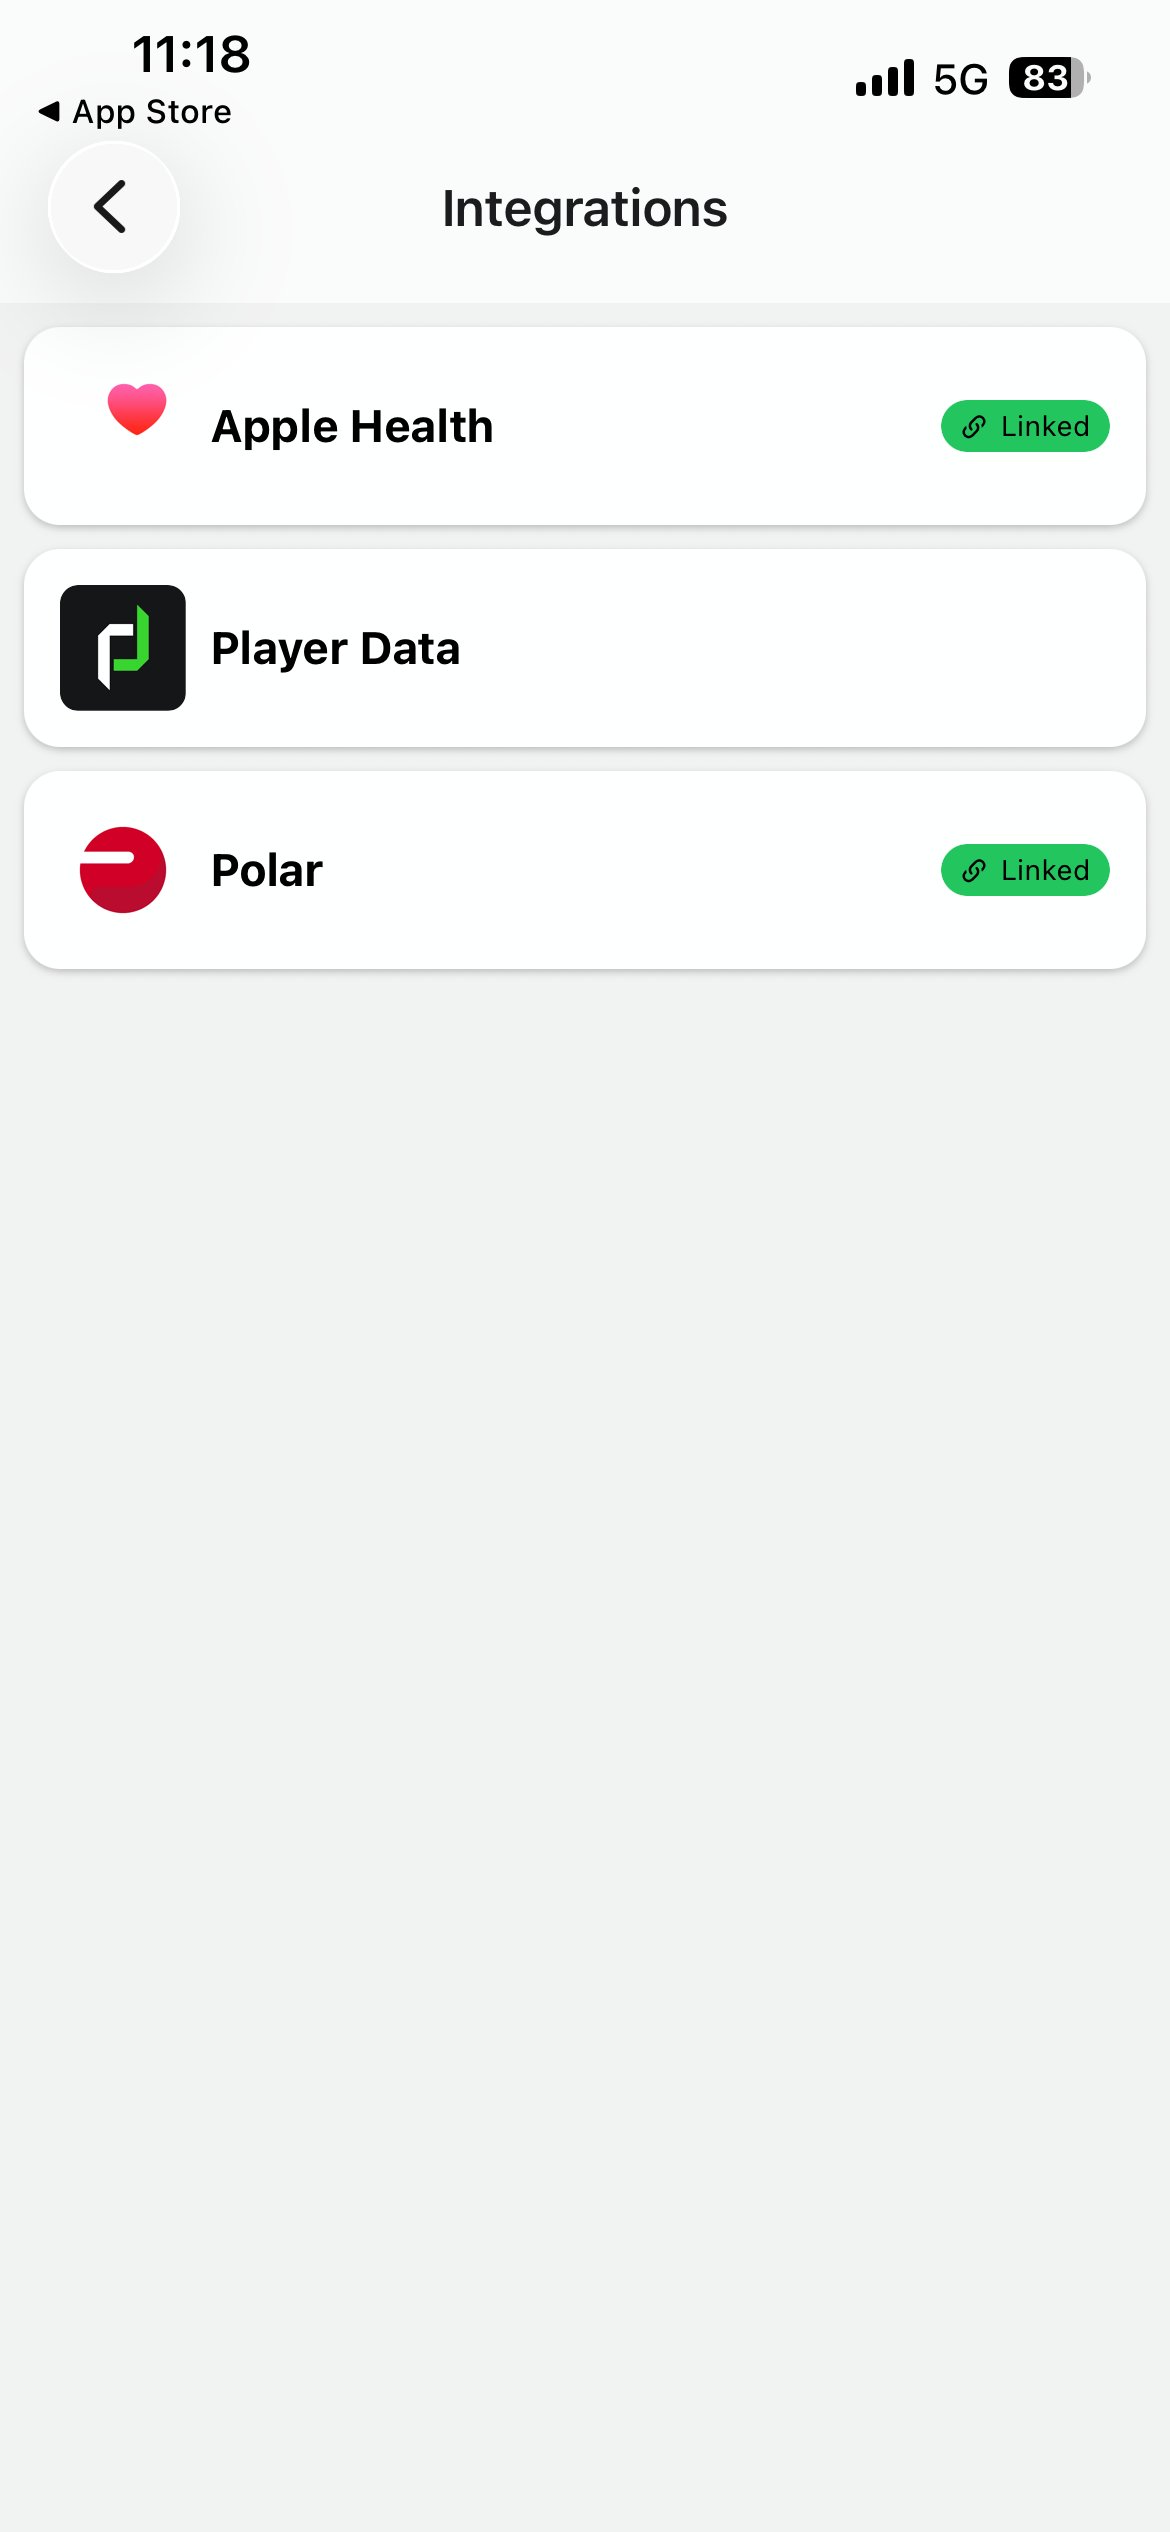
Polar = Linked
1.2 · Filter your data sources
To avoid duplicate sessions, configure your dashboard to only show Polar sessions.
Step 1 - Open Filters
From your Dashboard, tap the gear icon next to Synchronized Sessions - not the sync icon next to it.
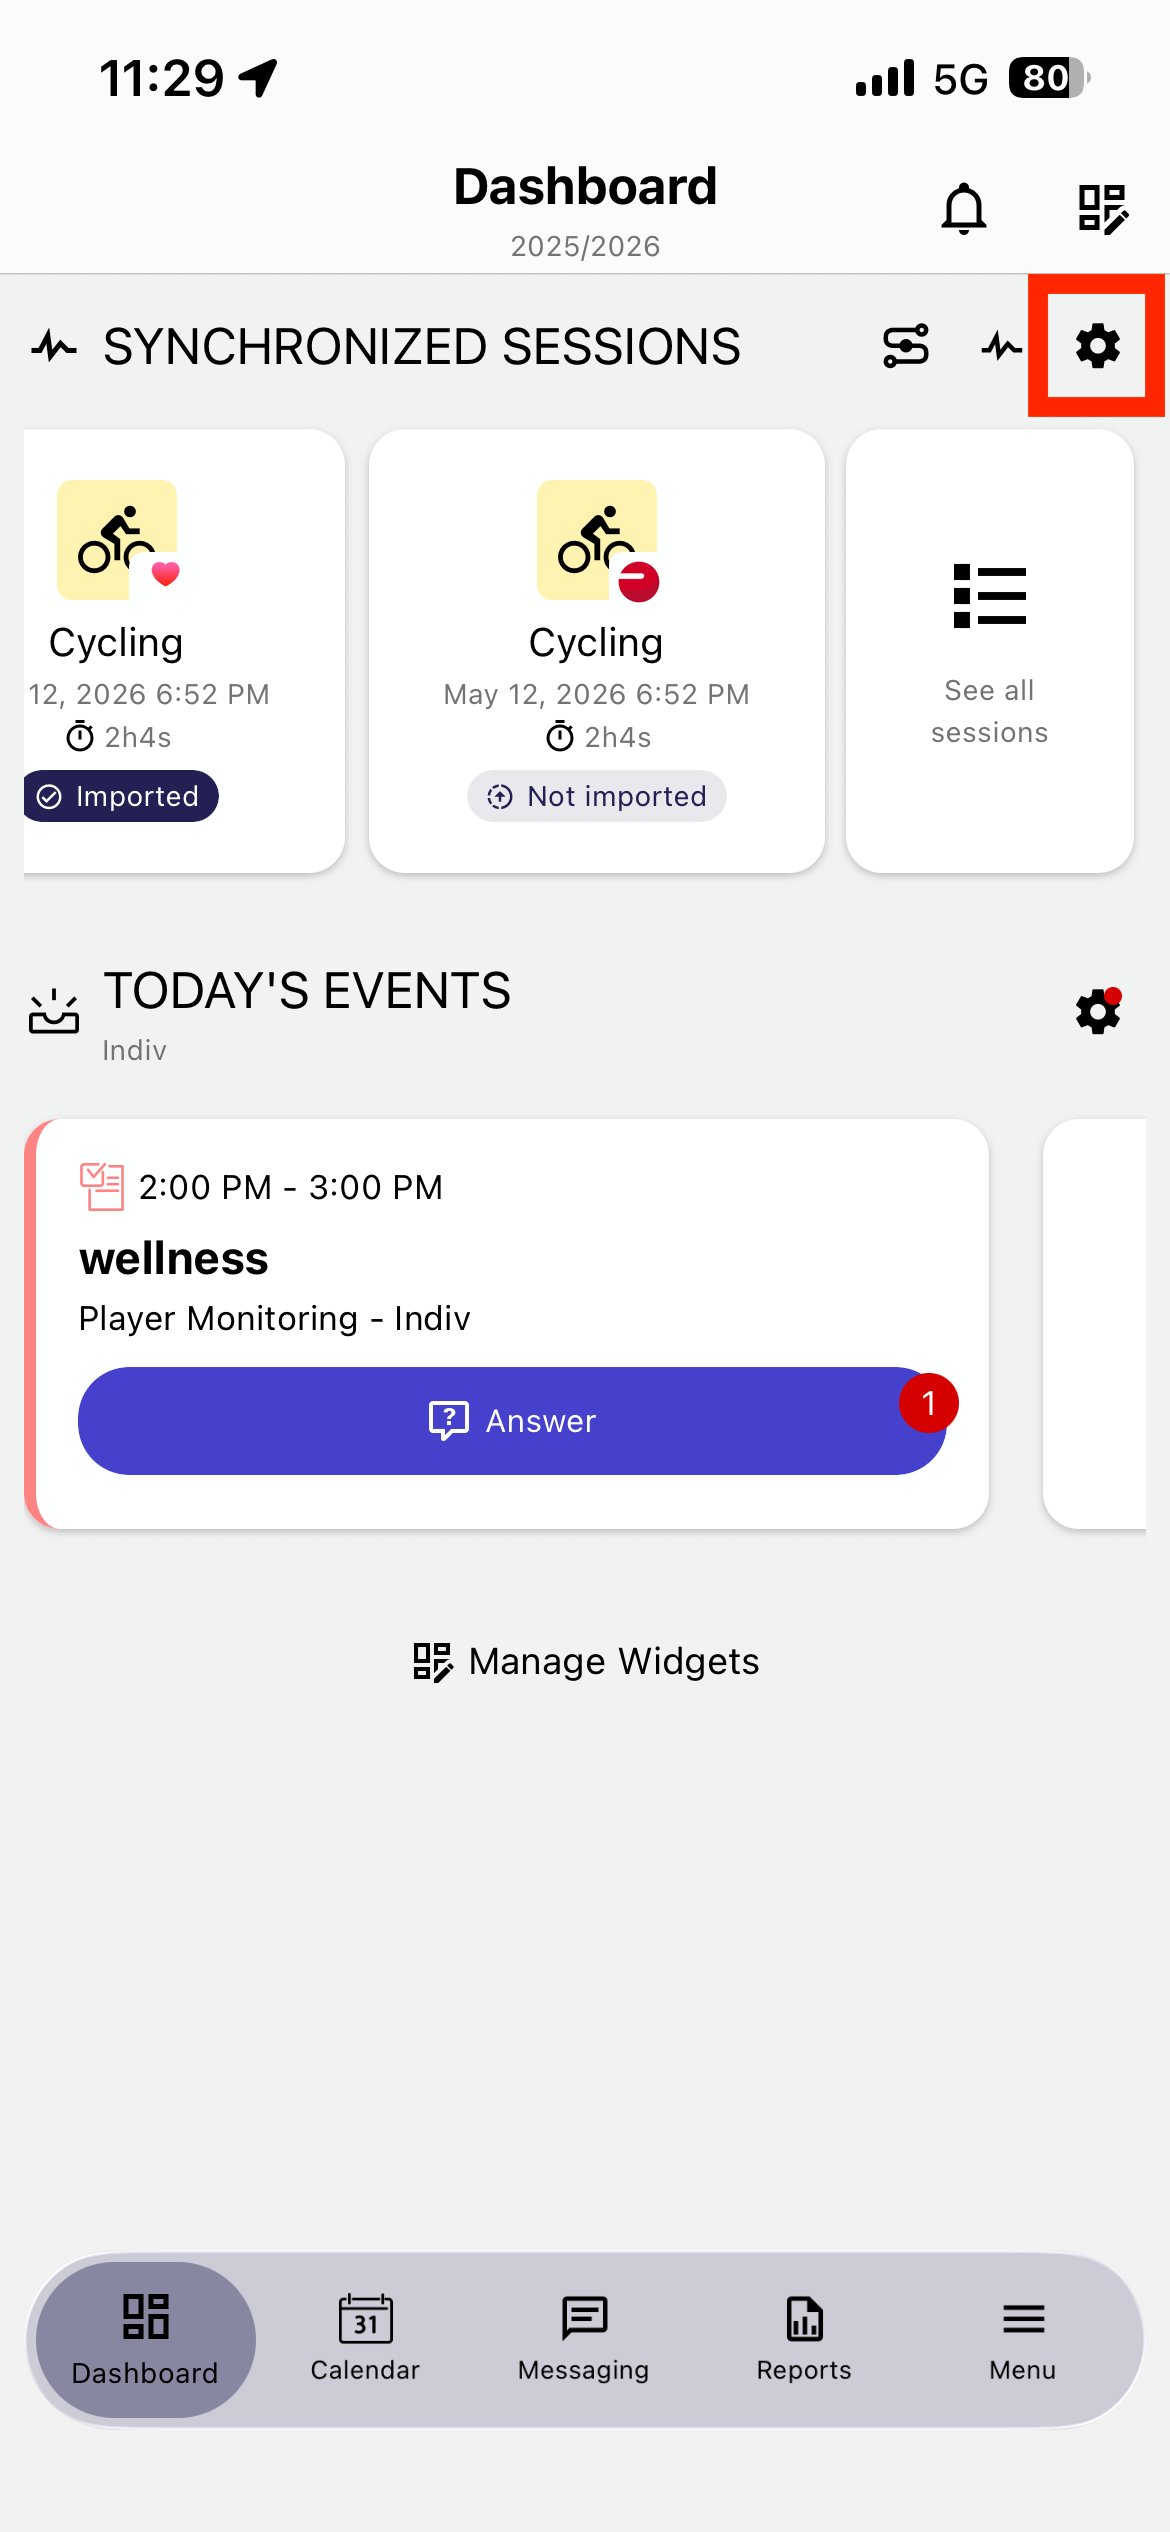
Dashboard · gear icon
Step 2 - Open Integrations dropdown
In the Filters panel, tap the Integrations dropdown to choose which source to display.
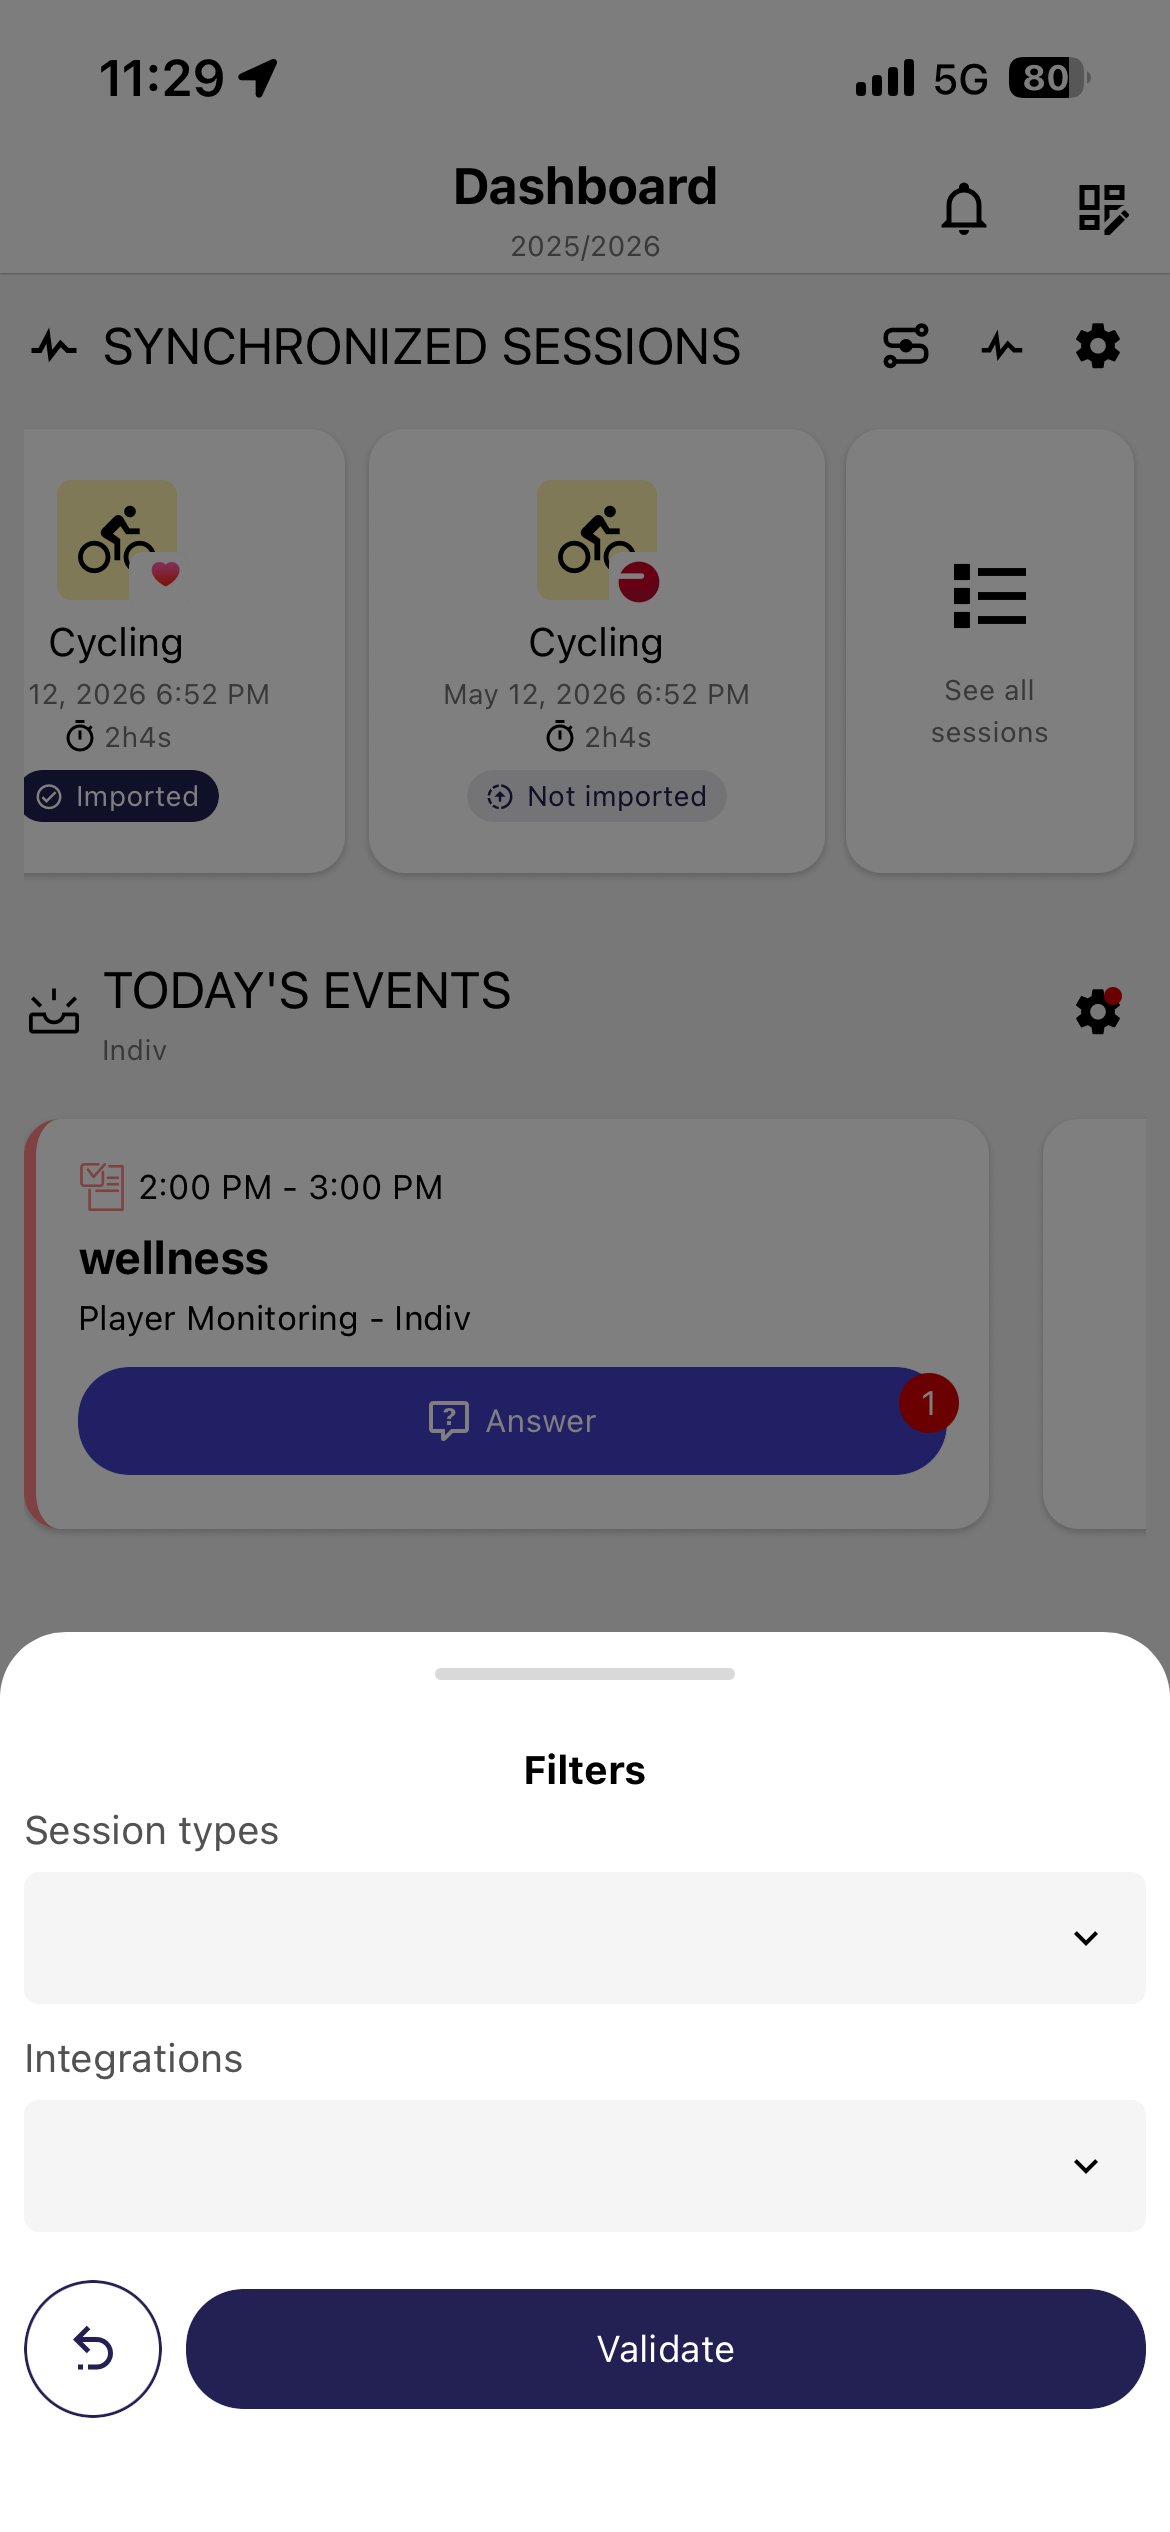
Filters panel
Step 3 - Select Polar only
Pick Polar - leave Apple Health unselected to avoid duplicates. Tap Done.
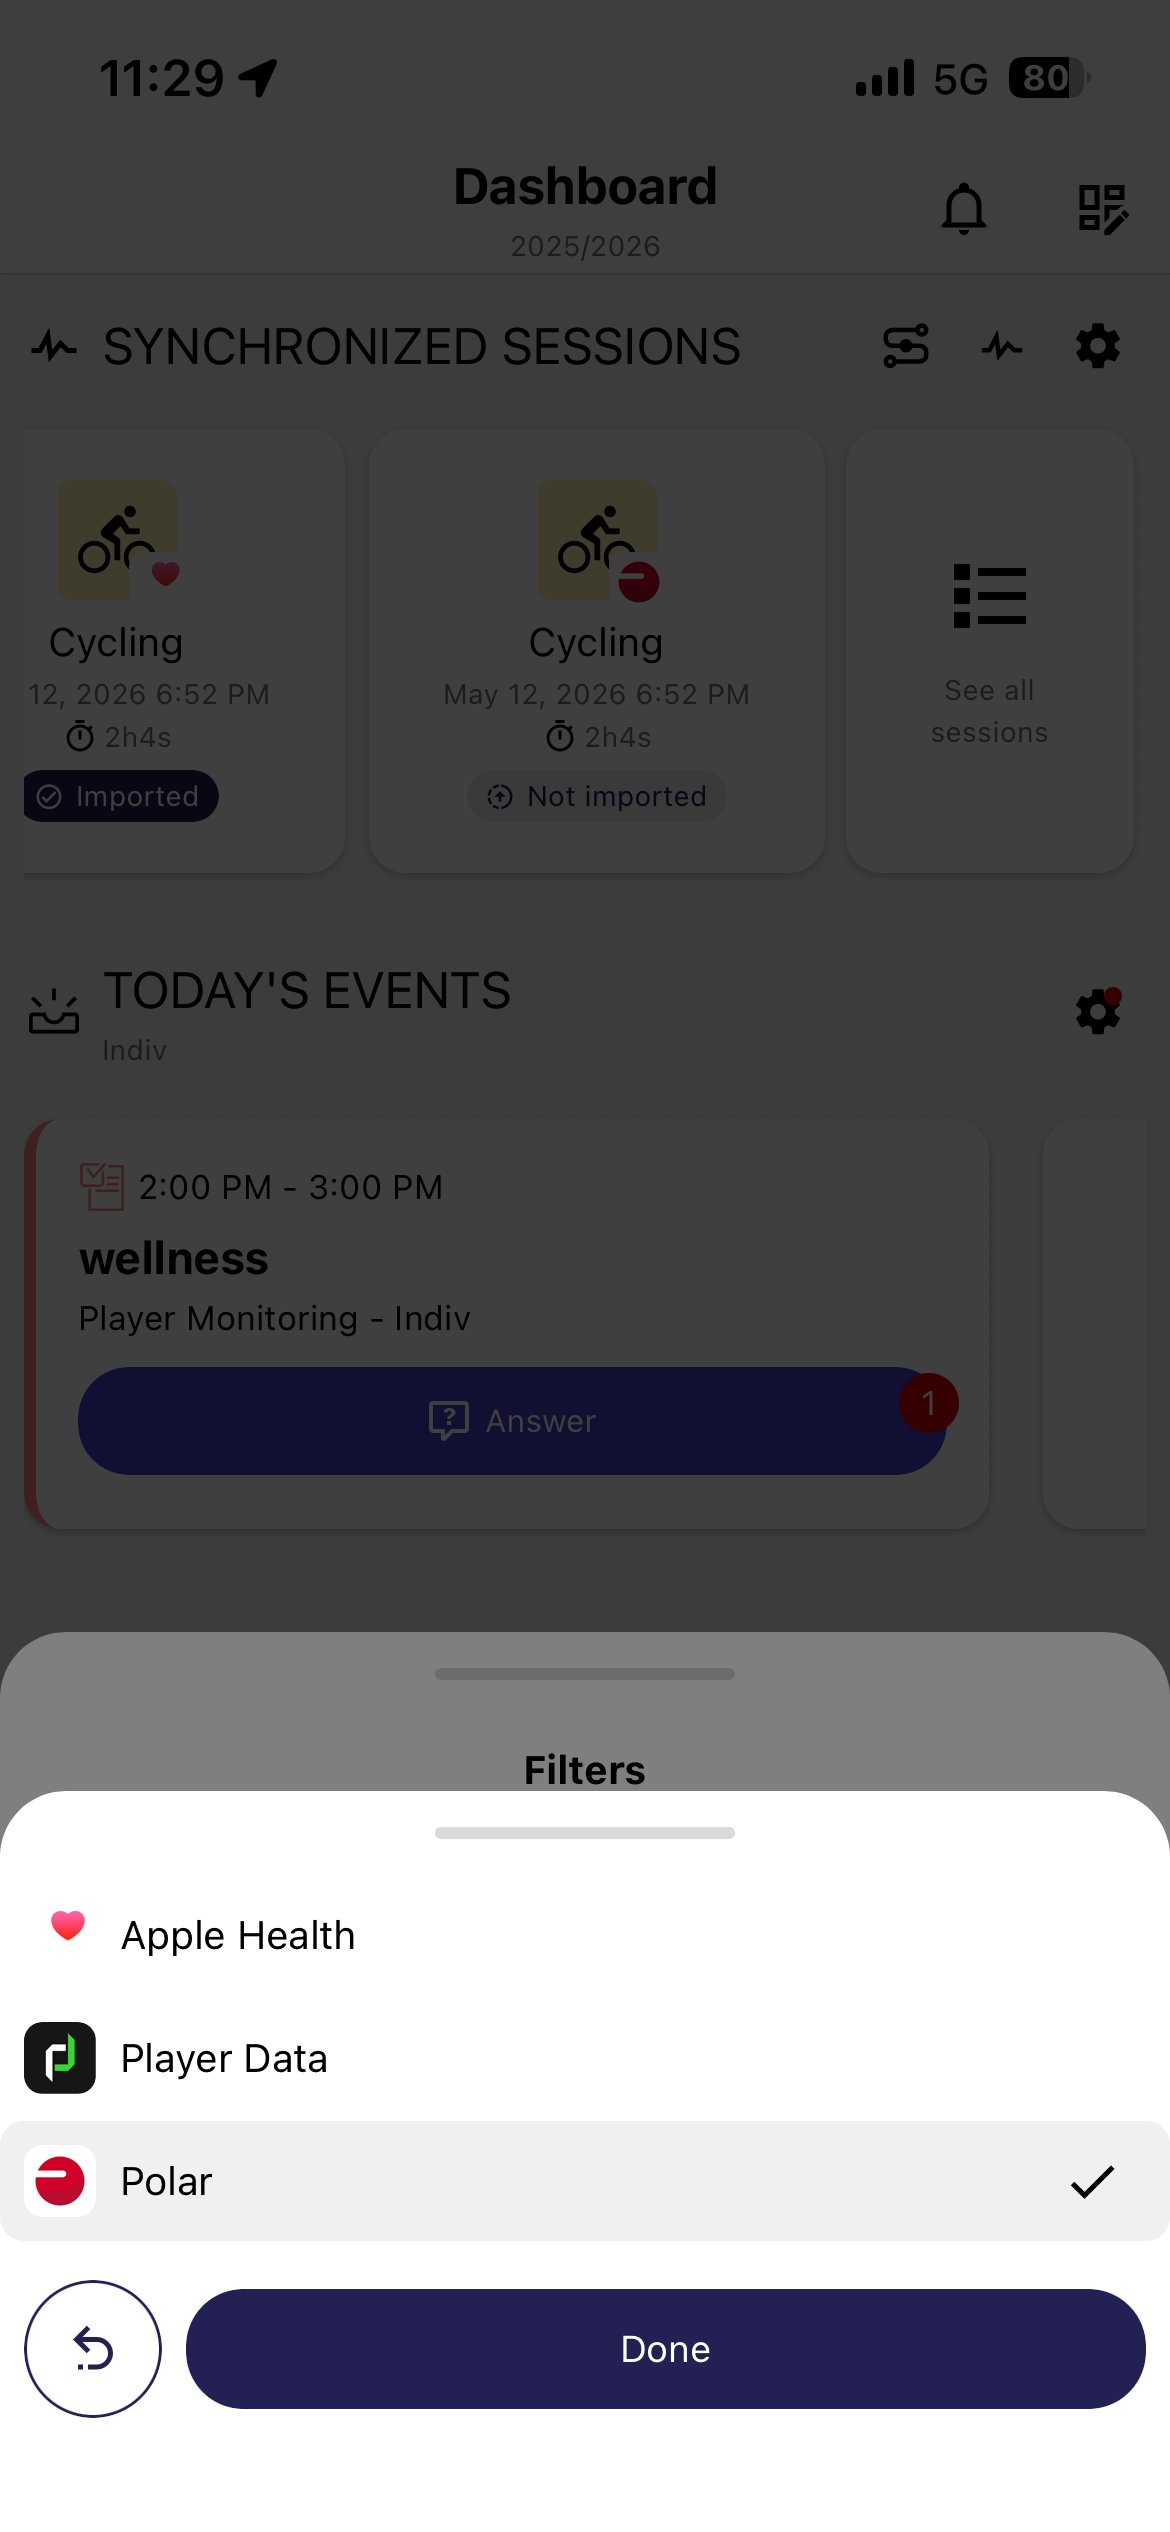
Integrations dropdown
Step 4 - Validate
Tap Validate. Your Synchronized Sessions list now shows only Polar sessions.
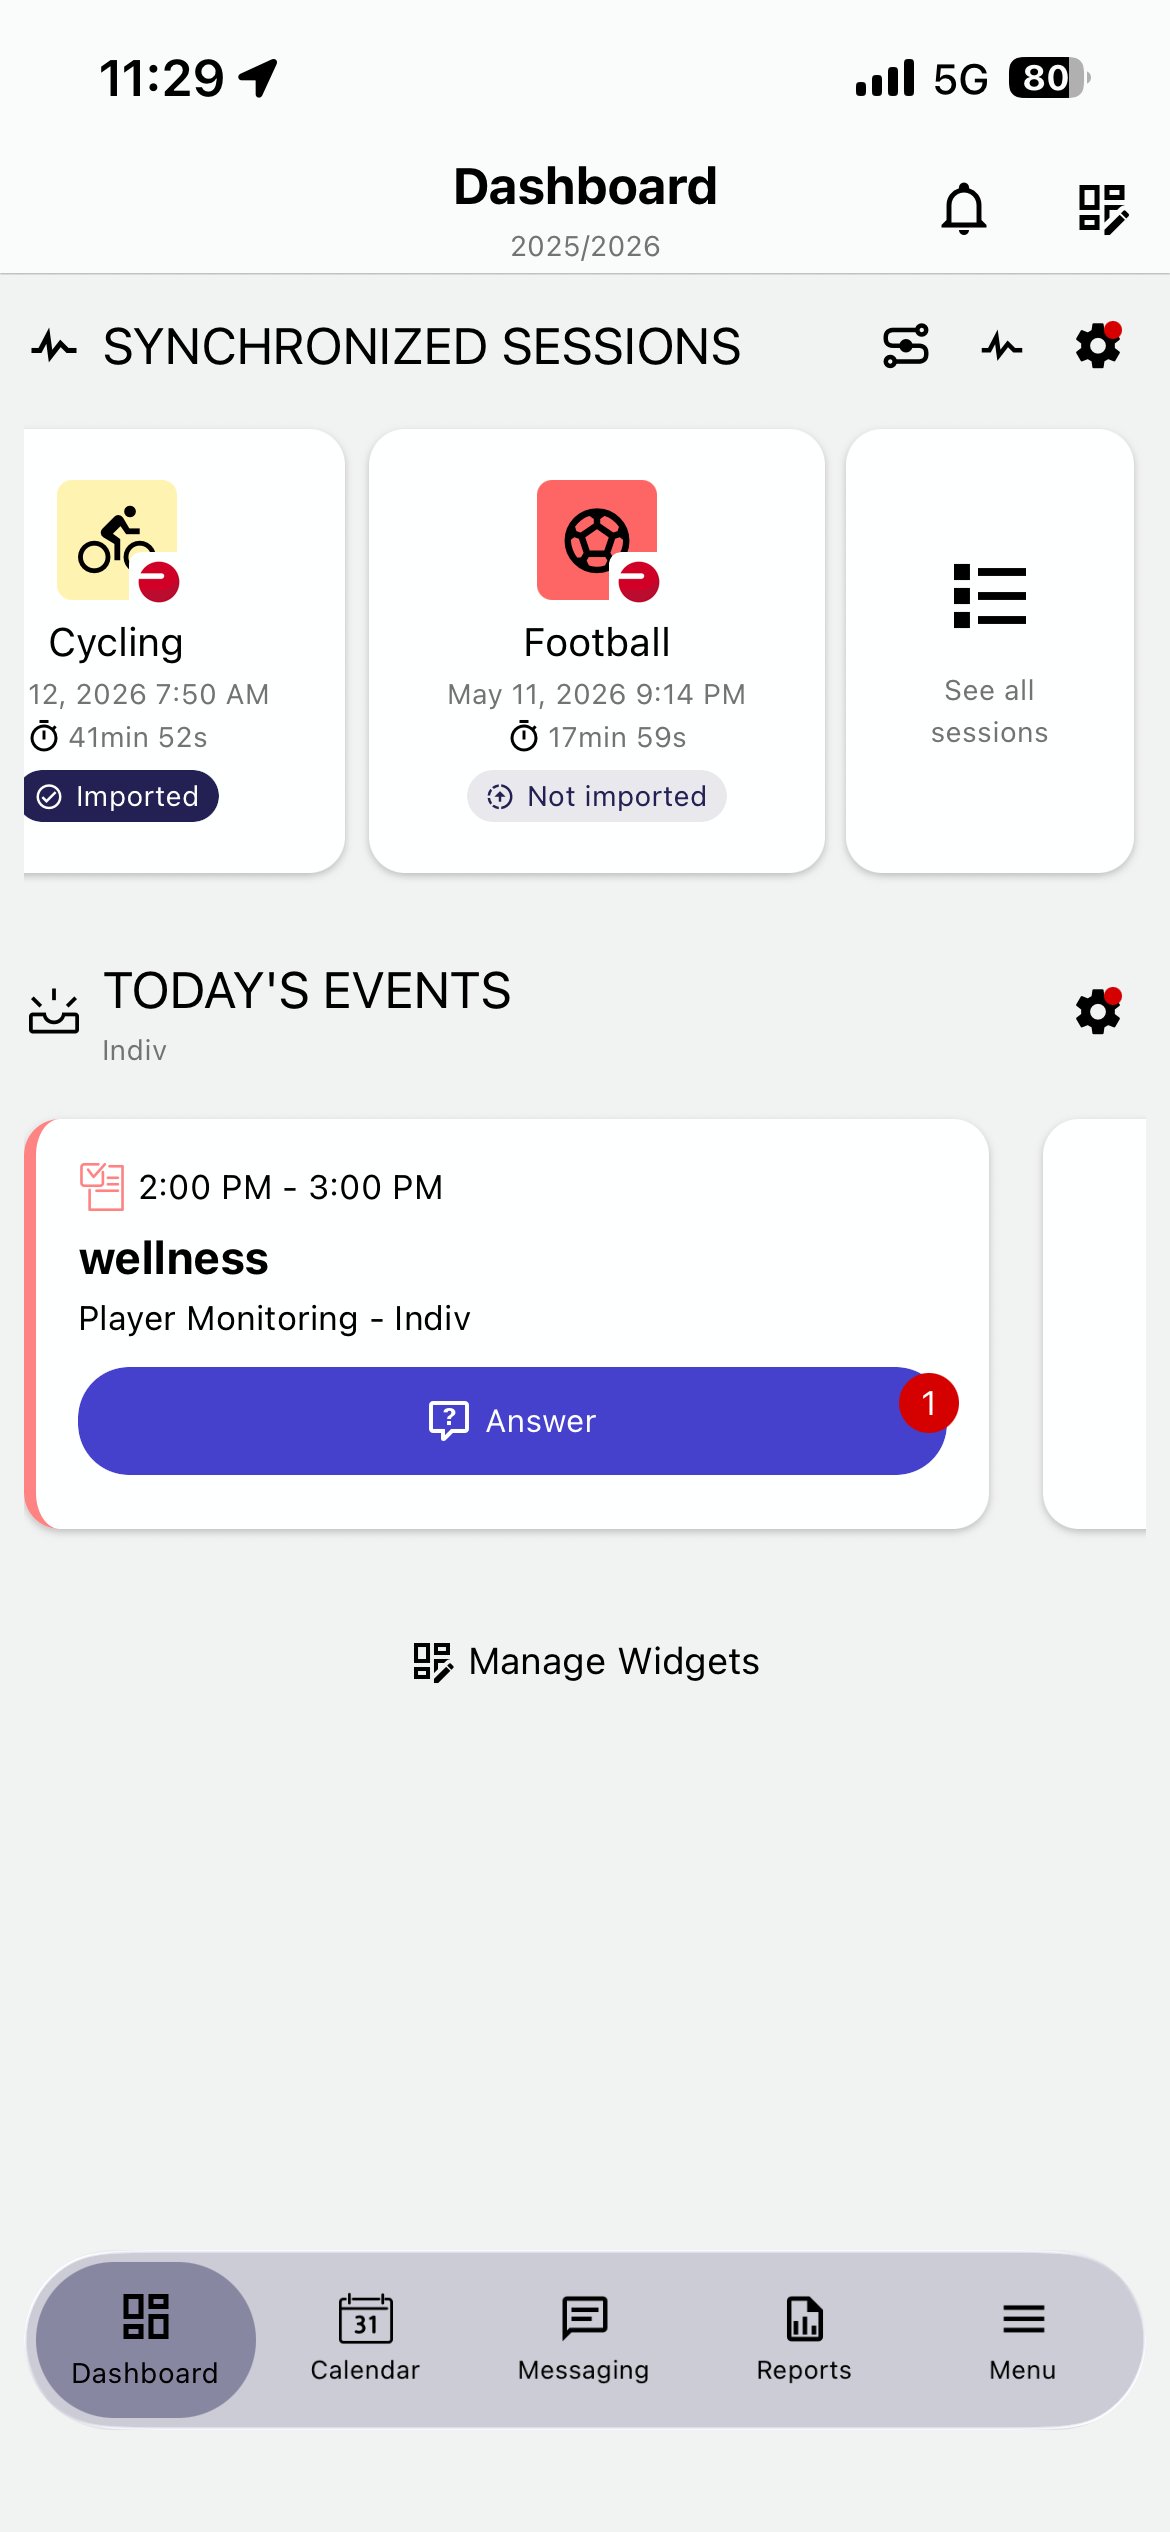
Filtered dashboard
⚠️ HEADS UP - What you'll see in your list
Only sessions uploaded to Polar Flow after you connected your account to MyCoach Pro will appear. Limited to the last 30 days.
Older sessions, or sessions from before your connection, won't be retrieved.
1.3 · Your post-session routine
Five steps. Familiar flow - same as today, with richer data.
| # | Step | What you do |
|---|---|---|
| 1 | Run | Run your Polar session as usual. |
| 2 | Sync | Sync your watch with Polar Flow. |
| 3 | Open | Tap the notification, or find it in MyCoach Pro. |
| 4 | Review | See the rich data: HR zones, pace, map. |
| 5 | Create | Tap Create player session. Done. |
Steps 1 & 2 - Run, then sync your watch
After your session, sync your Polar watch with Polar Flow as you always do. No change here.
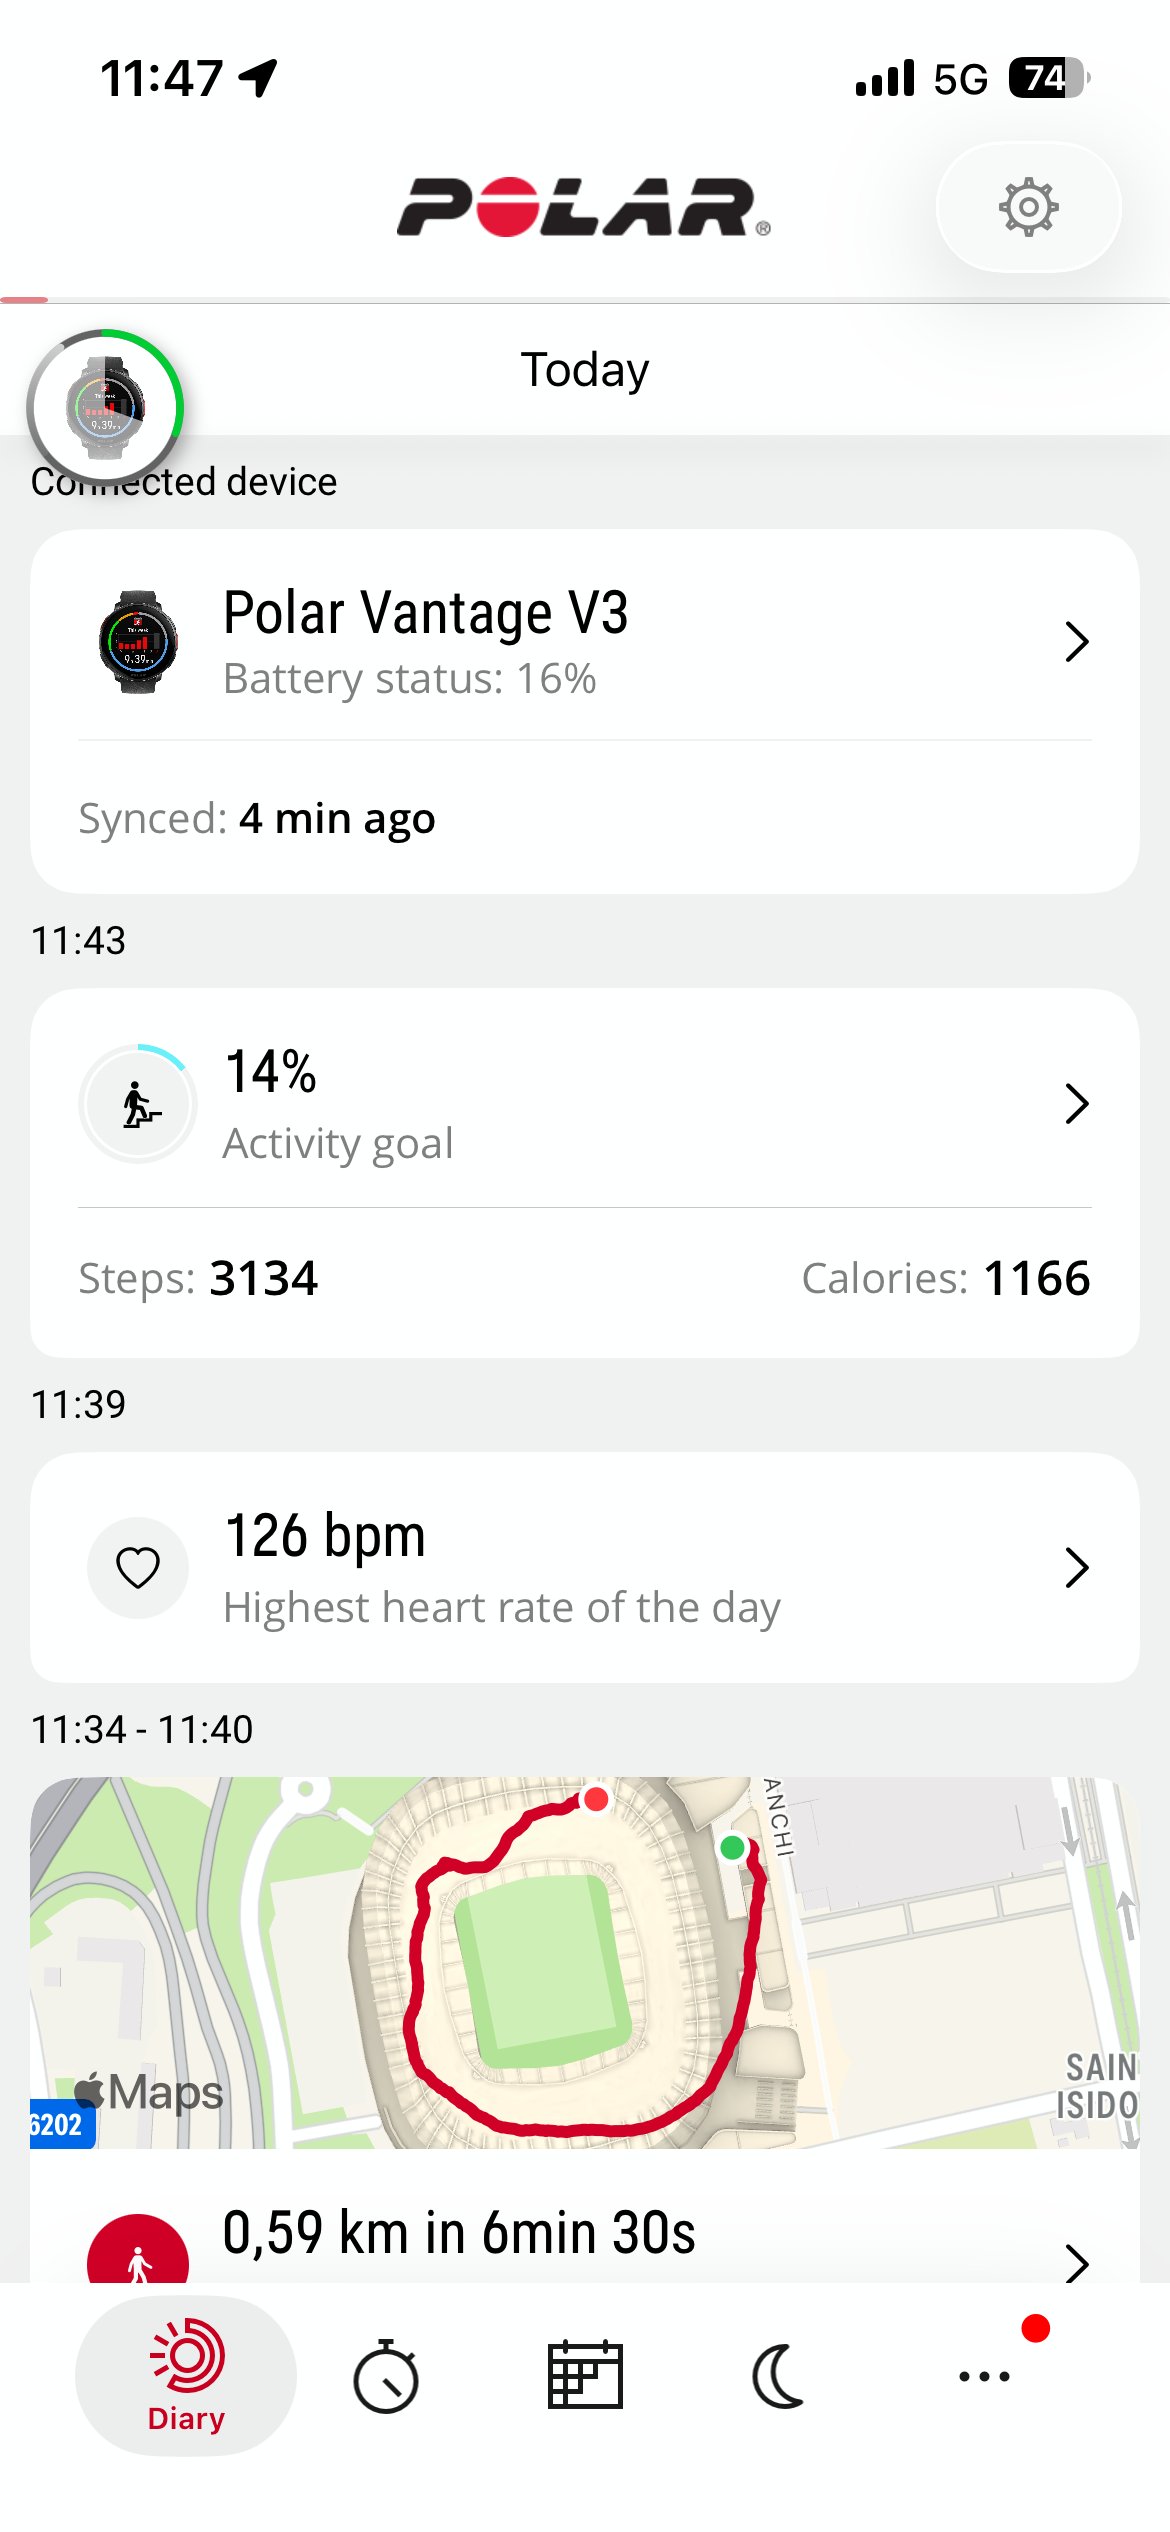
Polar Flow · Synced 4 min ago
Step 3 - Open your session
Two ways to get there - pick whichever fits your moment.
⚡ Fastest: tap the MyCoach Pro notification
The moment your watch finishes syncing with Polar Flow, MyCoach Pro detects the new session and pushes a notification: "Your session is ready to be imported. Tap to synchronize it." Tap it - you land directly on the session detail.
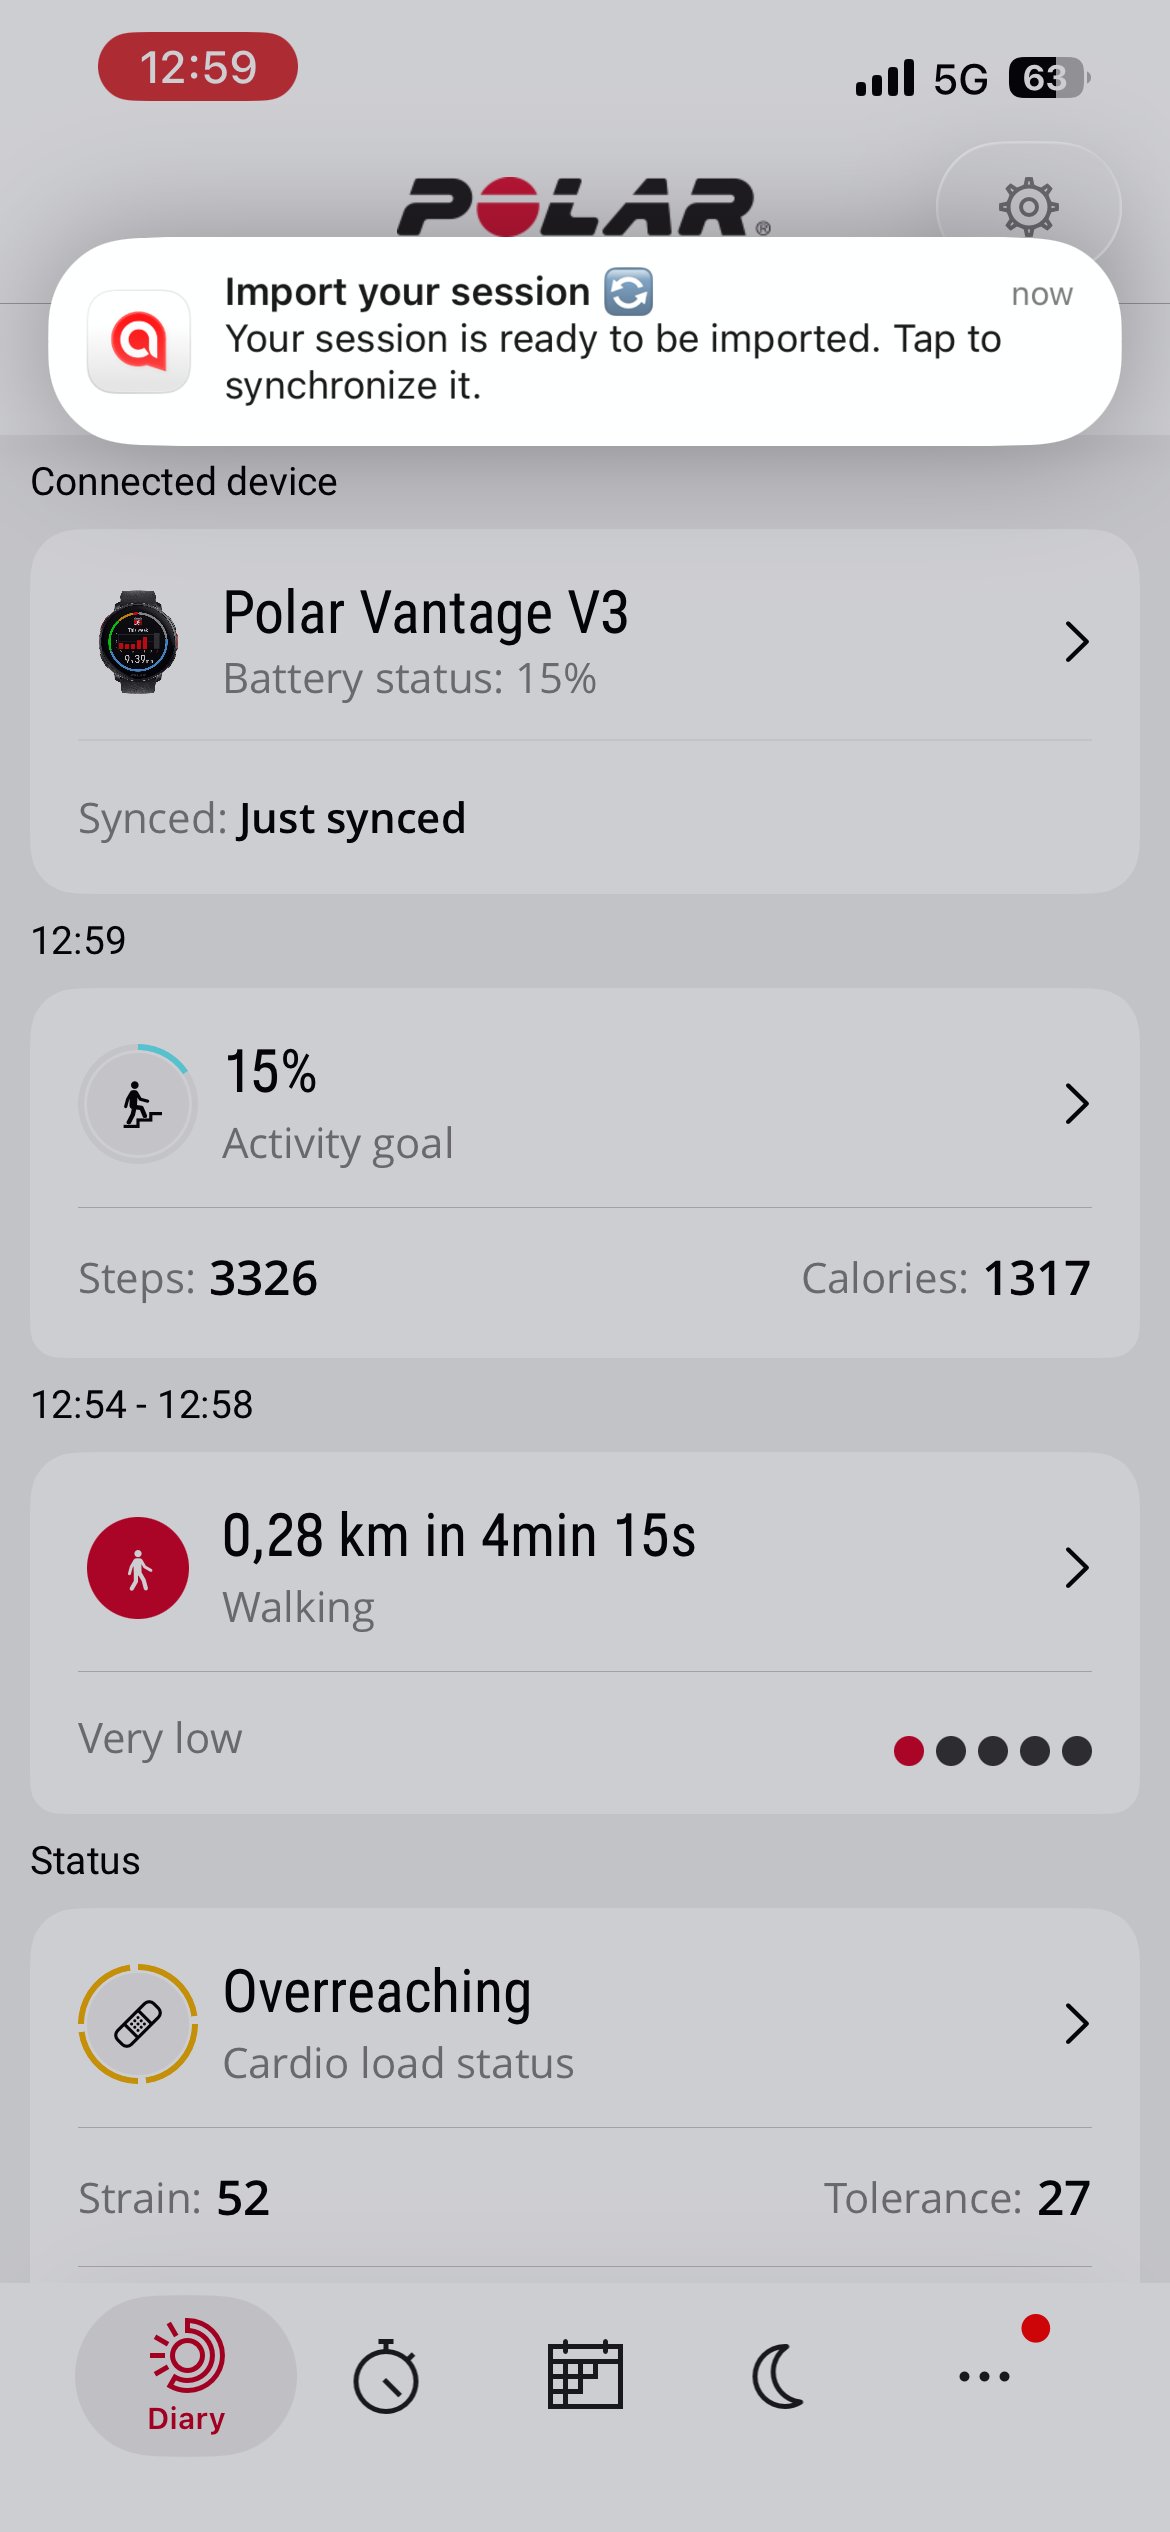
MyCoach Pro notification on top of Polar Flow
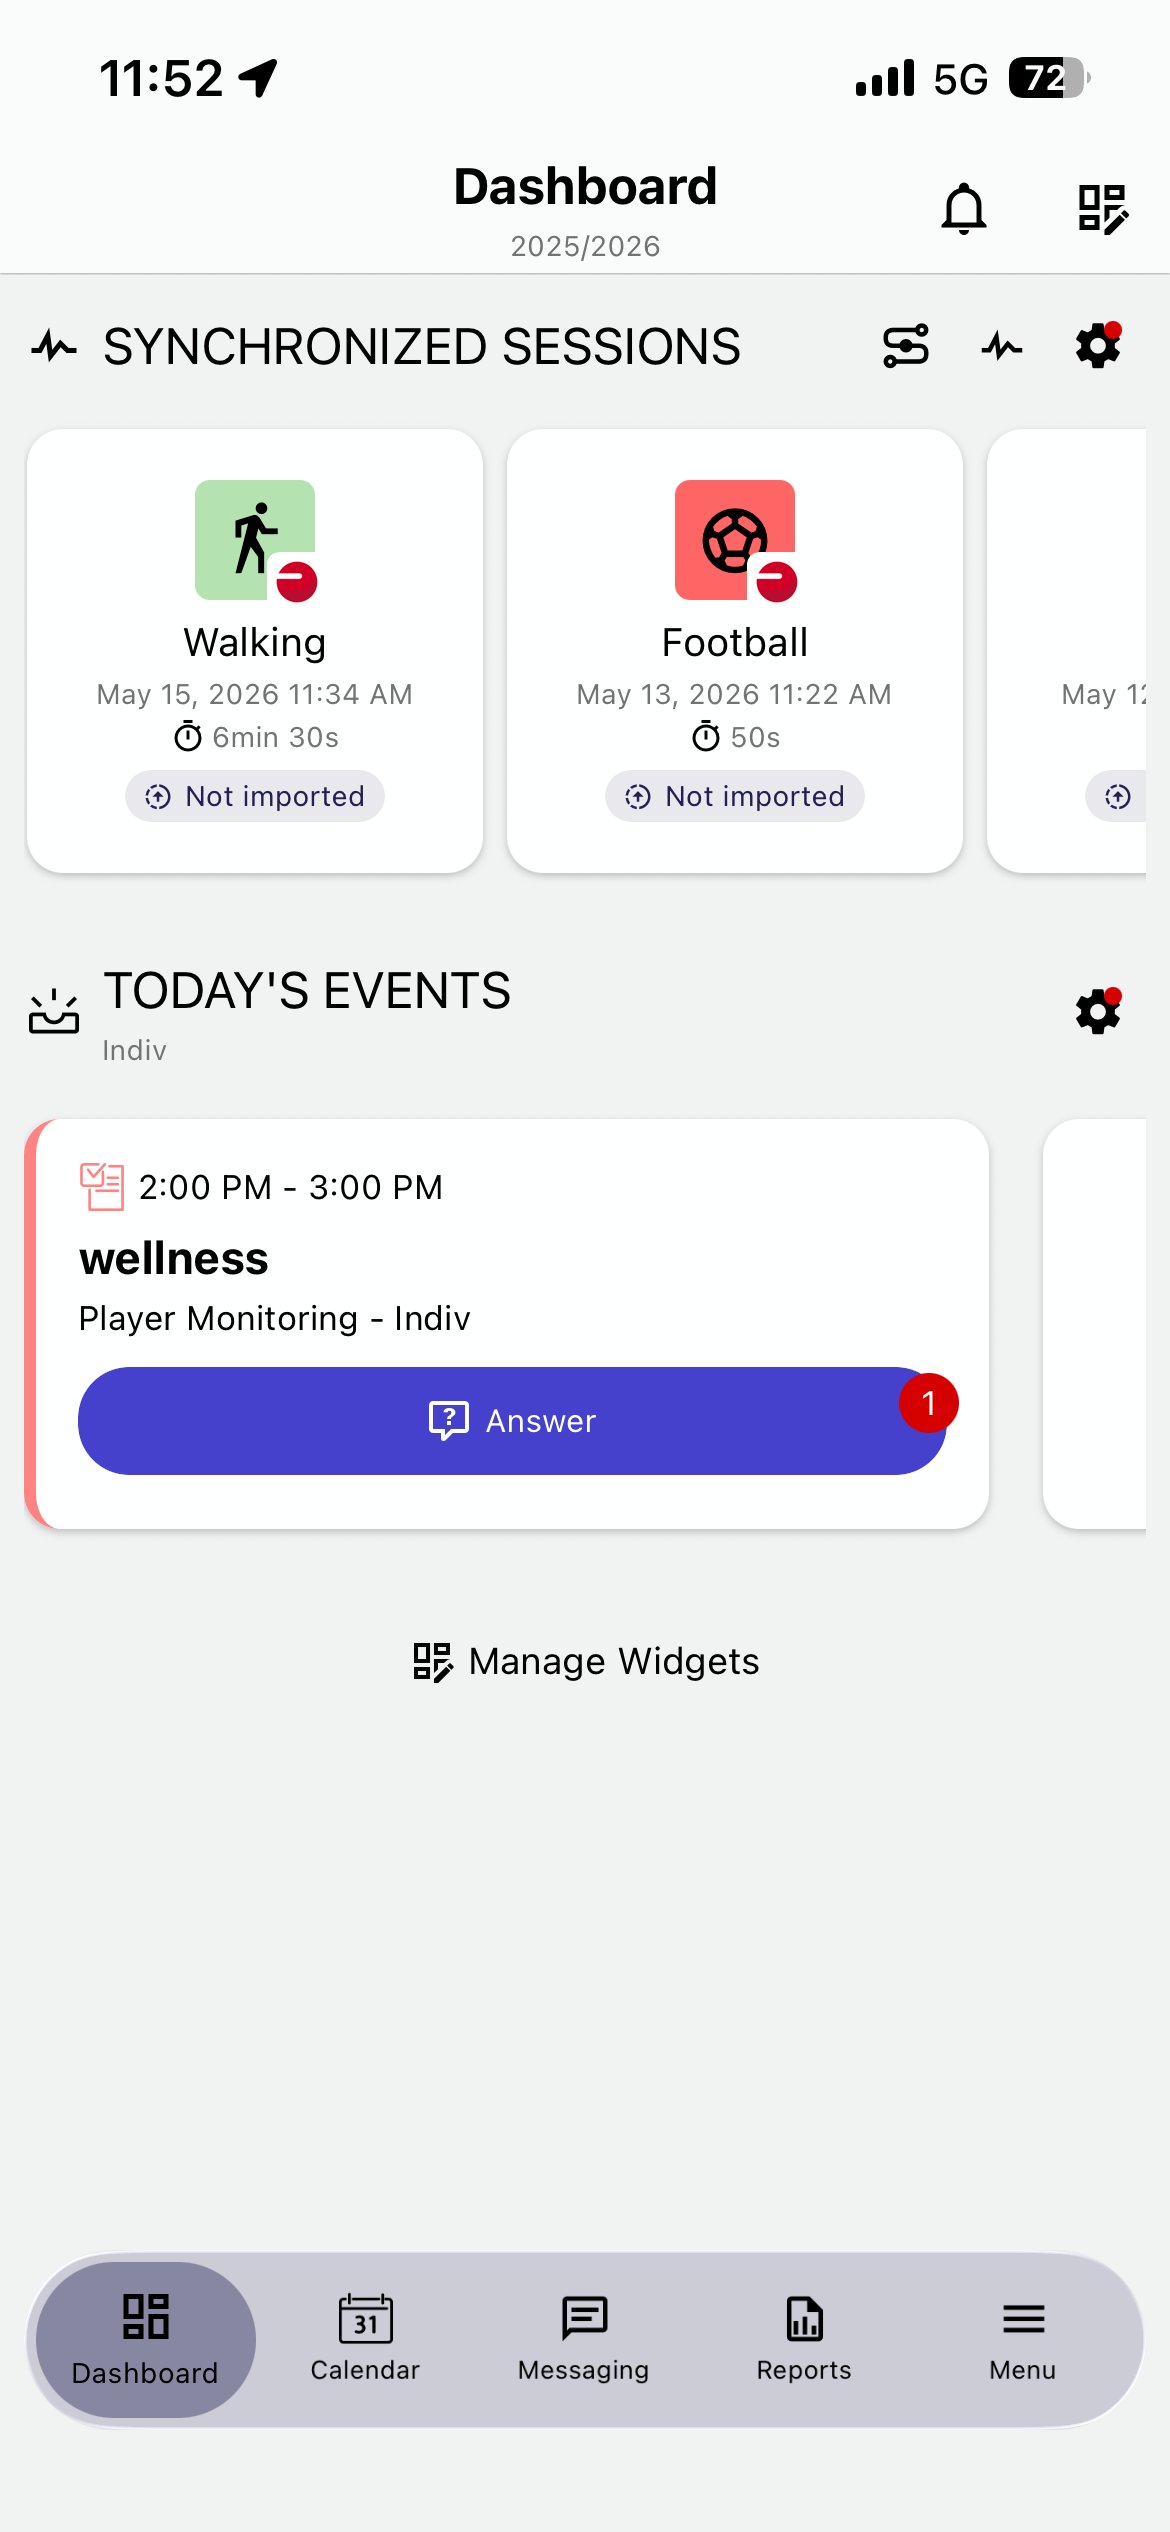
Or: open MyCoach Pro and find your session
If you missed the notification, no problem. Open MyCoach Pro - your Polar session appears in Synchronized Sessions, marked Not imported until you open it.
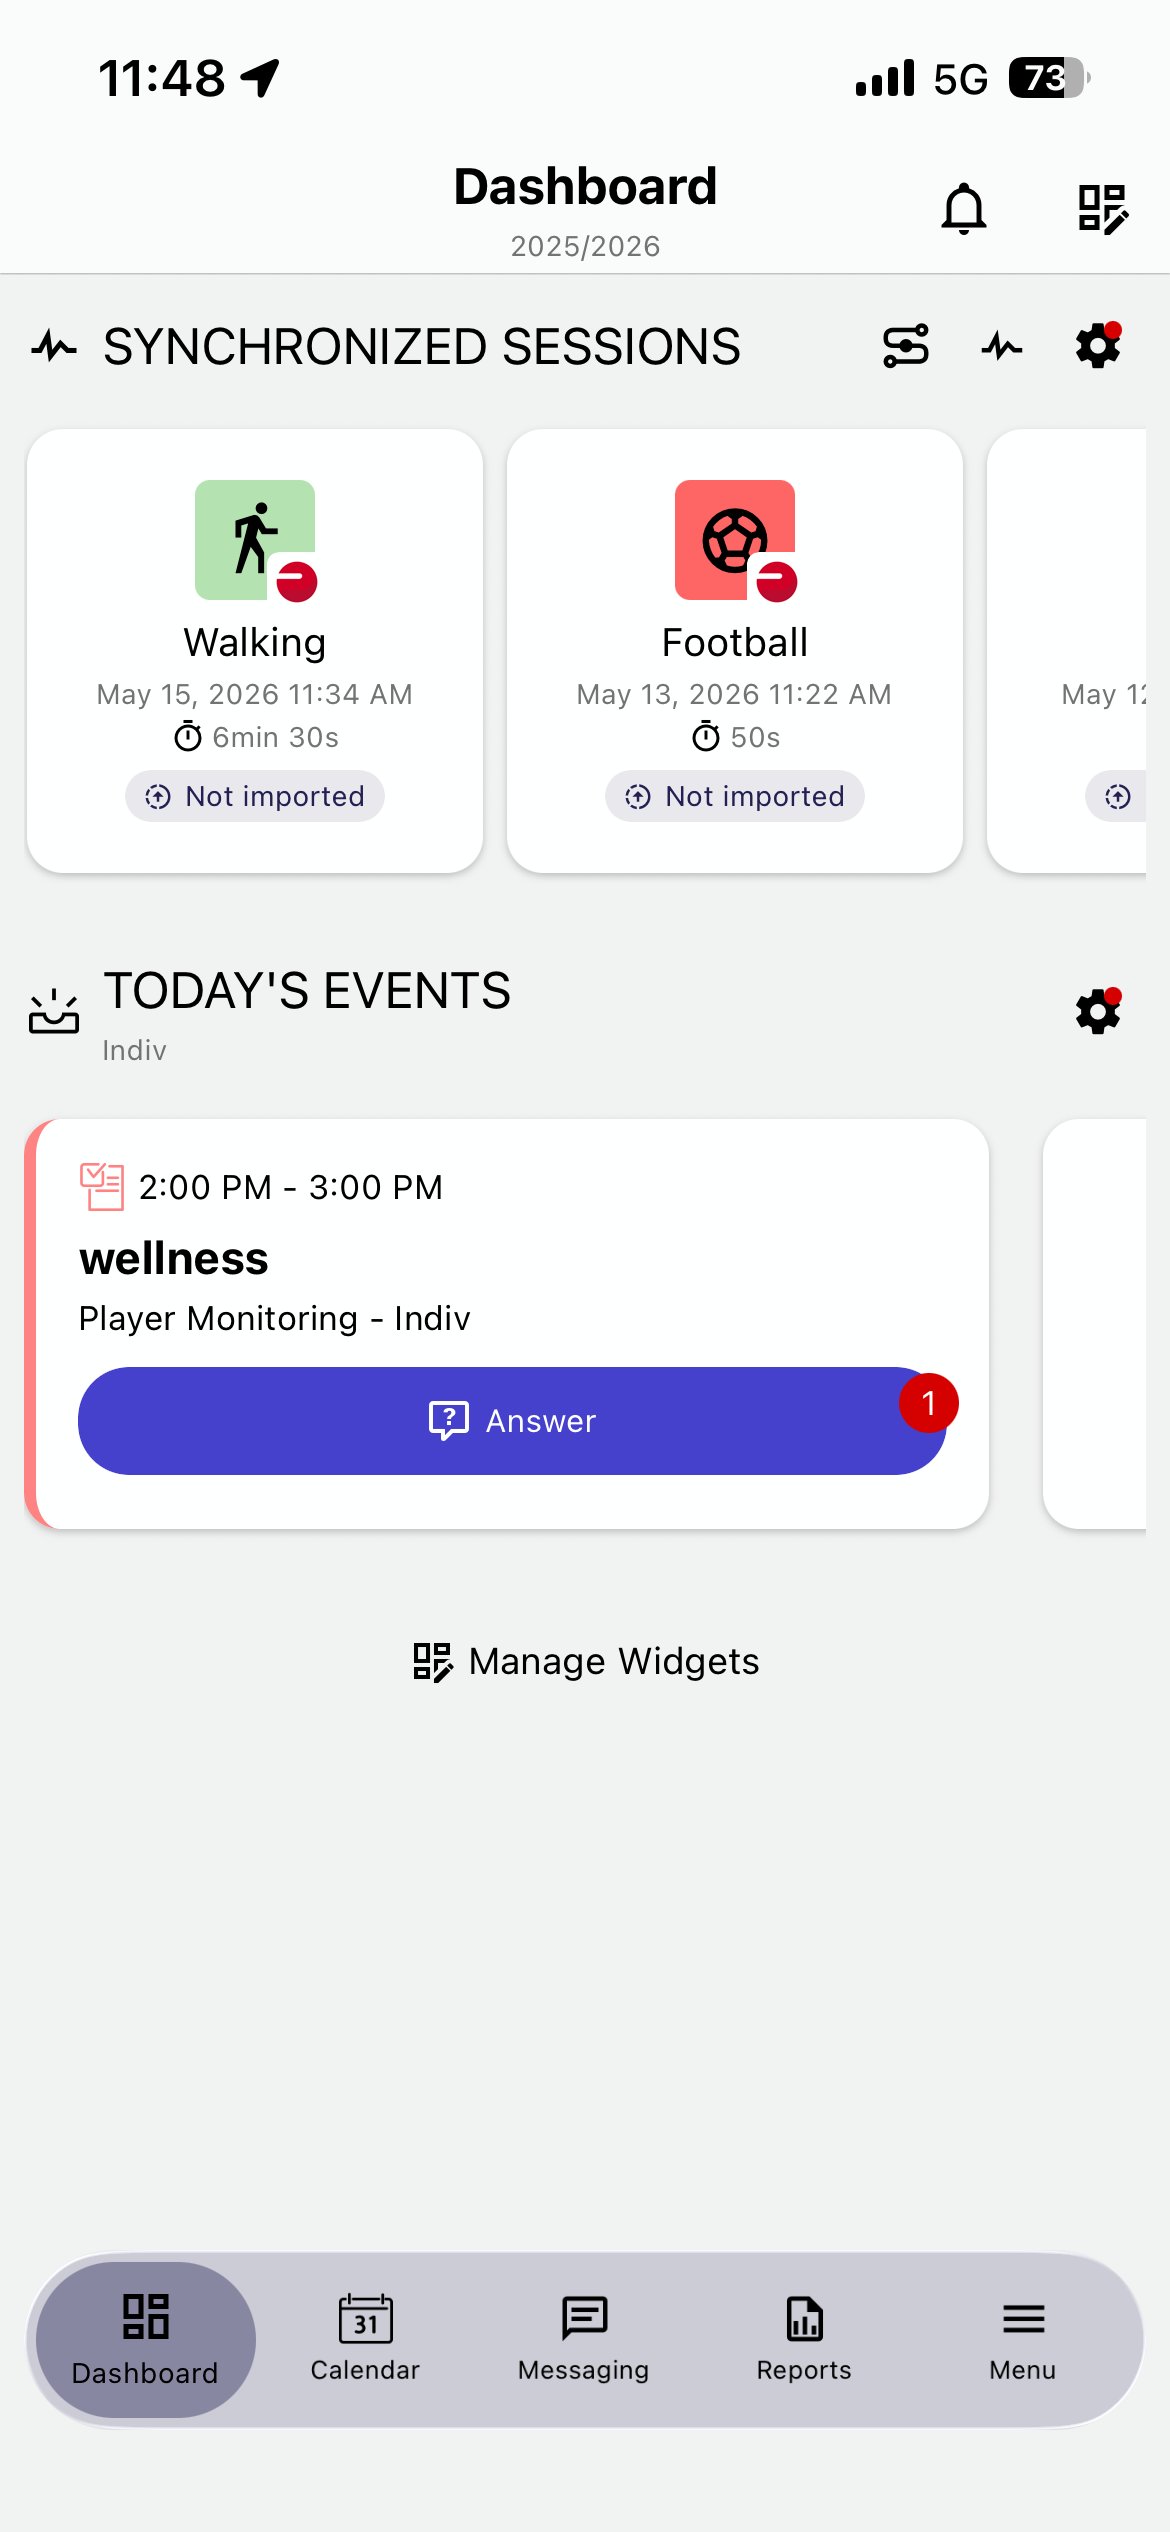
MyCoach Pro dashboard
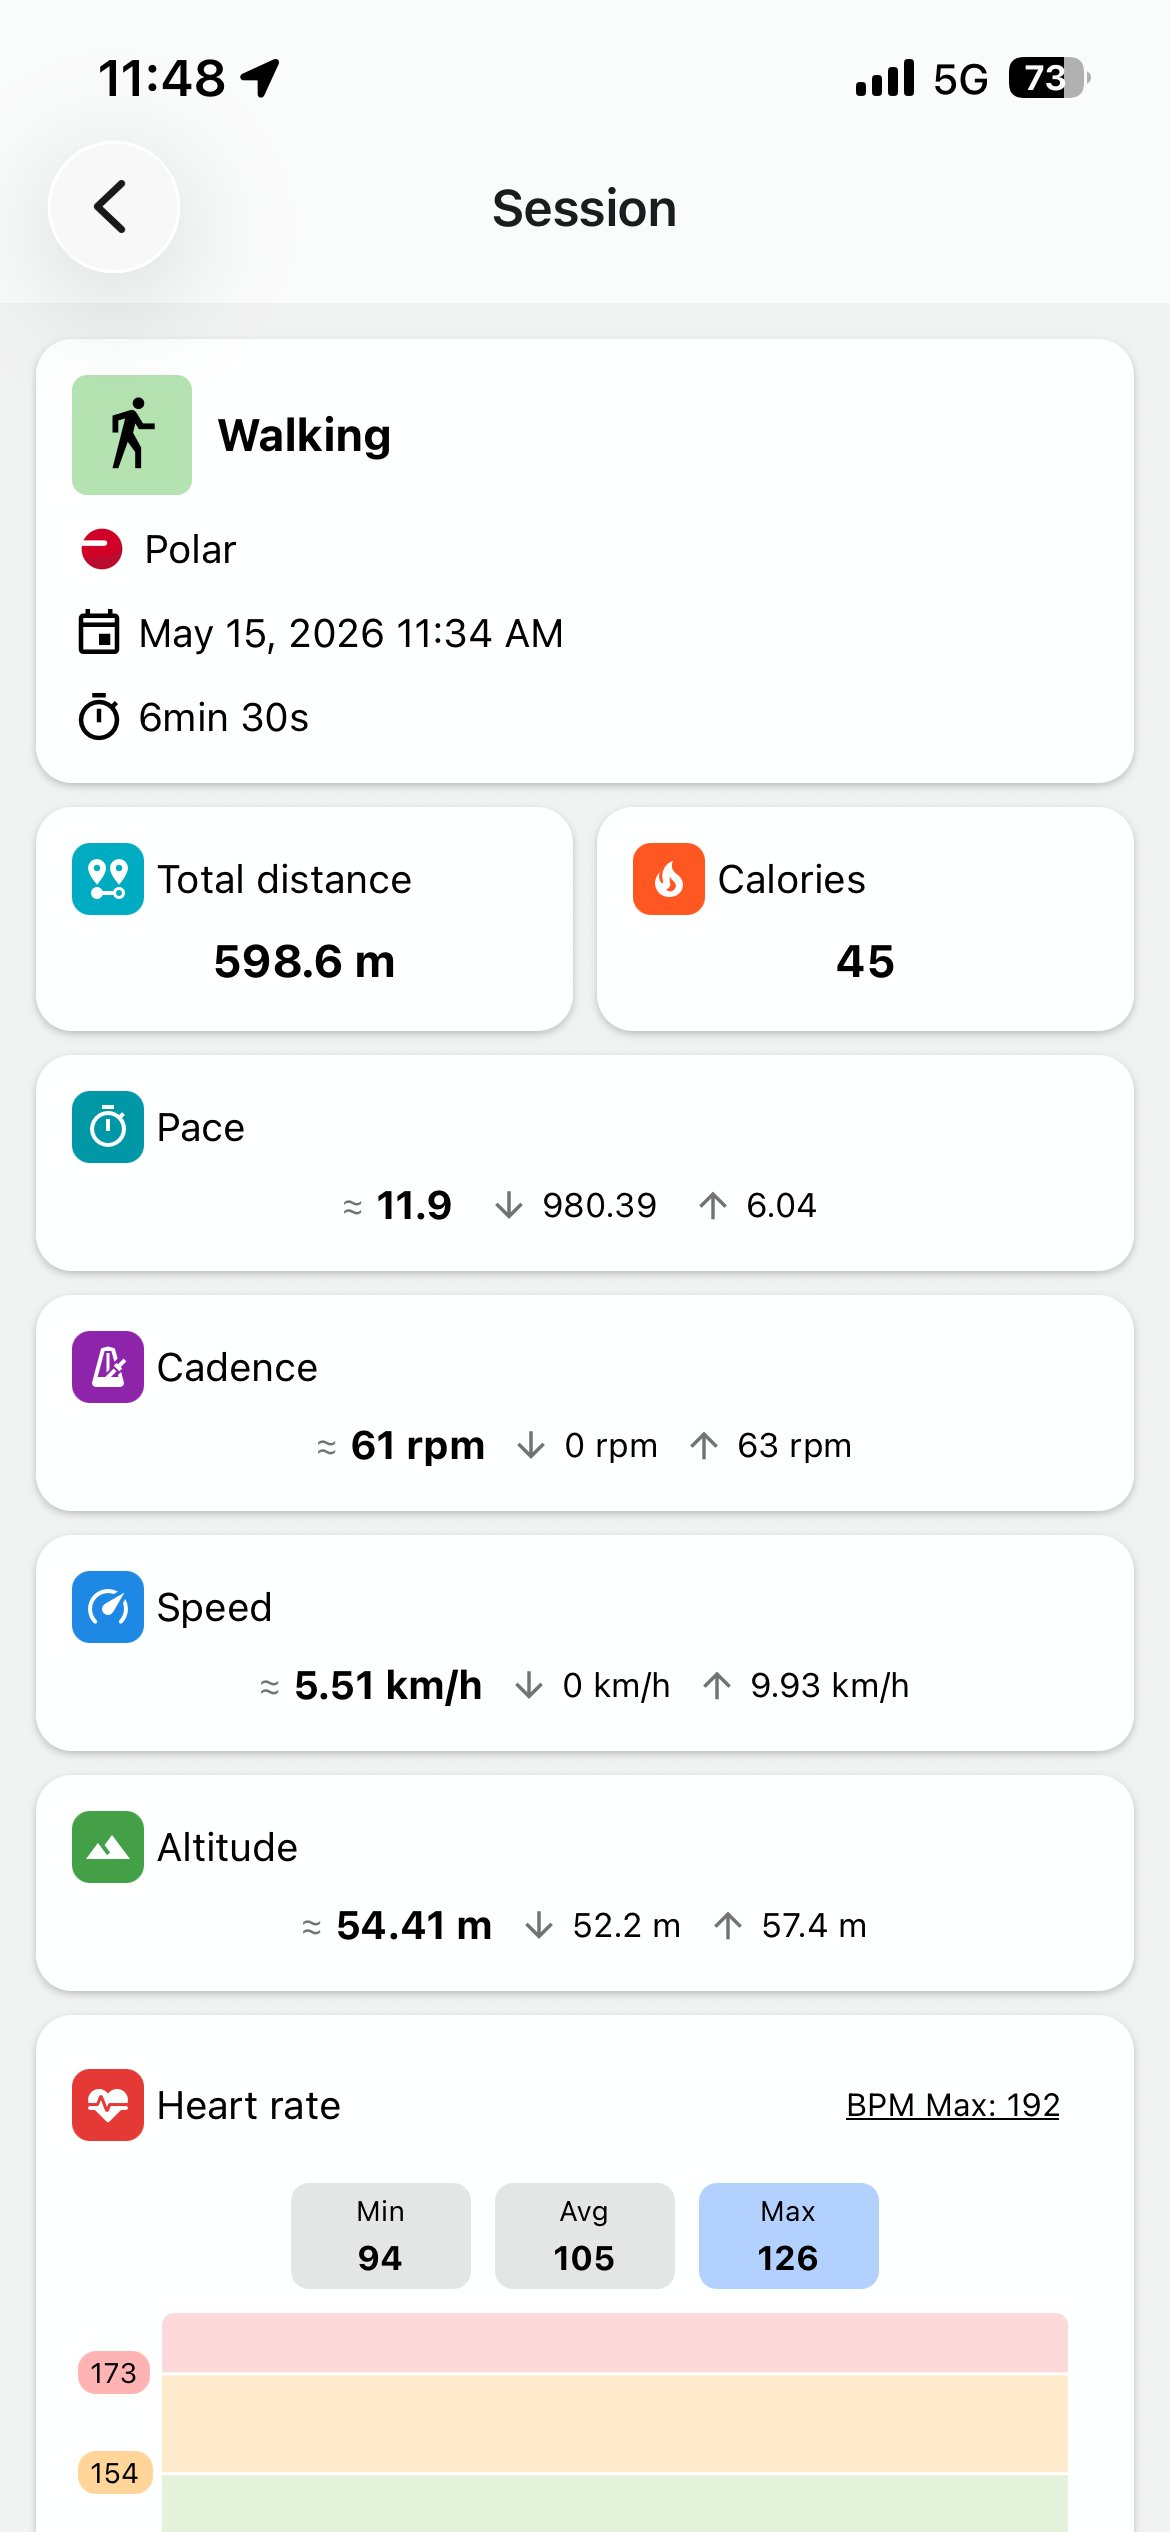
Step 4 - See the richer session data
Total distance, pace, cadence, speed, altitude - far beyond what you had before. Sourced directly from Polar.
Session detail · core KPIs
Scroll the session detail for full HR zone breakdown, pace evolution, and the GPS route on map.
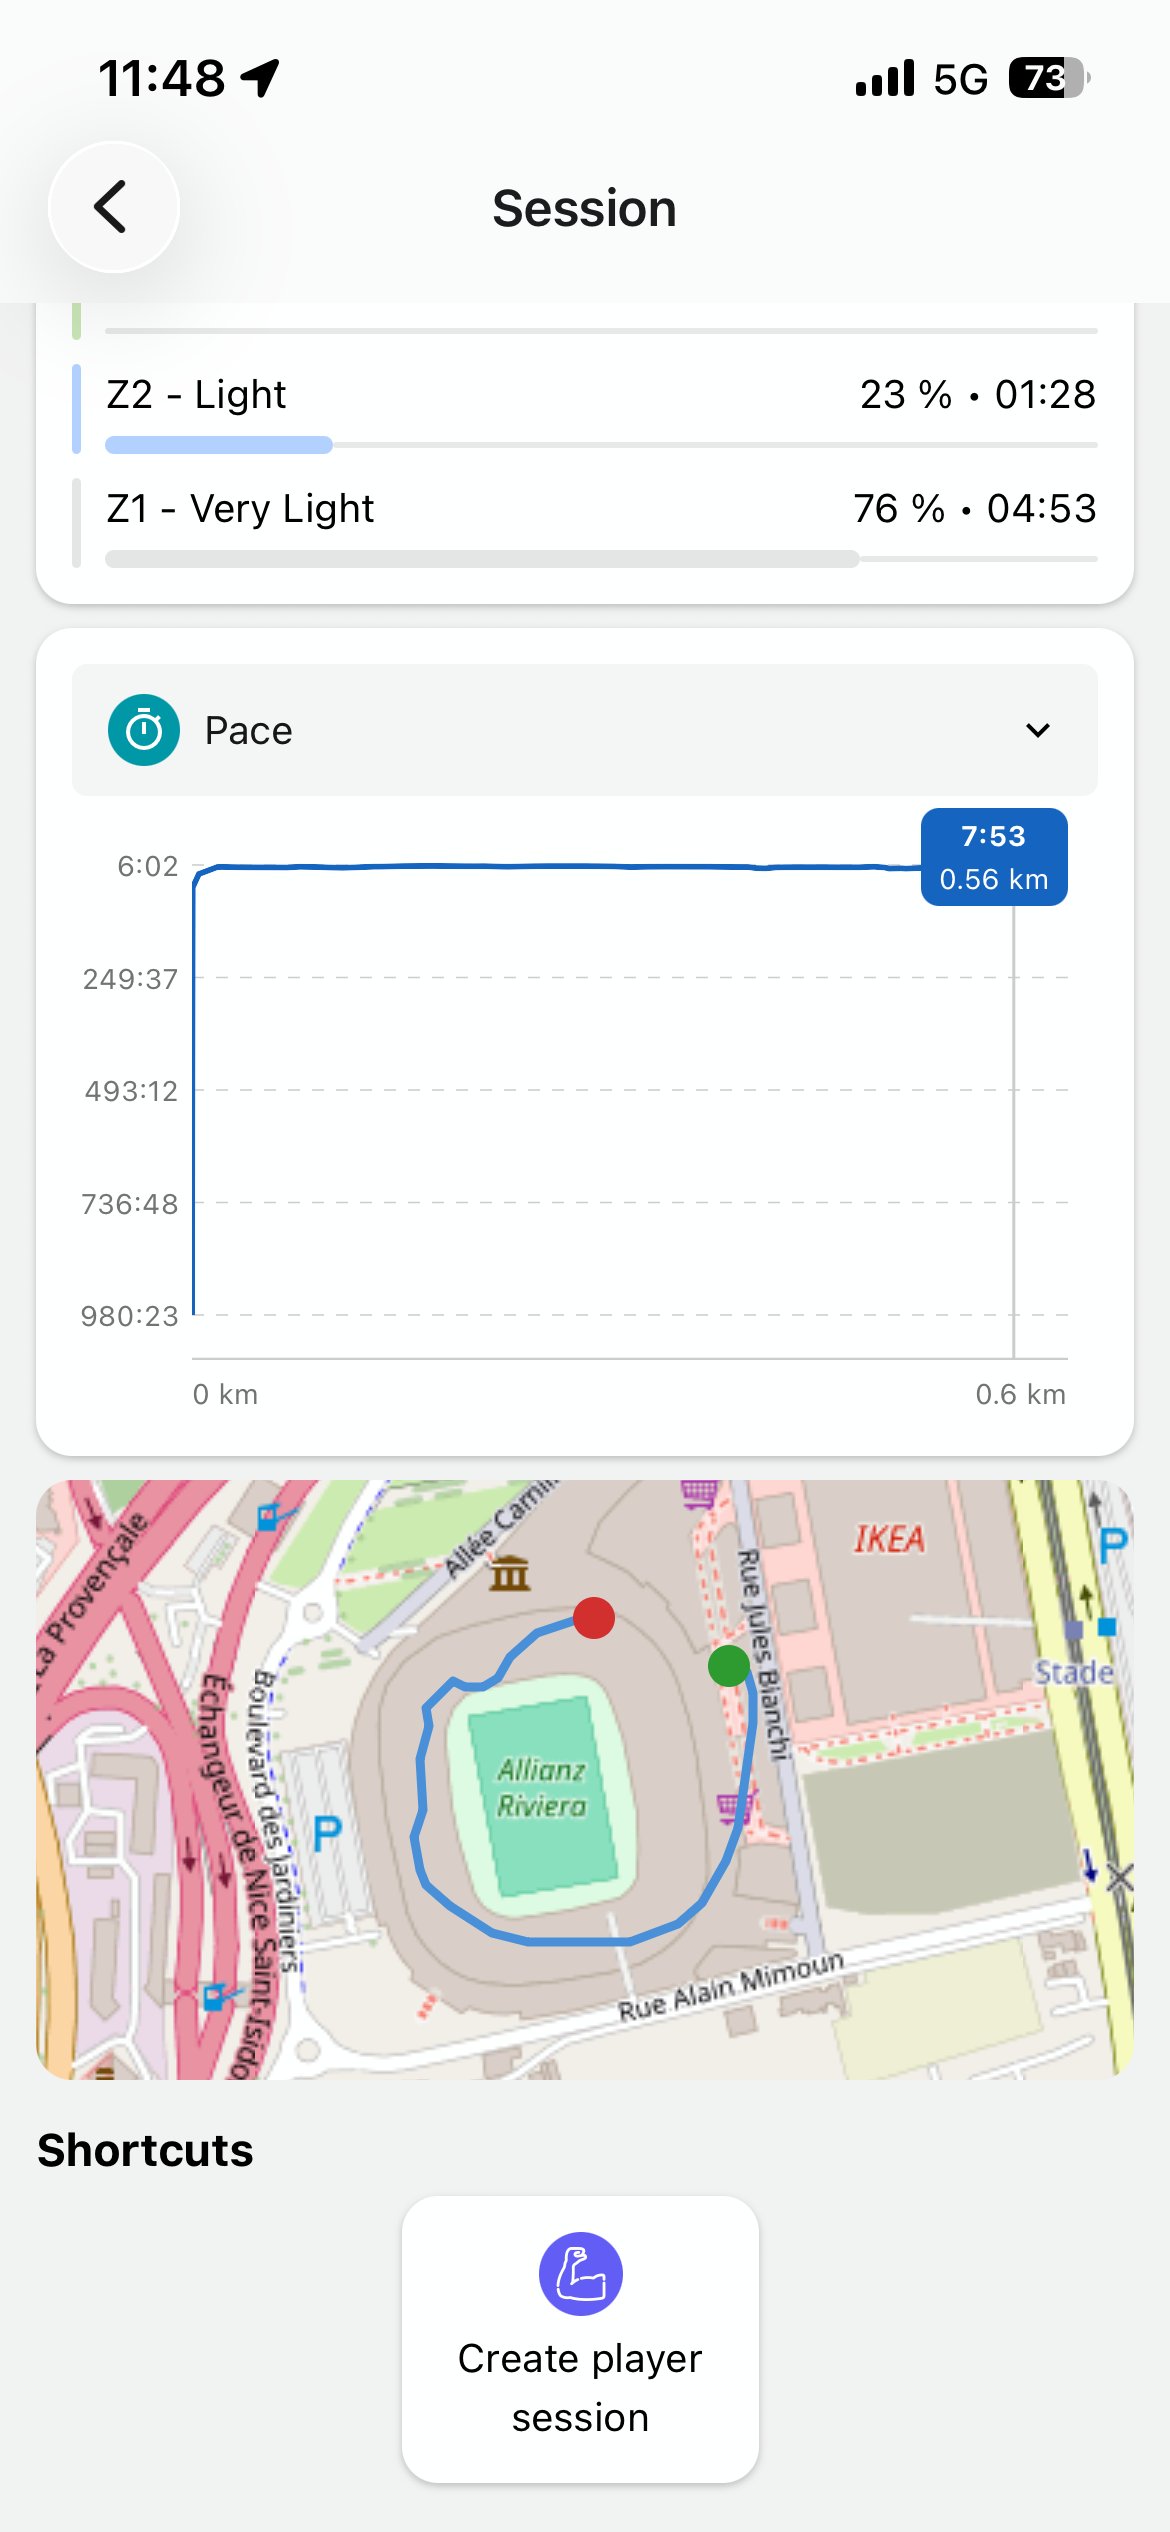
Session detail · HR zones & map
Step 5 - Create your player session
Tap Create player session, fill in the form the same way as today, then Done. Nothing changes here.
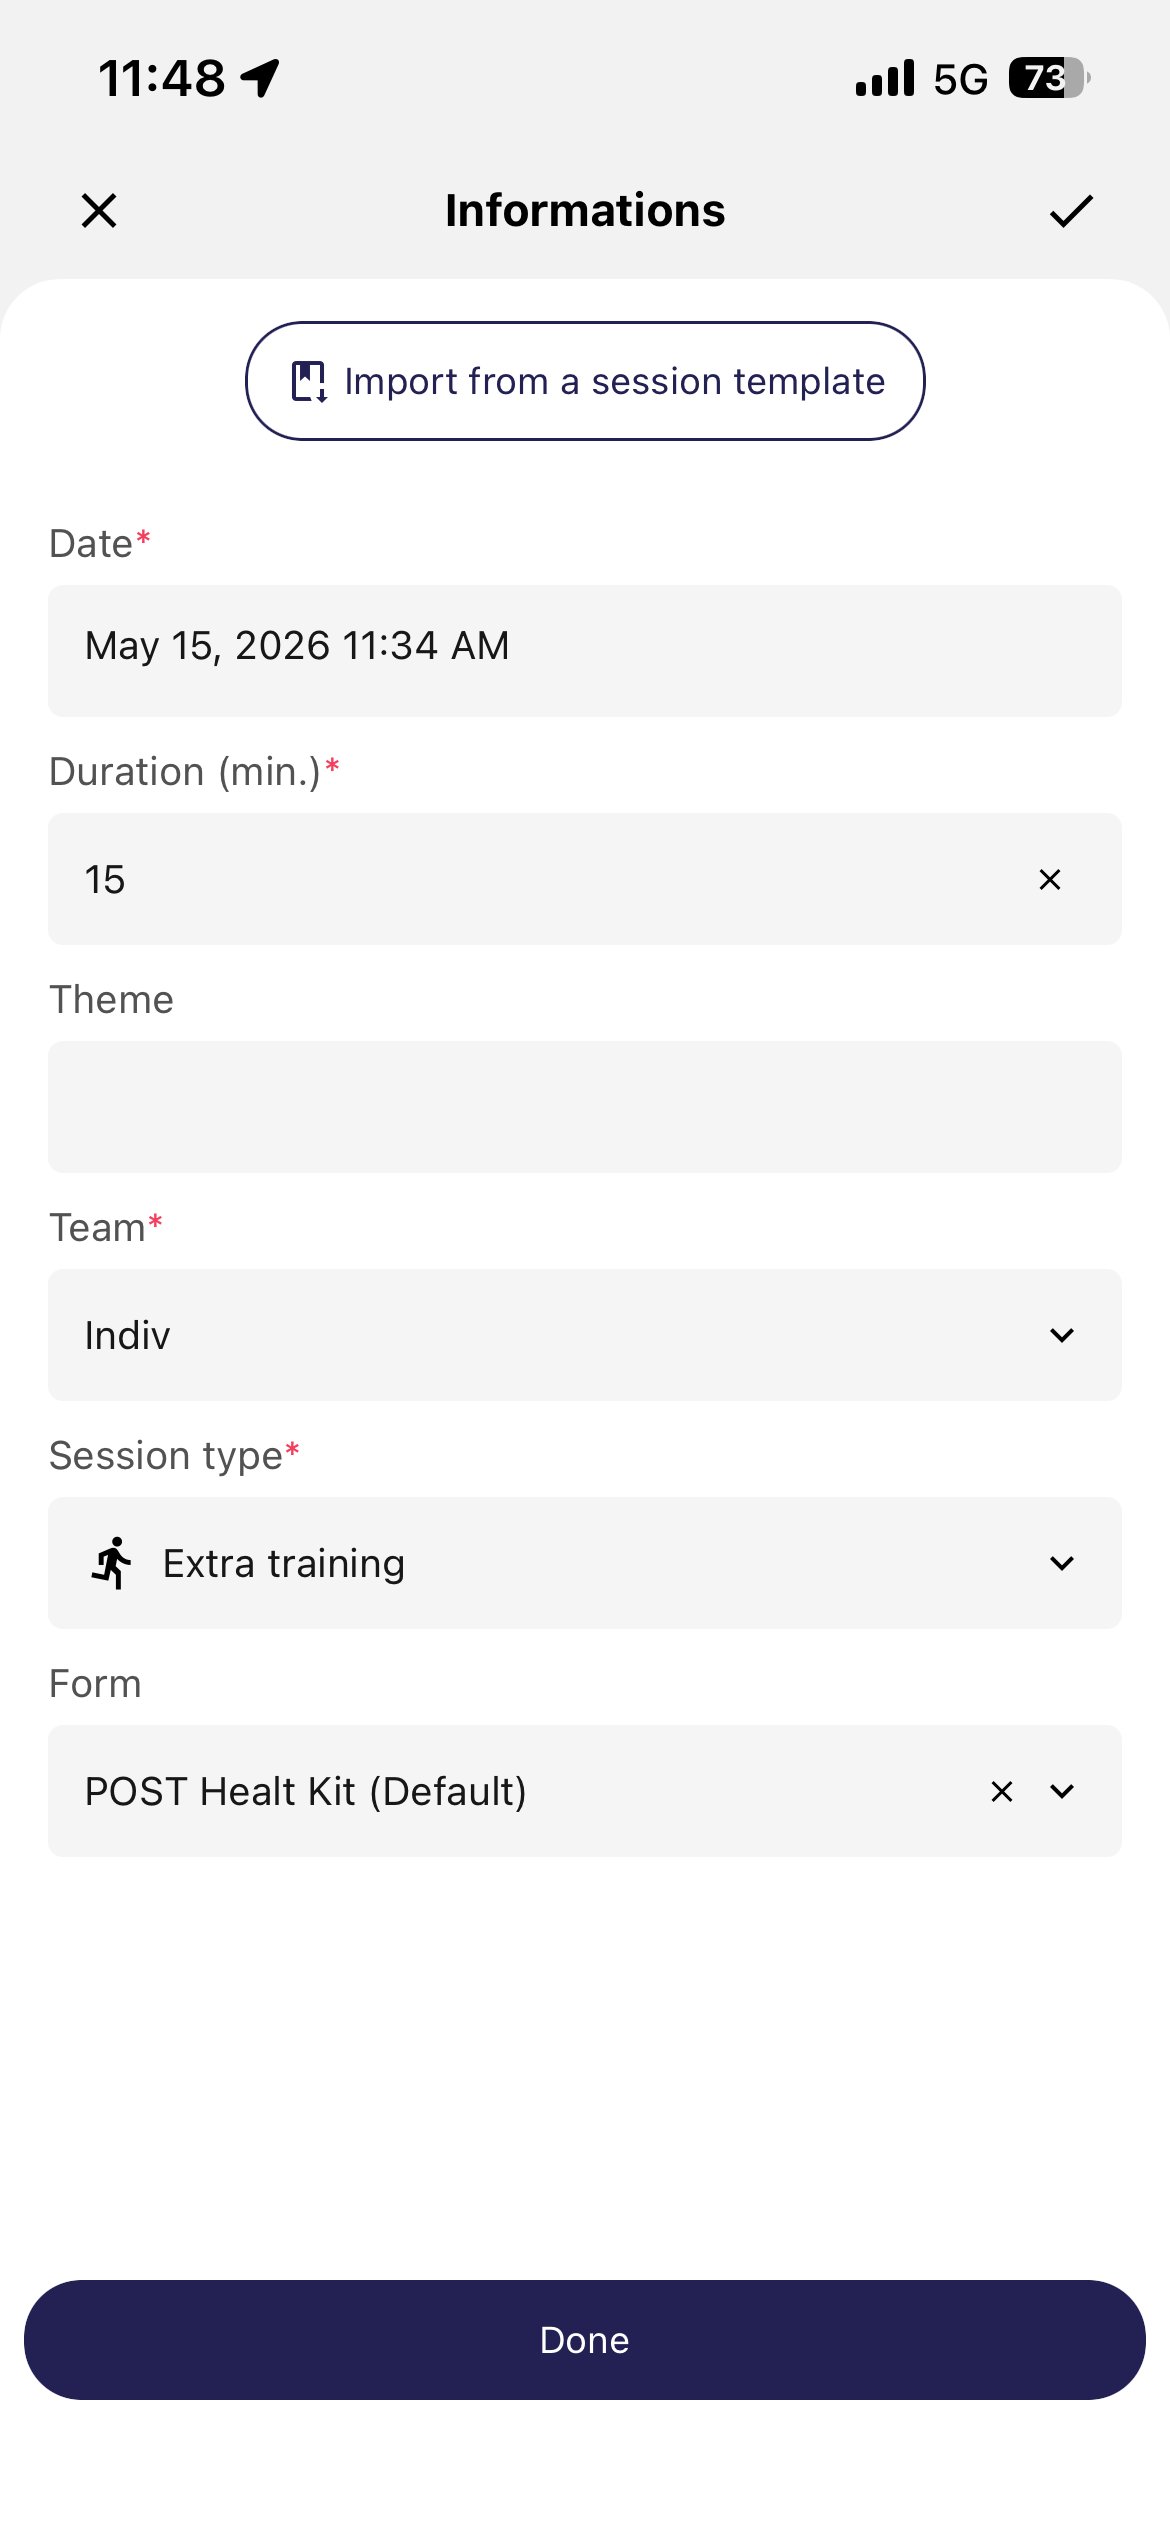
Create player session form
2 · PlayerData
Connect. Configure. Use.
GPS metrics - distance, sprints, accelerations, plus heart rate when paired with a chest strap. All new data in MyCoach Pro.
The flow in four steps
- Open Integrations
- Tap Player Data
- Sign in
- Linked ✓
2.1 · Connect to PlayerData
Step 1 - Open Integrations
From your Dashboard, tap the sync icon next to Synchronized Sessions - same entry point as Polar.
Dashboard · MyCoach Pro
Step 2 - Select Player Data
Tap Player Data in your Integrations list.
Integrations · MyCoach Pro
Step 3 - Sign in to PlayerData
⚠️ IMPORTANT - Use your PlayerData credentials
Use the same email and password you use in the PlayerData app. Tap Sign in.
PlayerData authentication
Step 4 - You're linked
Player Data now shows as Linked in your Integrations.
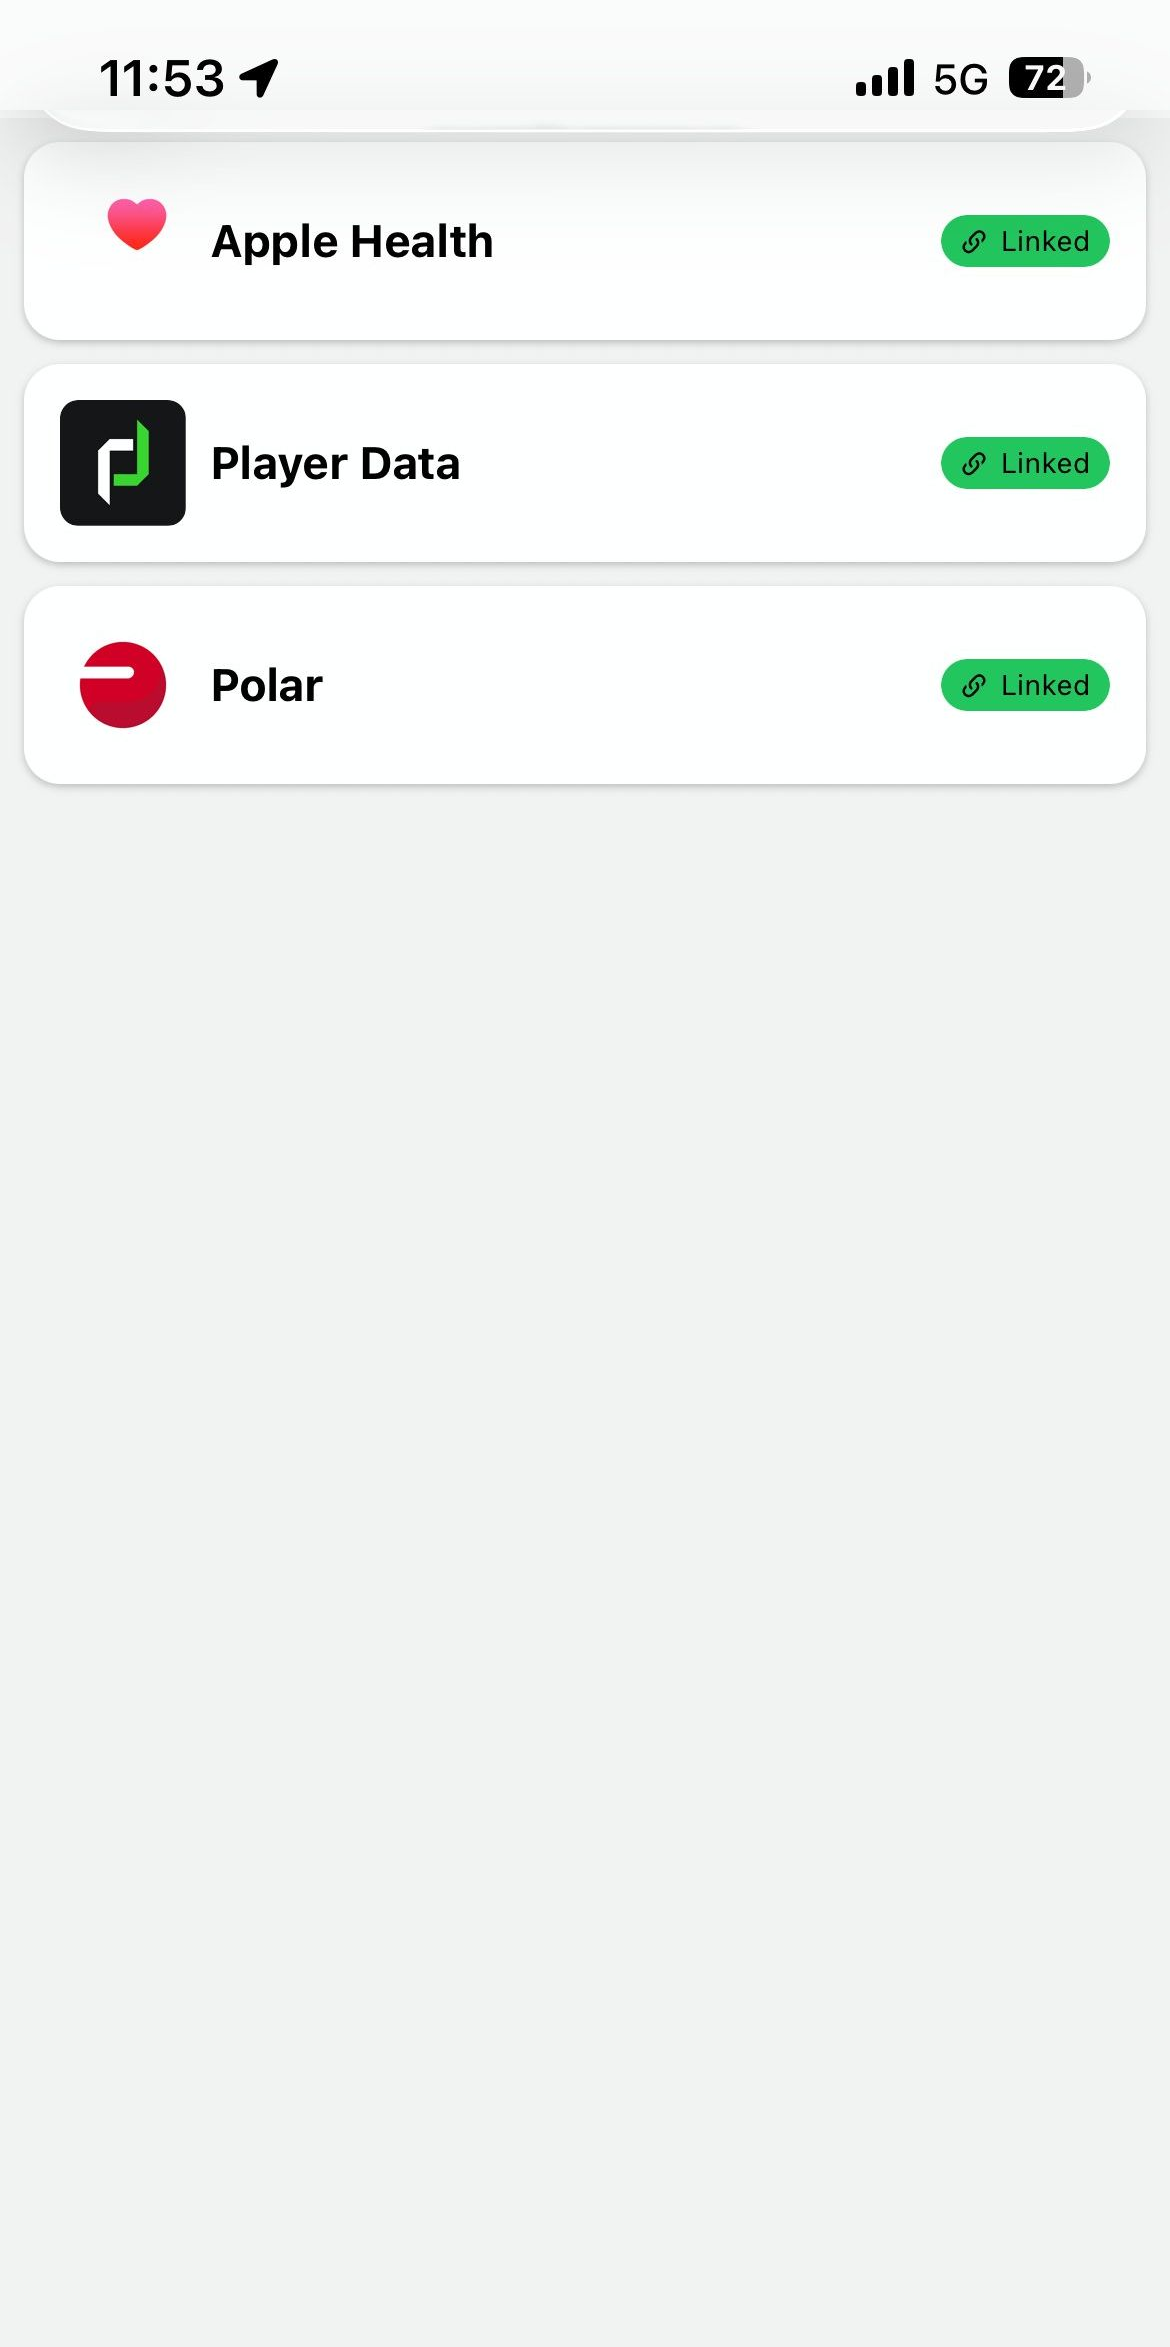
Player Data = Linked
2.2 · Filter your data sources
Same flow as Polar - three taps to keep only PlayerData sessions in your dashboard.
| # | Step | What you do |
|---|---|---|
| 1 | Open Filters | Tap the gear icon next to Synchronized Sessions. |
| 2 | Open Integrations | Tap the Integrations dropdown in the Filters panel. |
| 3 | Select Player Data | Pick Player Data only. Tap Done, then Validate. |
2.3 · Your post-session routine
Same five-step flow as Polar - same Create player session at the end.
| # | Step | What you do |
|---|---|---|
| 1 | Run | Run your session with the PlayerData GPS unit. |
| 2 | Check | Open the PlayerData app to confirm sync. |
| 3 | Find | Open MyCoach Pro, find your session. |
| 4 | Review | HR + new GPS metrics: sprints, accel, distance. |
| 5 | Create | Tap Create player session. Done. |
Steps 1 & 2 - Run, then check your session
Run your session with your PlayerData GPS unit. Open the PlayerData app - your session appears under Last Session.
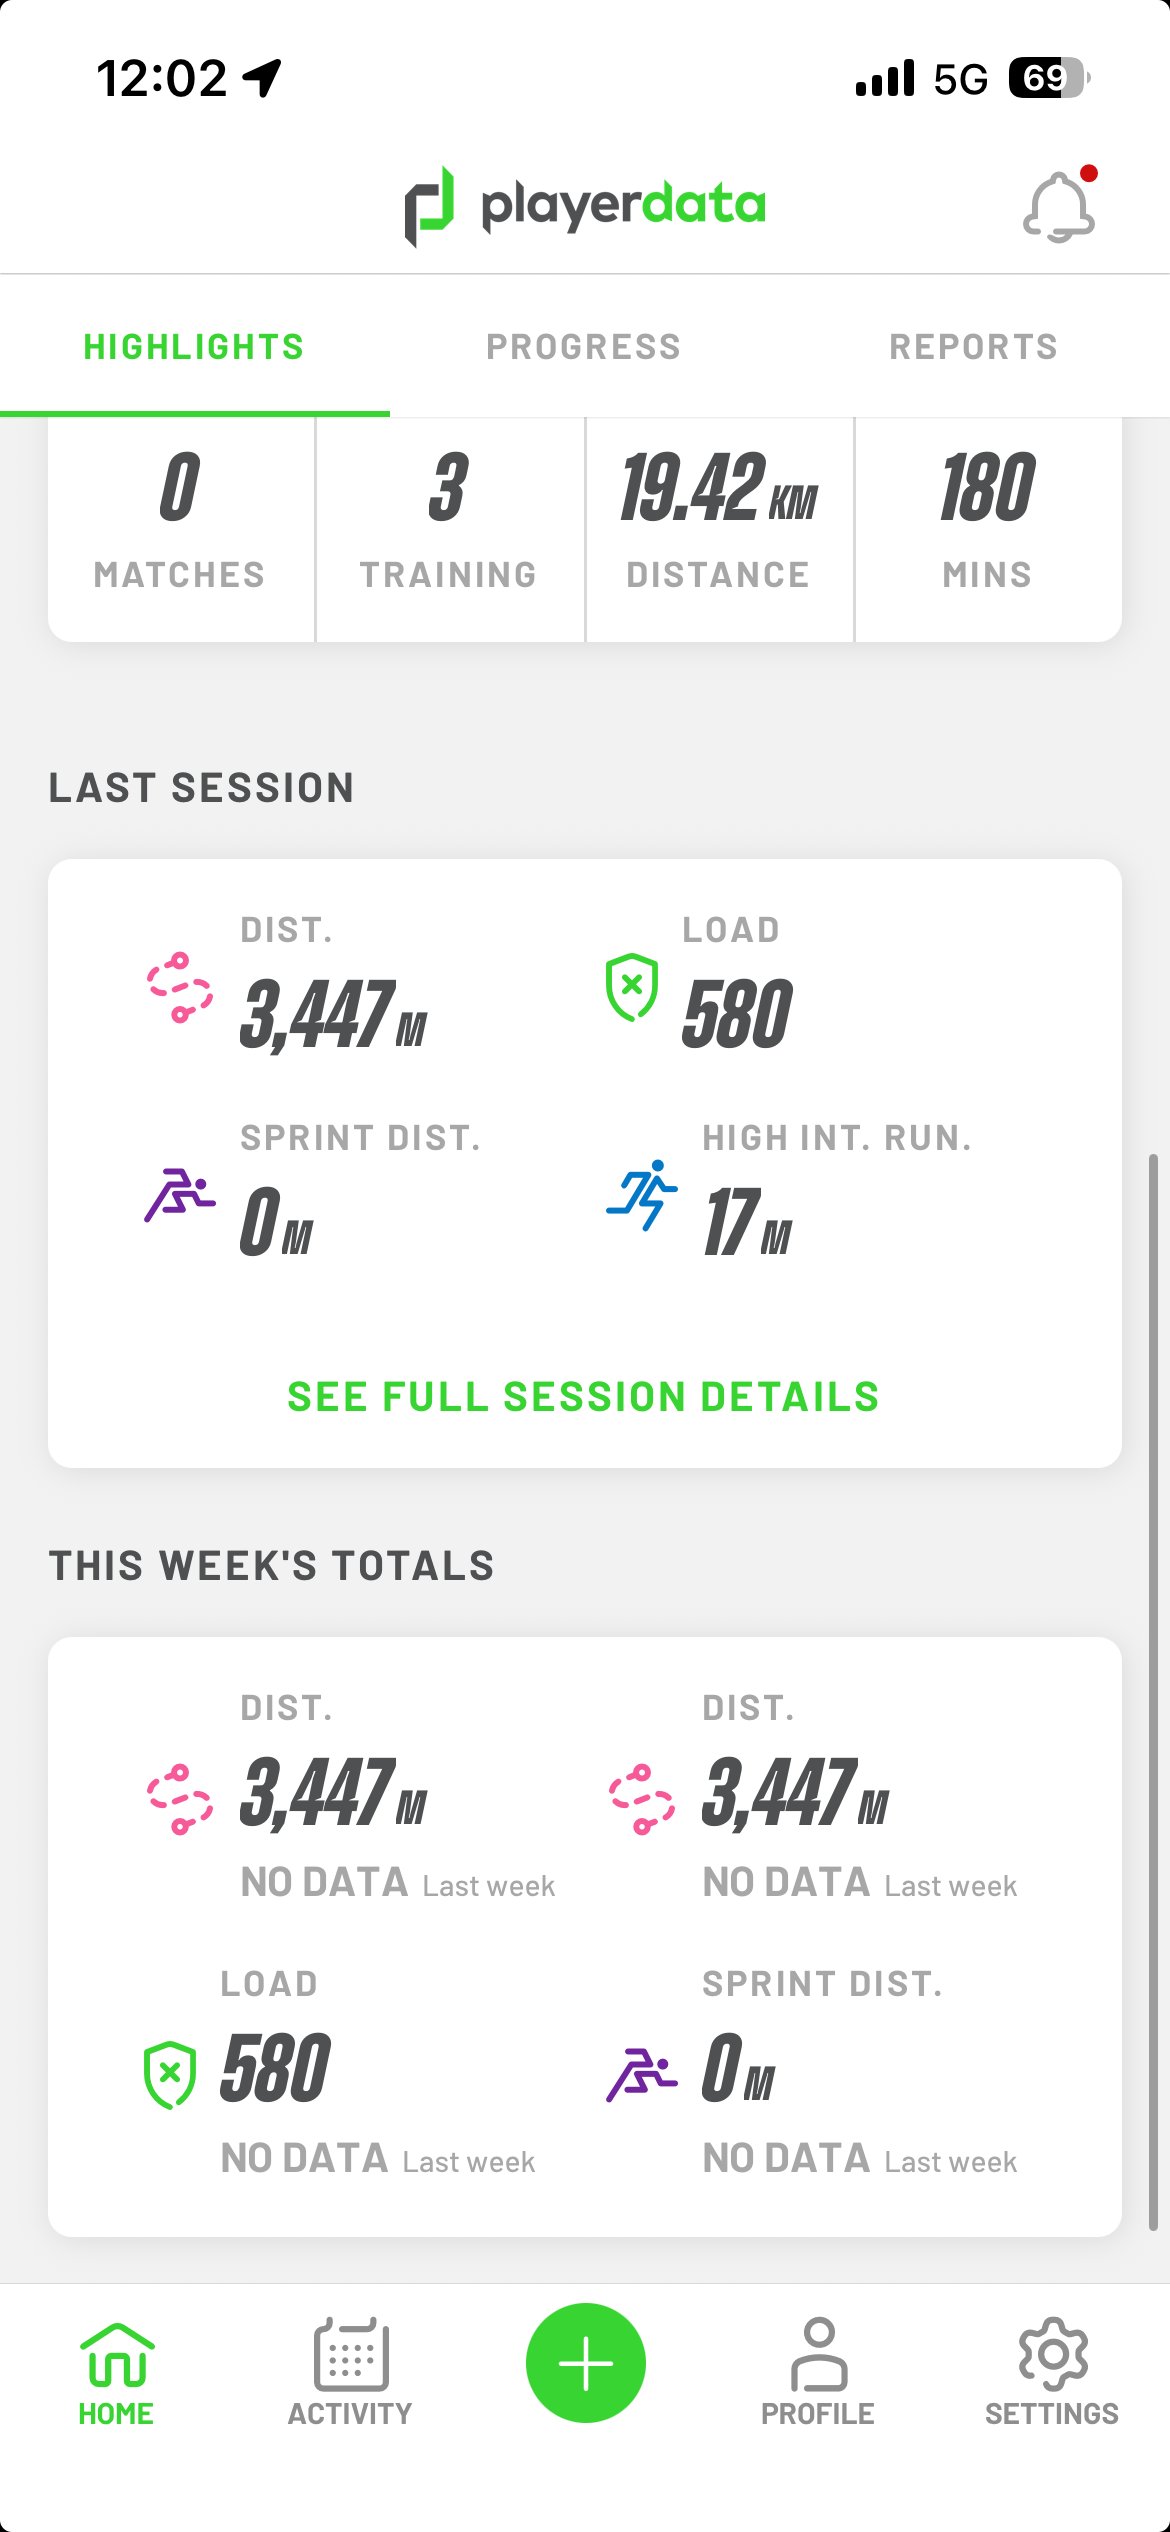
PlayerData app · Last Session
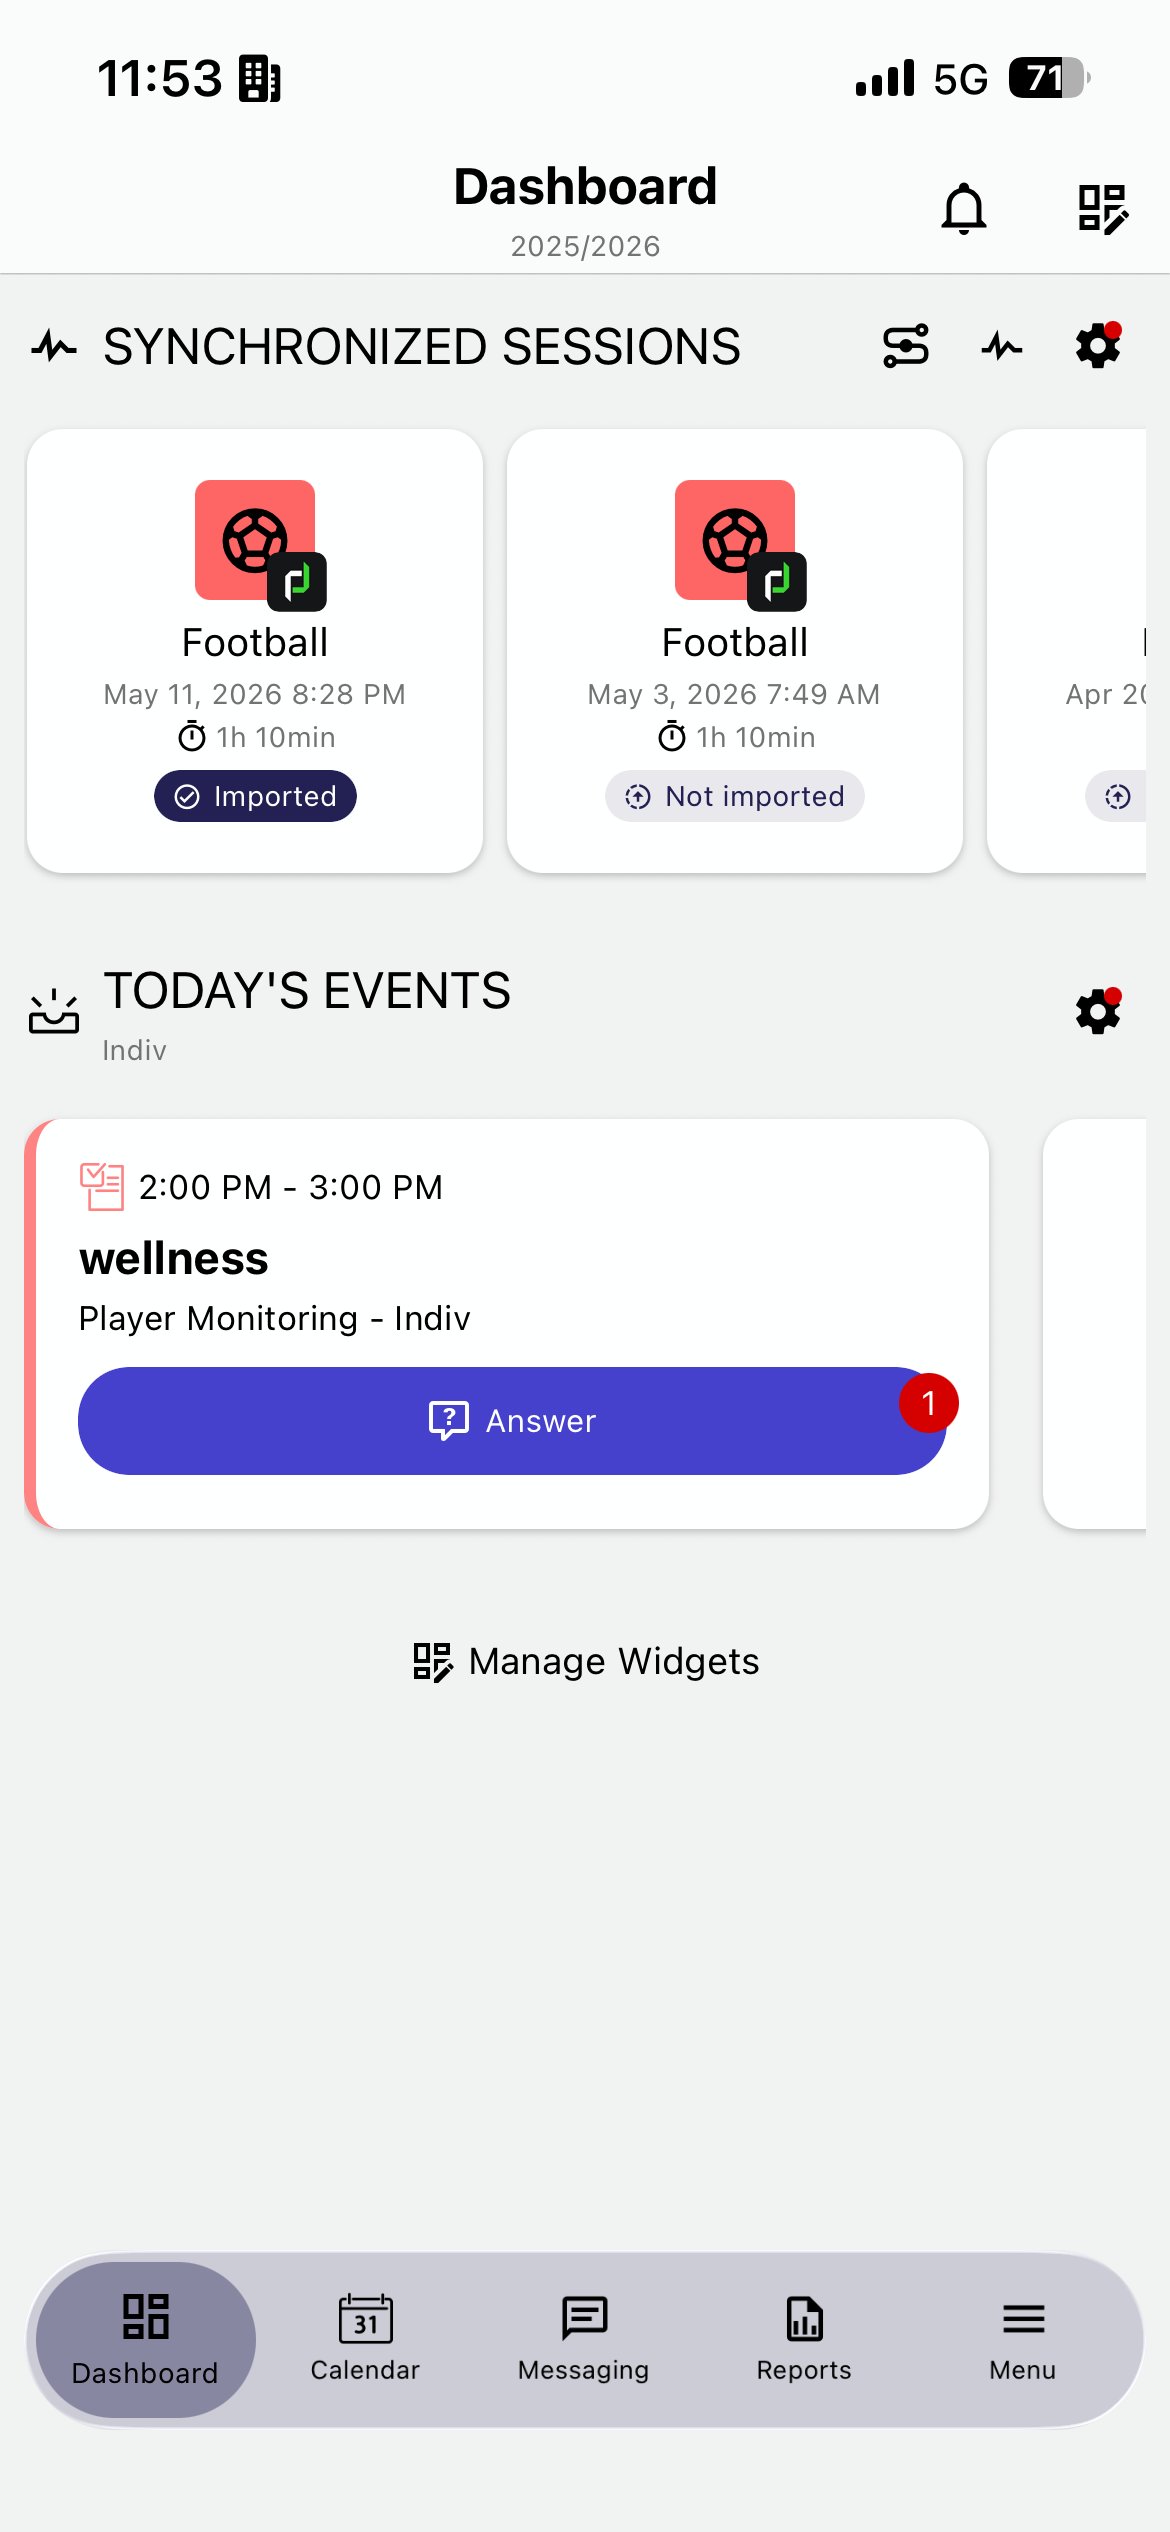
Step 3 - Find your session in MyCoach Pro
Your PlayerData session appears in Synchronized Sessions - look for the green PlayerData badge on the session card.
MyCoach Pro dashboard · PlayerData badge
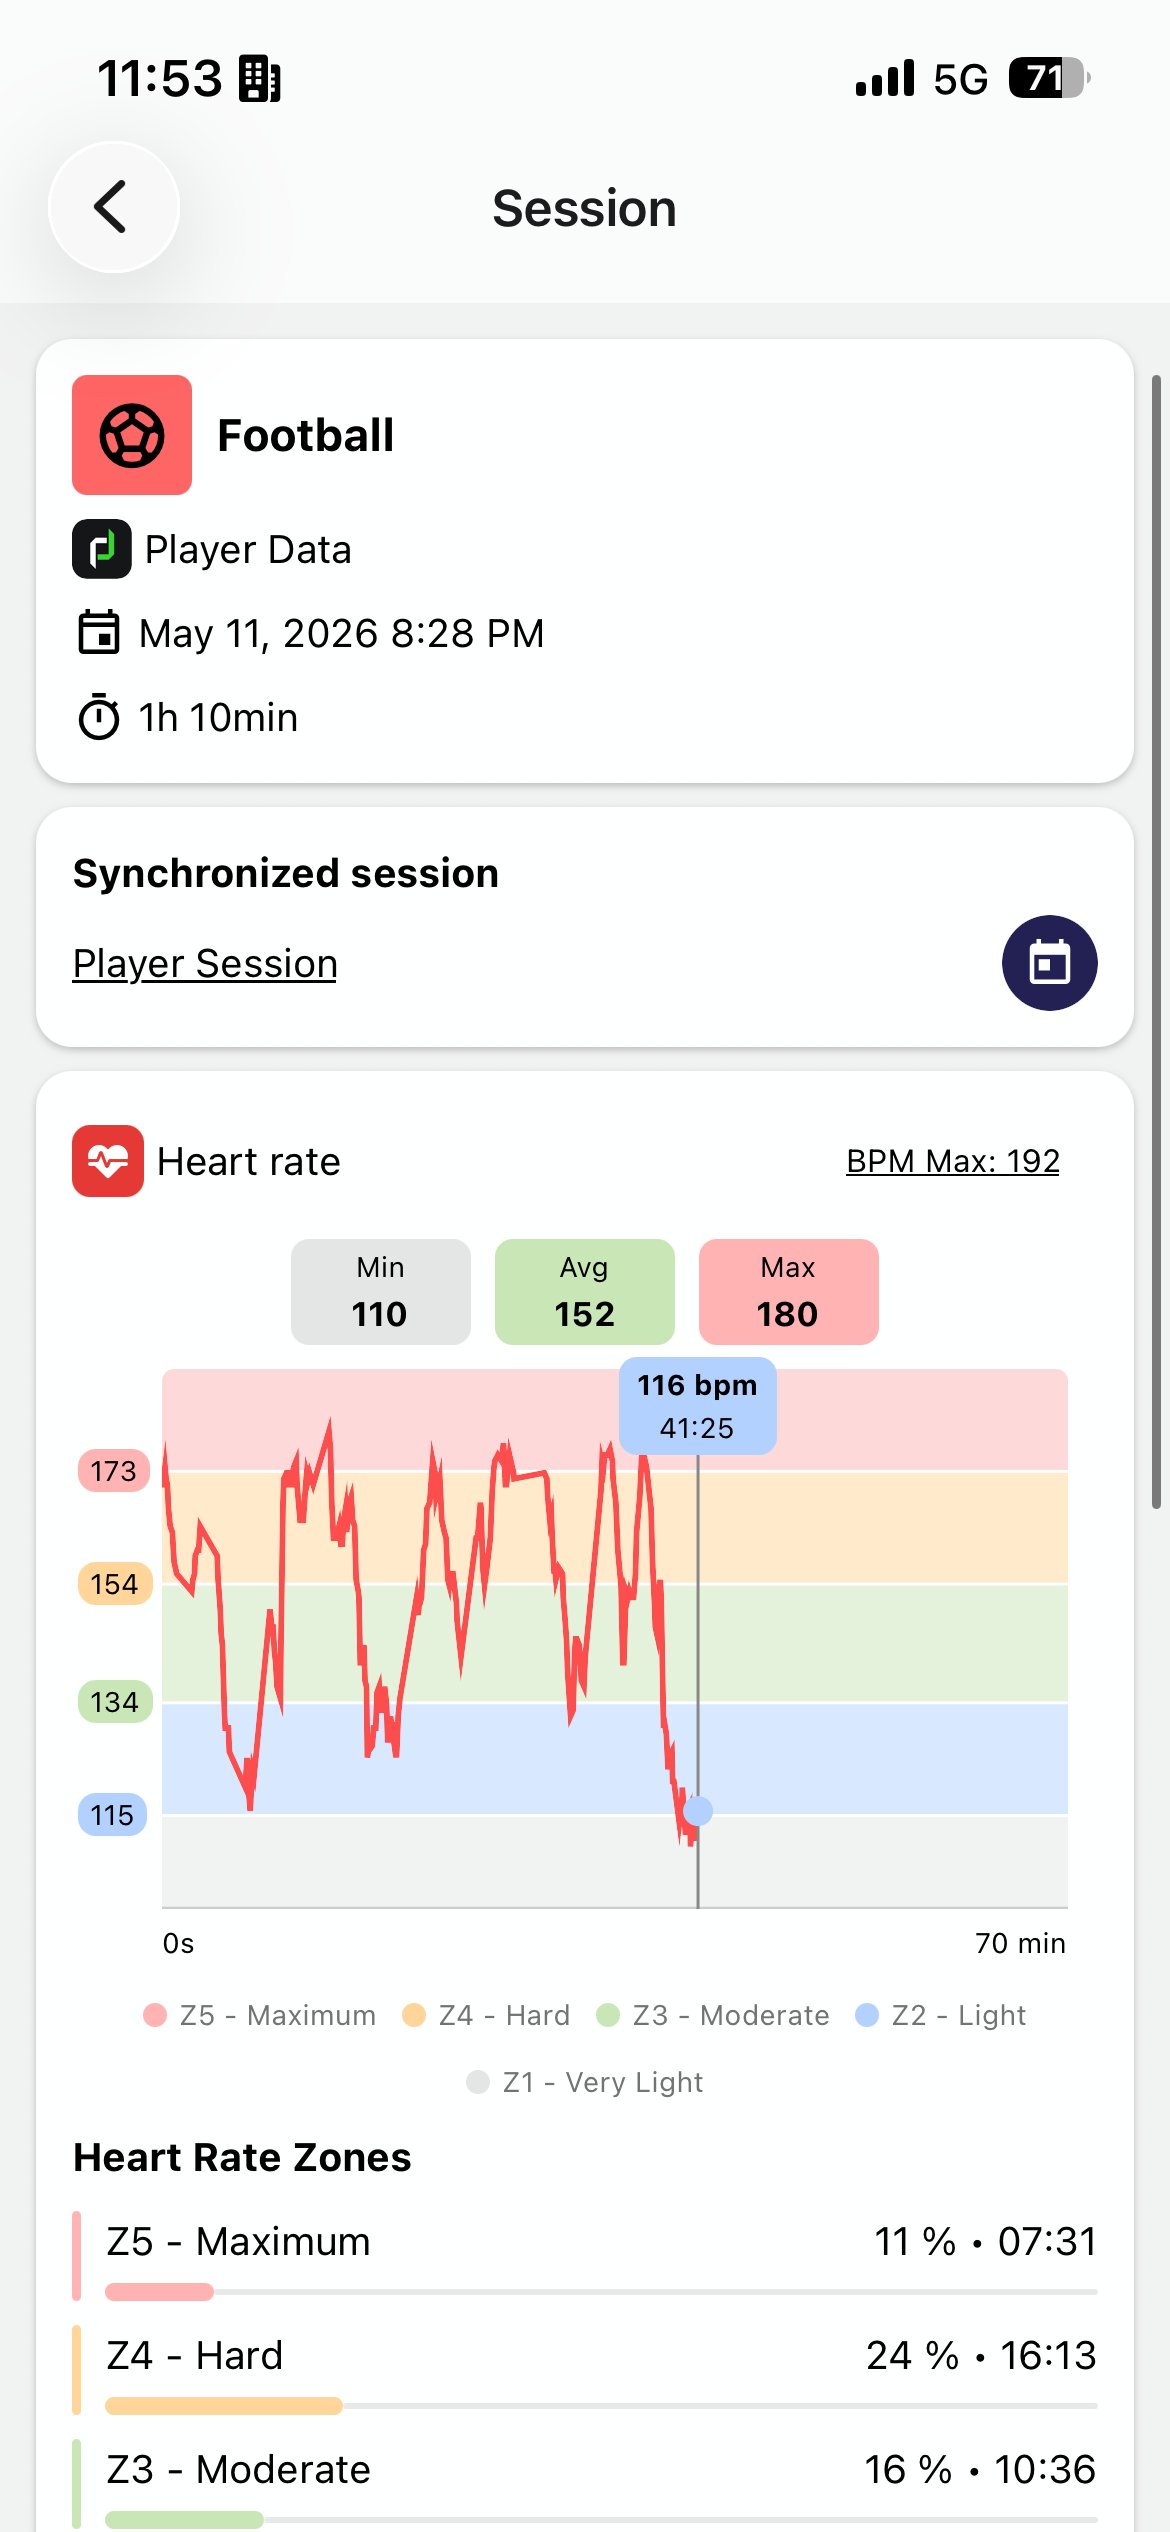
Step 4 - See your heart rate data
⚠️ IMPORTANT - Heart rate via PlayerData has a known limitation
When paired with a chest strap, PlayerData captures HR alongside GPS - but this connection is currently unreliable on iPhones due to a known Bluetooth issue. HR data may be partial or missing on some sessions.
→ If you wear your Polar watch + HR strap in parallel during the same session, your full HR data will still come through via your Polar integration.
Session detail · heart rate
Step 5 - Discover the new GPS metrics
Acceleration events, decelerations, max speed, sprint distance, high-intensity runs, metres per minute, heart rate zones, total distance - all new with PlayerData.
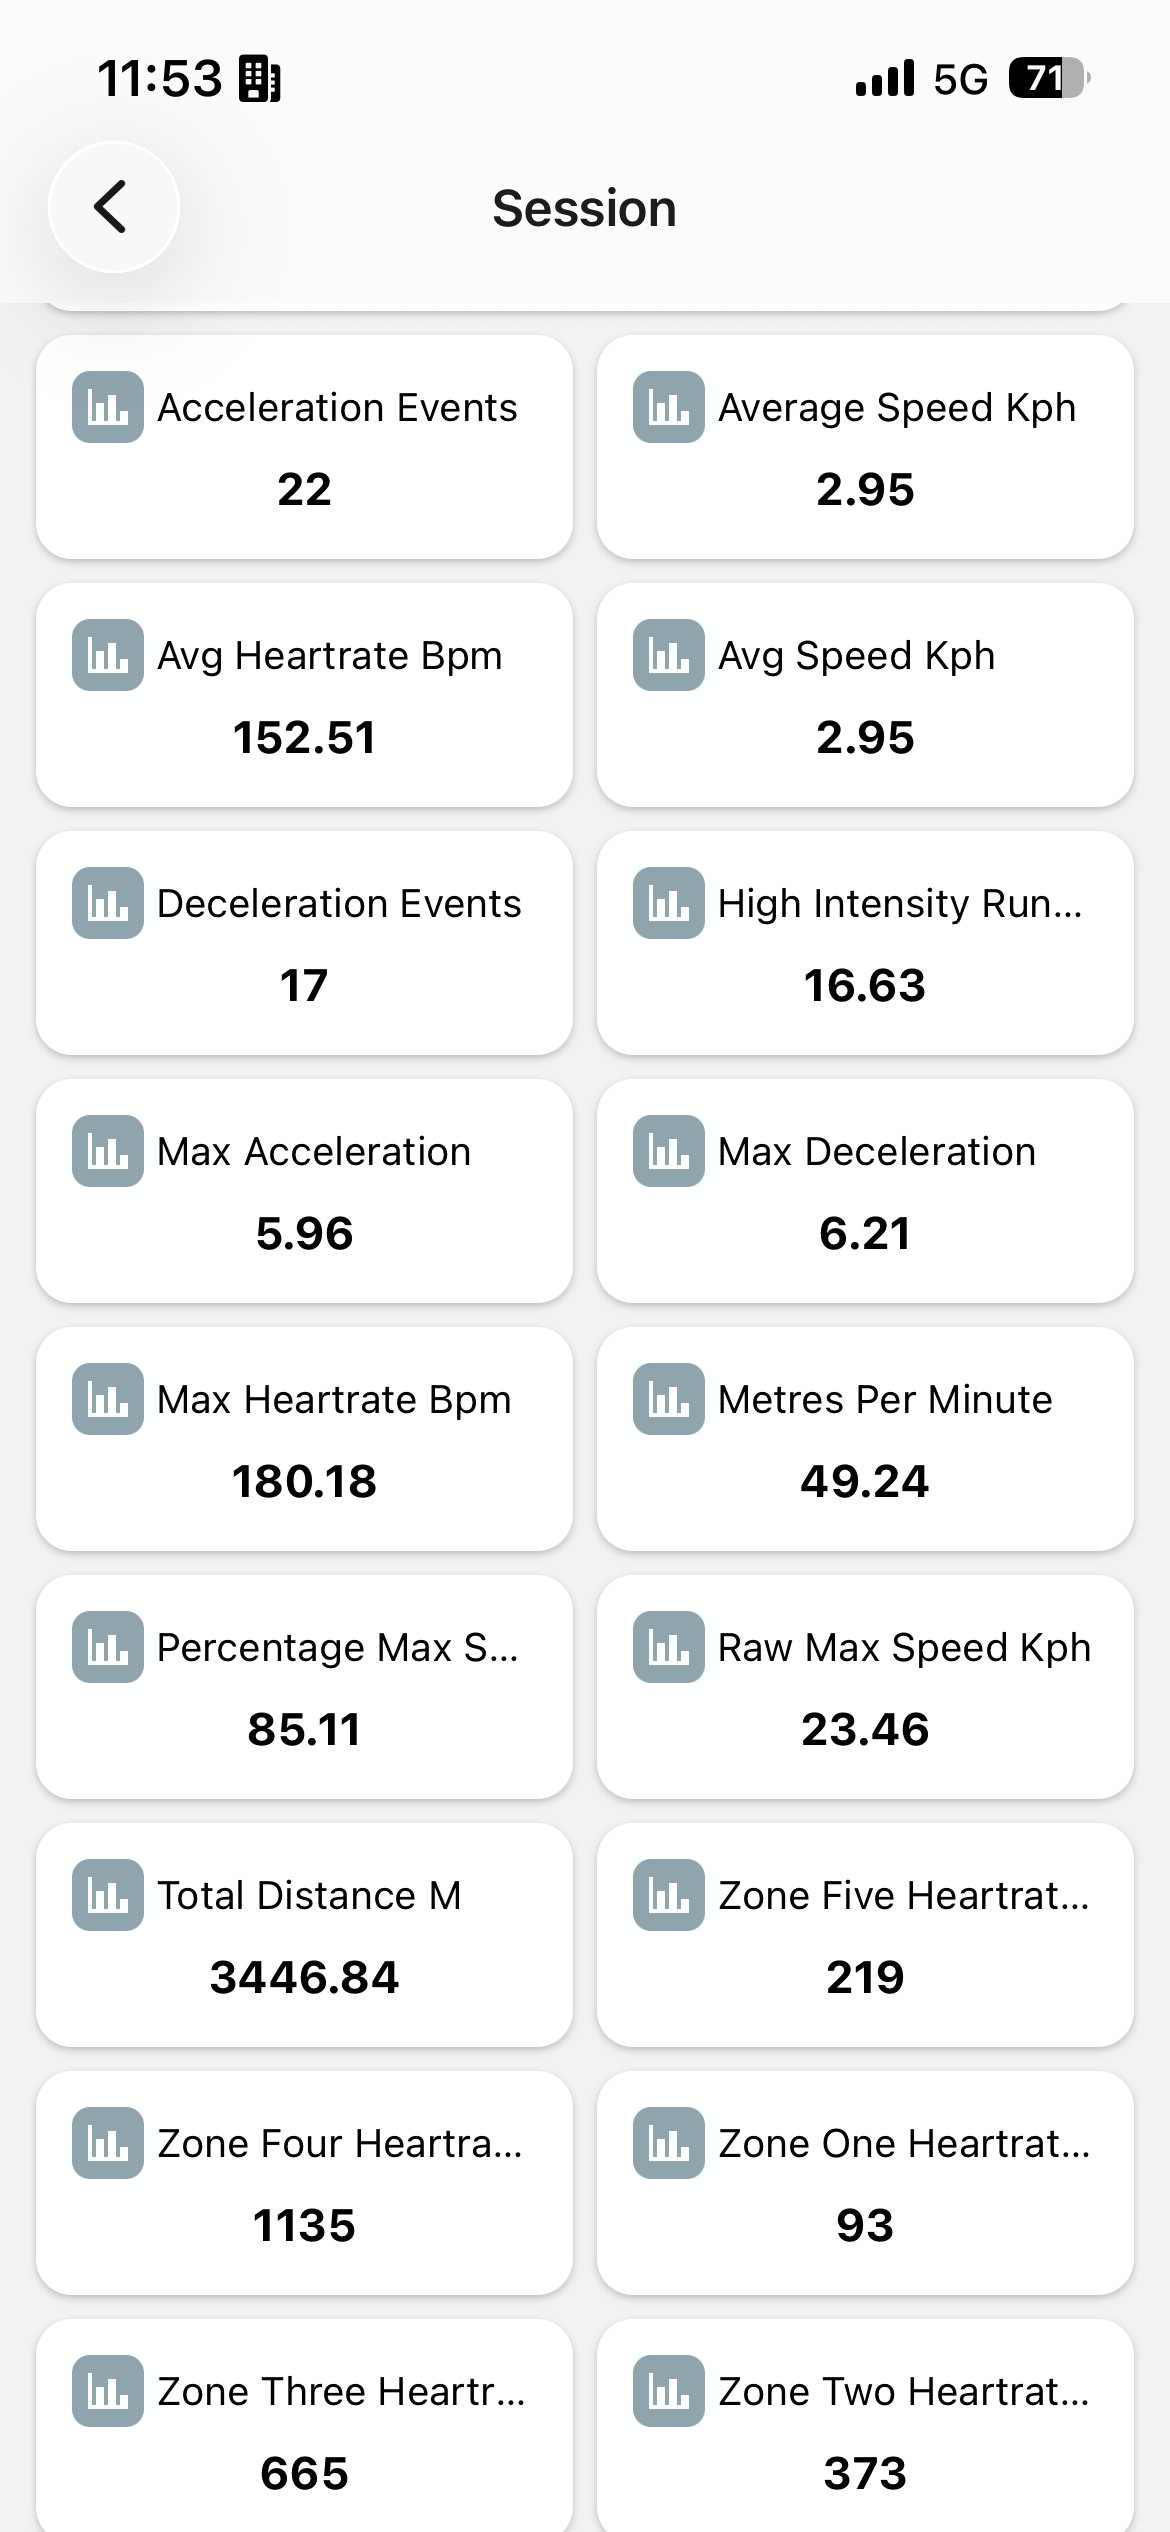
Session detail · GPS metrics
Step 6 - Create your player session
Same form, same flow as before. Tap Create player session, fill in the form, tap Done.
Create player session form (reuse)
Need help?
For app & connection issues → Email: support@mycoachpro.io Login, sync errors, missing sessions, app crashes.
For dashboards & coaching → Lorenzo & fitness instructors Reports, dashboards, training feedback.
How to insert the images in Coda
Coda doesn't import images automatically from this markdown. You have to add them manually after the import.
Quick workflow:
- Import this markdown into a new Coda page (Insert → Import → Paste markdown, or drag the
.mdfile) - Unzip the
coda_screenshots.zipsomewhere on your computer - For each
[📸 IMAGE: filename.png]line, do the following:- Delete the placeholder line
- In its place, drag-and-drop the matching file from the unzipped folder
- Coda will embed the image automatically
- Tip: the filenames are sorted in reading order - easy to follow top to bottom
Image file index (26 files):
| Section | Filename |
|---|---|
| Before you start | 00-prereq-app-store-ios.png · 00-prereq-google-play-android.png |
| Polar · Connect | polar-connect-01-open-integrations.png → polar-connect-06-linked.png (6 files) |
| Polar · Filter | polar-filter-01-open-filters.png → polar-filter-04-validate.png (4 files) |
| Polar · Routine | polar-routine-01-sync-watch.png · polar-routine-02b-notification.png · polar-routine-02-find-session.png · polar-routine-03-session-detail-kpis.png · polar-routine-04-session-detail-hr-map.png + routine-create-player-session.png |
| PlayerData · Connect | playerdata-connect-01-open-integrations.png → playerdata-connect-04-linked.png (4 files) |
| PlayerData · Routine | playerdata-routine-01-app-home.png → playerdata-routine-04-gps-metrics.png (4 files) + reuse routine-create-player-session.png |